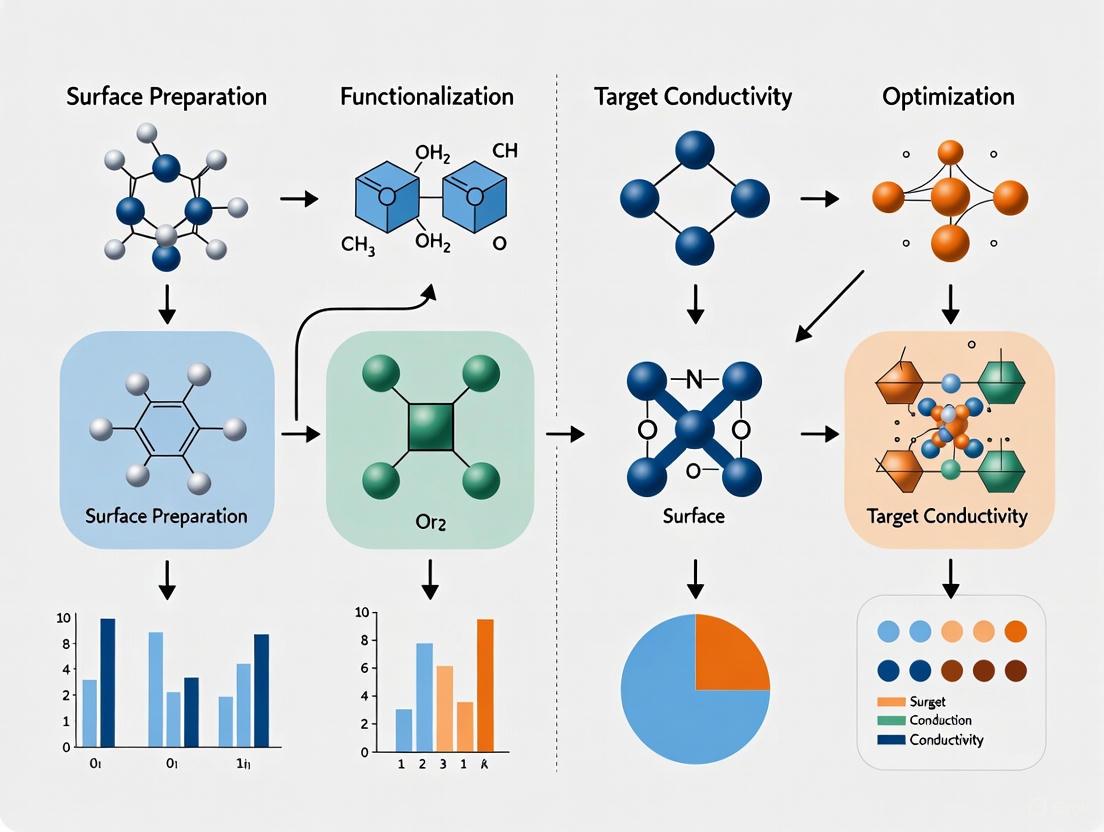
Optimizing Surface Functionalization for Target Conductivity: Strategies for Next-Generation Biomedical Applications
This comprehensive review explores cutting-edge strategies for optimizing surface functionalization to achieve target conductivity in biomedical applications.
Optimizing Surface Functionalization for Target Conductivity: Strategies for Next-Generation Biomedical Applications
Abstract
This comprehensive review explores cutting-edge strategies for optimizing surface functionalization to achieve target conductivity in biomedical applications. Covering foundational principles to advanced computational approaches, we examine how tailored interfacial chemistry enhances performance in biosensing, drug delivery, and thermoelectric systems. The article details functionalization mechanisms including covalent modification, polymer coatings, and nanomaterial engineering, while addressing critical challenges in stability, reproducibility, and specificity. Through comparative analysis of characterization techniques and validation methodologies, we provide researchers and drug development professionals with a framework for designing surface-enhanced systems with precisely controlled conductive properties for improved therapeutic and diagnostic outcomes.
Fundamental Principles of Surface Functionalization and Conductivity Mechanisms
Interfacial Chemistry and Charge Transport Fundamentals
Frequently Asked Questions (FAQs)
FAQ 1: Why does my molecular junction show unexpectedly low conductance even with a theoretically optimized molecular backbone?
The conductance of a molecular junction is not solely determined by the molecular backbone. The chemical groups anchoring the molecule to the electrodes play a critical role. The anchor group influences the electronic structure of the entire system and therefore its conductance. For example, electron-deficient contacts like 4-pyridyl can suppress conductance, while electron-rich contacts like 4-thioanisole can promote efficient charge transport. This is due to minute changes in charge distribution at the electrode interface [1].
FAQ 2: How can I improve charge transport through an inherently insulating surface functionalization layer?
A promising strategy is to incorporate conductive nanomaterials, such as gold nanoparticles (AuNPs), within the insulating matrix. These nanoparticles provide pathways for current to flow through the otherwise insulating film. The enhancement depends on the size of the AuNPs and their binding density on the functionalized surface. Maximizing the surface coverage of AuNPs is key to providing efficient electron transport pathways [2].
FAQ 3: What fundamental mechanism explains charge transport in high-mobility organic semiconductors?
In high-mobility organic semiconductors, charge carriers form "flickering polarons." These are charges that are delocalized over 10–20 molecules on average. They constantly change shape and extension under the influence of thermal molecular motions. Transport occurs through short bursts of wavefunction expansion that displace the carrier. This "transient delocalization" mechanism is distinct from simple band transport or hopping transport [3].
FAQ 4: Can electrostatic charges at interfaces drive useful chemical reactions?
Yes, interfacial electrostatic charges are a universal phenomenon that can promote redox and catalytic reactions at solid-liquid and liquid-gas interfaces. This reactivity reduces the reliance on traditional redox reagents and catalysts. The charges can provide electrons for transfer and create strong electric fields that orient molecules, lowering reaction energy barriers. This is particularly relevant for advancing green chemistry applications [4].
Troubleshooting Guides
Issue 1: Inverted Conductance Trends in Molecular Junctions
Problem: You observe reversed or unexpected conductance trends when comparing molecular wires with identical backbones but different anchor groups.
Diagnosis and Solution:
| Step | Action | Expected Outcome |
|---|---|---|
| 1. Verify Trend | Measure conductance for both electron-rich (e.g., 4-thioanisole) and electron-deficient (e.g., 4-pyridyl) anchors on the same backbone. | Confirm if the conductance order changes with the anchor, indicating a strong interfacial effect [1]. |
| 2. Calculate Charge Distribution | Perform DFT calculations to analyze the electronic structure and charge distribution at the molecule-electrode interface. | Identify if the anchor group is causing unfavorable charge reorganization that suppresses transport [1]. |
| 3. Select Anchor | Choose an anchor group whose electronic character (electron-rich/deficient) complements the backbone. | Restores the expected conductance trend and improves overall charge-transport efficiency [1]. |
Issue 2: Passivation or Insulation of Functionalized Electrodes
Problem: Your functionalized electrode surface becomes passivated or exhibits excessively high charge transfer resistance, impairing electrochemical sensing.
Diagnosis and Solution:
| Step | Action | Expected Outcome |
|---|---|---|
| 1. Diagnose Insulation | Perform Electrochemical Impedance Spectroscopy (EIS) to measure charge transfer resistance (Rct). | Quantify the increase in resistance caused by the insulating functional layer [2]. |
| 2. Incorporate Nanomaterials | Immobilize carboxyl-functionalized AuNPs onto the functionalized surface. The nanoparticle size and density are critical. | AuNPs provide conductive pathways, leading to a measurable decrease in Rct [2]. |
| 3. Construct Layered Architecture | Add a top functional layer over the AuNPs to enable subsequent biomolecule immobilization. | Maintains enhanced conductivity while providing a functional surface for biosensing applications [2]. |
Data Presentation
Table 1: Conductance of Molecular Wires with Identical Backbones and Different Anchor Groups
This table summarizes experimental single-molecule conductance data obtained via the STMBJ technique, highlighting the dramatic influence of the anchor group [1].
| Molecular Backbone | Anchor Group | Electronic Character of Anchor | Most Probable Conductance (G/G₀) | Relative Conductance Efficiency |
|---|---|---|---|---|
| Dithienophosphole Oxide | 4-thioanisole | Electron-rich | Higher | Promotes efficient transport |
| Dithienophosphole Oxide | 4-pyridyl | Electron-deficient | Lower | Suppresses conductance |
| Bithiophene | 4-thioanisole | Electron-rich | Data from [1] | Baseline for comparison |
| Bithiophene | 4-pyridyl | Electron-deficient | Data from [1] | Baseline for comparison |
Table 2: Charge Transport Properties and Mechanisms in Organic Semiconductors
This table compares key characteristics of different charge transport regimes as described in unified theoretical models [3].
| Transport Regime | Charge Carrier Nature | Typical Delocalization Scale | Characteristic Temperature Dependence of Mobility (μ) |
|---|---|---|---|
| Band-like (Metals) | Wave-like, coherent | Very large (>>20 molecules) | μ decreases with T (power law) |
| Flickering Polarons (Transient Delocalization) | Localized with transient delocalization | 10-20 molecules (av.) | Variable, can decrease with T |
| Hopping (Localized) | Particle-like, incoherent | 1 molecule (localized) | μ increases with T (Arrhenius) |
The Scientist's Toolkit: Research Reagent Solutions
Table 3: Essential Materials for Interfacial Chemistry and Charge Transport Experiments
| Reagent / Material | Function / Application | Key Considerations |
|---|---|---|
| 4-thioanisole anchor | Electron-rich contact group for gold electrodes. Promotes efficient charge transport [1]. | Use with backbones where strong coupling to the electrode is desired. |
| 4-pyridyl anchor | Electron-deficient contact group for gold electrodes. Can suppress conductance [1]. | Useful for probing interface-dominated transport phenomena. |
| Carboxyl-functionalized Gold Nanoparticles (AuNPs) | Nanomaterials to enhance electron transport through insulating polymer films [2]. | Particle size (e.g., 16 nm vs. 68 nm) and surface binding density are critical for performance. |
| Plasma Polymerized Polyoxazoline (POx) | A rapid, scalable substrate-independent film for electrode functionalization [2]. | Enables "click-chemistry" type binding of biomolecules via -COOH groups. Insulating by nature. |
| Potassium Hexacyanoferrate(III/II) | Standard redox couple for bulk electrochemical measurements like EIS [2]. | Used to characterize charge transfer resistance (Rct) of functionalized electrodes. |
Troubleshooting Guides & FAQs
Troubleshooting Common Experimental Issues
Issue: Nanoparticle Aggregation and Poor Dispersion
- Problem: Your functionalized nanoparticles are aggregating in the solvent, leading to inconsistent results and clogged equipment.
- Possible Causes & Solutions:
- Cause: Insufficient or incorrect functionalization. The surface charges are not providing enough electrostatic repulsion.
- Solution: Increase the density of charged functional groups (e.g., carboxylate, amine) on the nanoparticle surface via covalent methods. Characterize the ζ-potential to ensure it is sufficiently high (typically > ±30 mV for good electrostatic stability) [5].
- Cause: The solvent is incompatible with the functional groups on your nanoparticles.
- Solution: Switch to a solvent that matches the polarity of your surface ligands. For non-covalently functionalized graphene, ensure the use of solvents that favor π–π interactions [6].
- Cause: The functionalized nanoparticles have been stored for too long and the surface groups have degraded.
- Solution: Always prepare fresh batches of functionalized nanoparticles where possible and store them under optimal conditions (e.g., in dark, at 4°C). Characterize the size via Dynamic Light Scattering (DLS) before each use to confirm dispersion quality [5].
Issue: Low Cellular Uptake in Target Cells
- Problem: Your targeted nanoparticles are not being effectively internalized by the desired cell line.
- Possible Causes & Solutions:
- Cause: The targeting ligands (e.g., antibodies, peptides) are inactive or have been denatured during the conjugation process.
- Solution: Use gentler conjugation chemistry and always verify ligand activity after functionalization using a suitable bioassay (e.g., ELISA). For covalent binding, ensure the binding site is not blocked [5].
- Cause: The "corona" effect, where serum proteins adsorb onto the nanoparticle surface, masking the targeting ligands.
- Solution: Functionalize the surface with stealth coatings like polyethylene glycol (PEG) to reduce non-specific protein adsorption and improve the availability of active targeting ligands [5] [7].
- Cause: Incorrect ligand density. Too few ligands result in low binding affinity, while too many can hinder internalization.
- Solution: Titrate the amount of ligand used during functionalization and create a small library of nanoparticles with varying ligand densities to find the optimum for your specific application [5].
Issue: High Cytotoxicity in Biocompatibility Studies
- Problem: Your functionalized nanoparticles are showing high toxicity toward cells, confounding your research results.
- Possible Causes & Solutions:
- Cause: The nanoparticles themselves or the chemicals used for functionalization (e.g., certain cross-linkers) are inherently toxic.
- Solution: Consider alternative, more biocompatible materials or functionalization strategies. For example, the covalent attachment of human albumin to silver nanoparticles has been shown to reduce toxicity [5].
- Cause: Incomplete removal of reaction by-products or unbound ligands after the functionalization process.
- Solution: Implement more rigorous purification steps post-functionalization, such as extensive dialysis, centrifugation, or column chromatography. Analyze the supernatant for the absence of reactants [5].
- Cause: The functionalization has altered the surface charge to be highly positive, which is known to disrupt cell membranes.
- Solution: Aim for a neutral or slightly negative surface charge by choosing appropriate functional groups (e.g., PEGylation, carboxylation) to minimize non-specific cytotoxic interactions [5].
Frequently Asked Questions (FAQs)
FAQ 1: When should I choose a covalent functionalization strategy over a non-covalent one? Covalent functionalization is preferred when you require a stable, permanent attachment of molecules that will not dissociate under changing environmental conditions like pH or temperature. It is ideal for applications demanding robust performance, such as in sensors or fixed catalytic surfaces. However, it can disrupt the intrinsic electronic structure (e.g., converting sp2 to sp3 carbon in graphene) [6]. Non-covalent functionalization, through π–π interactions, electrostatic forces, or van der Waals forces, is better suited when you need to preserve the nanomaterial's innate electronic or mechanical properties, such as in conductive composites or certain electronic devices [7] [6]. It is generally simpler but can be reversible and less stable.
FAQ 2: How can I quantitatively compare the success of different functionalization methods? You should employ a suite of characterization techniques to quantitatively assess functionalization:
- Fourier Transform Infrared Spectroscopy (FTIR): Confirms the presence of new chemical bonds (e.g., amide bonds) and functional groups [5].
- ζ-potential Analysis: Measures the change in surface charge after functionalization. A significant shift indicates successful surface modification [5].
- Thermogravimetric Analysis (TGA): Quantifies the amount of organic material bound to the surface by measuring weight loss upon heating [6].
- X-ray Photoelectron Spectroscopy (XPS): Provides elemental and chemical state information about the surface, confirming the introduction of new atoms (e.g., nitrogen from aminosilanes) [5].
FAQ 3: What are the best practices for storing functionalized nanomaterials to maintain their properties? Functionalized nanomaterials are susceptible to degradation. Best practices include:
- Storage Condition: Store in a dark place at 4°C to slow down chemical degradation and bacterial growth. For some materials, freezing at -20°C in a suitable solvent is acceptable.
- Solvent Choice: Store in the same solvent used for functionalization and dispersion to prevent aggregation.
- Container: Use inert containers (e.g., glass) to avoid leaching of contaminants.
- Shelf Life: Conduct time-course DLS and ζ-potential measurements to establish a reliable shelf-life for your specific material, as properties can change over time [8].
Comparative Data Analysis
Table 1: Comparison of Covalent vs. Non-Covalent Functionalization
| Feature | Covalent Functionalization | Non-Covalent Functionalization |
|---|---|---|
| Bond Type | Strong covalent bonds [6] | Weak interactions (π–π, electrostatic, van der Waals) [6] |
| Stability | High; permanent attachment [6] | Moderate to low; can be reversible [6] |
| Impact on Nanomaterial Structure | Alters electronic structure; can create defects (sp2 to sp3) [6] | Preserves intrinsic electronic and mechanical properties [6] |
| Process Complexity | Generally more complex, multi-step [5] | Simpler, often a single adsorption step [6] |
| Common Applications | Sensors, catalysis, stable composites, drug delivery where controlled release is not via bond cleavage [5] [6] | Supercapacitors, bioimaging, drug delivery via adsorption, conductive inks [7] [6] |
| Typical Functional Groups/Molecules | Aminosilanes, thiols, carboxylic acids, diazonium salts, polymers (PVA, PEI) [5] [6] | Aromatic dyes (methylene blue), surfactants, polymers (PEG, chitosan), biomolecules [7] [6] |
Table 2: Essential Research Reagent Solutions
| Reagent / Material | Function in Functionalization |
|---|---|
| Aminosilanes (e.g., APTES) | Covalent linker; introduces primary amine (-NH2) groups to silica and metal oxide surfaces for subsequent bioconjugation [5]. |
| Polyethylene Glycol (PEG) | "Stealth" polymer; improves biocompatibility, reduces protein fouling, and enhances stability in physiological solutions. Can be attached via covalent or non-covalent methods [5] [7]. |
| Polyethylenimine (PEI) | Cationic polymer; used in gene delivery as it binds nucleic acids. Can be grafted onto nanomaterials like graphene oxide to create a delivery platform [7]. |
| Sulfanilic Acid | Aromatic compound; used to covalently functionalize GO, improving water dispersibility through ionic repulsion [6]. |
| Thio-Carboxylic Acids | Covalent linker; binds to noble metal surfaces (Au, Ag) via thiol (-SH) group, while the carboxylic acid (-COOH) allows further conjugation [5]. |
| 1-Ethyl-3-(3-dimethylaminopropyl)carbodiimide (EDC) | Crosslinker; facilitates the formation of amide bonds between carboxylic acid and amine groups without becoming part of the bond itself. |
Experimental Protocols & Methodologies
Protocol 1: Covalent Functionalization of Graphene Oxide (GO) with an Amine-Terminated Molecule
This protocol describes the activation of carboxyl groups on GO for covalent attachment to a molecule containing a primary amine (e.g., a protein or a polymer like PEI) [5] [7].
- Preparation of GO Suspension: Disperse 50 mg of GO in 50 mL of a suitable buffer (e.g., MES, pH 4.5-5.5) using probe sonication for 30 minutes to create a homogeneous 1 mg/mL suspension.
- Carboxyl Group Activation: Add a crosslinker solution to the GO suspension. First, add 240 mg of EDC (to a final concentration of 25 mM), followed by 120 mg of N-Hydroxysuccinimide (NHS, to a final concentration of 12.5 mM). React for 15-30 minutes at room temperature with gentle stirring. This step activates the carboxyl groups, forming an NHS ester.
- Ligation Reaction: Add the amine-containing molecule (e.g., 100 mg of a polymer) to the activated GO suspension. Adjust the pH to 7.5-8.5 if necessary. Allow the reaction to proceed for 2-4 hours at room temperature or overnight at 4°C with constant stirring.
- Purification: Purify the functionalized GO from unreacted molecules and reaction by-products by repeated cycles of centrifugation (e.g., 15,000 rpm for 20 minutes) and re-dispersion in the desired buffer or solvent (e.g., PBS or water). This step is critical for removing cytotoxic impurities.
- Characterization: Re-disperse the final product in a storage buffer. Characterize using DLS for size and ζ-potential, FTIR for confirmation of amide bond formation, and UV-Vis for quantification.
Protocol 2: Non-Covalent Functionalization of Graphene with a Polymer via π–π Stacking
This protocol leverages the π-electron cloud of graphene to adsorb aromatic or conjugated polymers [7] [6].
- Preparation of Graphene/GO Suspension: Disperse 20 mg of reduced graphene oxide (rGO) or pristine graphene in 40 mL of solvent (e.g., water, DMF) using bath sonication for 1 hour to create a 0.5 mg/mL dispersion.
- Polymer Addition: Slowly add a solution of the functional polymer (e.g., 50 mg of PEGylated polymer or a conjugated polymer like polydopamine) to the graphene dispersion under vigorous stirring.
- Incubation: Continue stirring the mixture for 12-24 hours at room temperature to allow for sufficient π–π stacking and adsorption to occur.
- Purification: Remove excess, non-adsorbed polymer by dialyzing the mixture against the desired solvent using a dialysis membrane with an appropriate molecular weight cutoff (MWCO) for 24-48 hours, changing the dialysis solvent every 6-8 hours.
- Characterization: Characterize the final product using Raman spectroscopy to ensure the graphene structure remains intact, TGA to estimate polymer loading, and UV-Vis spectroscopy to confirm functionalization.
Visualizations & Workflows
Diagram: Decision Framework for Functionalization Strategy
Diagram: Surface Functionalization Workflow
Troubleshooting Guides and FAQs
MXene-Based Composites
Q: My MXene/polymer composite is not achieving the predicted electrical conductivity, even after exceeding the theoretical percolation threshold. What could be the issue?
- A: This is a common challenge often related to interfacial and processing factors. The effective conductivity (σ) depends on more than just filler loading. Key parameters to check include:
- Contact Resistance: A large contact resistance between MXene flakes can severely limit overall conductivity. This is influenced by the contact diameter and the tunneling distance between nanosheets. Ensuring good dispersion to prevent agglomeration and using surfactants that do not overly insulate flakes can help [9].
- Interphase Properties: The polymer matrix surrounding each MXene flake forms an "interphase" region. A thick interphase with low conductivity can hinder electron transport. The model from Scientific Reports suggests that optimizing the interphase thickness is crucial for building an effective conductive network [9].
- MXene Flake Dimensions: The aspect ratio of the MXene flakes is critical. Thicker flakes (e.g., >2 nm) or smaller contact diameters (e.g., <8 nm) between flakes can lead to a sharp decline in conductivity, effectively turning the composite into an insulator. Using flakes with a high aspect ratio (large diameter-to-thickness ratio) is beneficial [9].
Q: How can I improve the environmental stability of MXenes to prevent degradation during my experiments?
- A: MXenes, particularly Ti₃C₂Tₓ, are susceptible to oxidative degradation, which can degrade their electrical and electrochemical properties over time. Solutions include:
- Surface Functionalization: Covalently bonding molecules like (3-aminopropyl)triethoxysilane (APTES) or dopamine to the MXene surface can form a protective layer, shielding it from water and oxygen [10] [11].
- Controlled Storage: Store MXene dispersions in a cold, oxygen-free environment. Research indicates that dispersions can be stored at -80°C prior to use to maintain stability and prevent oxidation [11].
- Composite Integration: Embedding MXenes within a polymer matrix can physically isolate them from the environment, enhancing long-term stability [10].
Graphene-Based Materials
Q: I am using Graphene Oxide (GO) for a biomedical application. How can I manage its interactions with biological systems to reduce toxicity and improve targeting?
- A: The complex interactions of graphene with biological systems are a recognized challenge in drug delivery. Solutions involve surface modification to accentuate favorable characteristics [12].
- Functionalization for Biocompatibility: Covalently attaching biocompatible polymers like polyethylene glycol (PEG) can reduce unwanted protein adsorption and improve stability in biological fluids [12].
- Creating Tailored Vehicles: Graphene is increasingly used as one component of a multifunctional delivery vehicle. You can modify its surface with targeting ligands (e.g., antibodies, peptides) to achieve specific cell targeting and reduce off-target effects [12].
Q: What are the key differences between graphene oxide and reduced graphene oxide for conductive applications?
- A: The primary difference lies in their chemical structure and resulting electrical properties.
- Graphene Oxide (GO) is heavily decorated with oxygen-containing functional groups (epoxide, hydroxyl, carbonyl). These groups disrupt the sp² carbon network, making GO electrically insulating but highly dispersible in water, which is useful for processing [13].
- Reduced Graphene Oxide (rGO) has a significant portion of these oxygen groups removed, restoring a large sp² carbon domain. This process dramatically increases its electrical conductivity, making it an intermediate material between insulating GO and highly conductive pristine graphene. The presence of some residual functional groups and defects means its conductivity is generally lower than pristine graphene [13].
Carbon Nanotube (CNT)-Based Systems
Q: I want to use CNTs as artificial membrane channels, but I'm concerned about their cytotoxicity and poor dispersion in aqueous media. What is the recommended solution?
- A: The inherent toxicity and low bioavailability of pristine CNTs are significant hurdles. The primary solution recommended in recent literature is functionalization [14] [15].
- Covalent Functionalization: Attaching hydrophilic functional groups (e.g., carboxylic acids, hydroxyls) or biocompatible polymers like PEG to the CNT surface significantly decreases cytotoxicity, enhances water solubility, and improves dispersibility [15].
- Impact on Orientation: Functionalization also affects how CNTs interact with and orient within the cell membrane, which is critical for forming effective channels. Molecular dynamics simulations show that modified CNTs with appropriate functional groups can be effectively integrated into the lipid bilayer to facilitate mass transfer [14] [15].
The following tables summarize key parameters from recent research that are critical for optimizing nanomaterial-enhanced interfaces for conductivity.
| Parameter | Impact on Conductivity | Optimal Range / Target |
|---|---|---|
| MXene Thickness (t) | Thicker flakes reduce conductivity; thinner flakes are superior. | < 2 nm (aim for 1 nm) |
| Contact Diameter (D) | A larger contact area between flakes drastically lowers resistance. | ~20 nm |
| Interphase Thickness (tᵢ) | An expanded interphase can lower the percolation threshold. | Optimize for network formation |
| Percolation Threshold (φₚ) | Lower threshold enables conductivity at lower loadings. | φₚ = (40t)²/(D + 20tᵢ)² |
| Tunneling Distance | Electrons tunnel between flakes; minimal separation is key. | Minimize through processing and dispersion |
| Material | Key Strengths | Key Limitations | Common Functionalization Agents |
|---|---|---|---|
| MXene (Ti₃C₂Tₓ) | Exceeds GO in strength, modulus, and electrical conductivity; highly hydrophilic; environmentally stable under proper storage [11]. | Susceptible to oxidative degradation over time; complex surface chemistry requires careful control [10]. | Dopamine, Ethylenediamine (EDA), (3-aminopropyl)triethoxysilane (APTES) |
| Graphene Oxide (GO) | High versatility, scalability, and low cost; abundant oxygen groups facilitate easy functionalization [13] [11]. | Electrically insulating due to disrupted sp² network; requires reduction for conductive applications [13]. | Dopamine, Ethylenediamine (EDA), (3-aminopropyl)triethoxysilane (APTES) |
Experimental Protocols
Protocol 1: Surface Functionalization of MXene and Graphene Oxide with Amines
This protocol is adapted from studies investigating surface modification to enhance stability and integration into polymer matrices [11].
1. Objective: To covalently functionalize Ti₃C₂Tₓ MXene and Graphene Oxide flakes with amine-containing molecules (e.g., Ethylenediamine - EDA, APTES) to tune interfacial properties and improve stability.
2. Materials:
- Delaminated Ti₃C₂Tₓ MXene dispersion in water (e.g., 1 mg/mL) [11].
- Graphene Oxide dispersion in water (prepared via Hummers method) [11].
- Functionalizing agent: EDA or APTES.
- Solvent: Ultrapure deionized water.
- Laboratory equipment: Centrifuge, sonication bath, magnetic stirrer, vacuum oven.
3. Methodology:
- Step 1: Preparation. Dilute the MXene or GO dispersion to a concentration of 1 mg/mL using ultrapure water and sonicate for 10 minutes to ensure a uniform suspension.
- Step 2: Reaction. Add a molar excess of the functionalizing agent (e.g., EDA or APTES) to the dispersion under constant stirring. The reaction can be performed at room temperature or mild heating, depending on the molecule.
- Step 3: Purification. Allow the reaction to proceed for a set time (e.g., 24 hours). Then, centrifuge the mixture at 3500 rpm to separate the functionalized flakes from the unreacted reagents and solvent.
- Step 4: Washing. Discard the supernatant and redisperse the sediment in fresh ultrapure water. Repeat the centrifugation and redispersion cycle 3-5 times until the supernatant reaches a neutral pH.
- Step 5: Drying. The final functionalized nanomaterial can be collected as a sediment for composite integration or redispersed for further use [11].
Protocol 2: Probing Nanoscale Surface Properties via Advanced AFM
This protocol outlines the procedure for characterizing functionalized flakes at the nanoscale, which is essential for understanding heterogeneity.
1. Objective: To map the mechanical, electrical, and chemical properties of individual functionalized MXene and GO flakes.
2. Materials:
- Functionalized MXene or GO flakes.
- Atomically flat substrate (e.g., silicon wafer).
- Atomic Force Microscope (AFM) equipped with Quantitative Nanomechanical (QNM), Kelvin Probe Force Microscopy (KPFM), and Nano-IR modes.
3. Methodology:
- Step 1: Monolayer Deposition. Use the Langmuir-Blodgett (LB) technique to deposit a monolayer of the functionalized flakes onto the substrate. This is critical for analyzing individual flakes and avoiding artifacts from stacking [11].
- Step 2: Topographical Imaging. First, perform standard AFM topography scanning to identify individual, well-dispersed flakes.
- Step 3: Multimodal Analysis.
- QNM Mode: Engage QNM mode on a selected flake to measure the distribution of mechanical properties like adhesion force and elastic modulus across the flake's surface.
- KPFM Mode: Use KPFM to map the surface potential (work function) of the flake, revealing electrical heterogeneity.
- Nano-IR Mode: Perform Nano-IR spectroscopy to obtain infrared chemical maps, showing the distribution of specific chemical functional groups (e.g., amines from EDA) on the flake [11].
- Step 4: Data Correlation. Correlate the data from all modes to build a comprehensive picture of how the functionalization affects different properties at the nanoscale.
Experimental Workflow and Conductive Network Formation
Surface Functionalization Workflow
Conductive Network in Nanocomposite
The Scientist's Toolkit: Research Reagent Solutions
Table 3: Essential Materials for Nanomaterial Functionalization and Characterization
| Reagent / Material | Function in Research | Key Consideration |
|---|---|---|
| Ethylenediamine (EDA) | Amine-based functionalization agent; induces cross-linking between flakes via covalent bonds, improving mechanical strength [11]. | Contains two amine groups, enabling it to act as a cross-linker between flakes. |
| Dopamine | A catecholamine used for surface modification; improves adhesion to surfaces and enhances charge transfer [11]. | Known for its strong adherence to a variety of surfaces; a less toxic alternative to harsher reducing agents. |
| APTES | An organosilane used for functionalization; covalently bonds to MXene/graphene oxide via Si–O bonds, providing a protective coating and post-functionalization ability [11]. | Can adjust the hydrophilicity of the nanomaterial surface and significantly improve oxidative stability. |
| Langmuir-Blodgett (LB) Trough | Used to deposit highly uniform monolayers of 2D materials onto substrates for accurate nanoscale characterization [11]. | Essential for preparing samples for Advanced AFM analysis to study individual flakes. |
| AFM with QNM & KPFM | Characterizes nanomechanical properties (elastic modulus, adhesion) and surface potential (work function) of functionalized flakes at the nanoscale [11]. | Reveals heterogeneity in functionalization that bulk techniques cannot detect. |
Electrostatic Interactions and DLVO Theory in Nano-Bio Interfaces
Frequently Asked Questions (FAQs)
Q1: What is the fundamental role of electrostatic interactions in nanoparticle-based drug delivery?
Electrostatic interactions are a dominant force at the nano-bio interface, enabling the reversible and tunable loading of biomolecules onto nanoparticles (NPs). These non-covalent interactions are crucial for creating targeted drug delivery systems, as they allow for the adsorption of therapeutic proteins, nucleic acids, and targeting ligands through the attraction between oppositely charged surfaces. Their strength and direction are highly susceptible to the surrounding medium, making them responsive to environmental changes such as pH and ionic strength, which can be exploited for controlled release [16].
Q2: How does the DLVO theory explain colloidal stability, and what are its main limitations?
The Derjaguin–Landau–Verwey–Overbeek (DLVO) theory explains colloidal stability by balancing attractive van der Waals forces with repulsive electrostatic double layer forces. It predicts particle interactions based on separation distance, revealing energy barriers (primary maximum) that prevent aggregation and shallow energy wells (secondary minimum) that allow for reversible flocculation [17]. However, the theory has several key limitations:
- Non-DLVO Forces: It ignores other significant interactions such as hydration forces, steric forces (from adsorbed polymers), and hydrophobic interactions [17].
- Simplifying Assumptions: It assumes smooth, spherical particles and a uniform medium, which often deviates from real, complex systems with surface heterogeneities and specific ion effects [17].
- Ionic Properties: The classical theory treats ions as point charges and does not account for finite ion size, ion correlations, or dielectric decrement, which can significantly impact interactions in highly charged systems or multivalent electrolytes [18] [19].
Q3: What advanced concepts correct the classical DLVO theory for soft biological nanoparticles?
For soft particles (e.g., polymer colloids, microorganisms), the classical DLVO framework is insufficient. Advanced corrections involve:
- Soft Particle Electrostatics: A proper model must account for the three-dimensional distribution of structural charges within the ion-permeable shell of the particle, not just a surface charge [18].
- Modified Poisson-Boltzmann Theory: This incorporates molecular effects such as finite ion size, ion correlations, and the decrease in dielectric permittivity near charged surfaces (dielectric decrement) [18].
- Beyond Derjaguin Approximation: For nano-sized particles or when the particle size is comparable to the Debye length, the Derjaguin approximation fails. The Surface Element Integration (SEI) method provides a more accurate evaluation of interaction energy by accounting for particle curvature [18].
Q4: Why is my nanoparticle-biomolecule complex aggregating even though they are similarly charged?
According to classical DLVO theory, similarly charged particles should repel. However, experimental observations and statistical-thermodynamic considerations confirm that an electrostatic, counterion-mediated attraction can exist between similarly charged species. This occurs because the electrostatic Gibbs free energy (ΔGel) is not equal to the Helmholtz free energy (ΔFel) in ionic systems. The difference gives rise to an attractive component in the interaction potential, which can overcome the repulsive barrier, especially with multi-valent or even mono-valent counterions, leading to aggregation despite net similar charges [19].
Q5: How does surface functionalization tune electrostatic interactions for targeted conductivity?
Surface functionalization directly modulates the surface charge and electronic structure of nanomaterials, which in turn controls their electrostatic interactions and electrical conductivity. For example, in Ti3C2 MXenes:
- Functionalization with specific groups (e.g., -F, -OH, -O) drastically alters their thermal conductivity and light absorption properties by changing the electronic structure and electron-phonon scattering [20].
- Covalent functionalization using diazonium salts with different tail groups allows for precise tuning of surface energy and electronic properties, enabling selectivity for specific targets like gas molecules while modifying the material's conductive response [21].
Troubleshooting Guides
Problem 1: Uncontrolled Aggregation of Nanoparticles in Biological Media
Potential Causes and Solutions:
| Cause | Diagnostic Experiment | Solution |
|---|---|---|
| Charge Screening & Double Layer Compression: High ionic strength compresses the EDL, reducing electrostatic repulsion [16]. | Measure zeta potential as ionic strength increases. A sharp drop confirms charge screening. | Reduce salt concentration in the medium or use a buffer with lower ionic strength. |
| Specific Ion Effects / Ion Correlation: Multivalent ions can induce strong attraction, overriding electrostatic repulsion [18] [19]. | Test dispersion stability in the presence of mono- vs. multi-valent salts. Rapid aggregation with multivalent salts indicates this issue. | Chelate multivalent cations or use non-ionic stabilizers (e.g., polyethylene glycol) to introduce steric hindrance [16]. |
| Protein Corona Formation: Adsorption of proteins can neutralize surface charge or bridge particles [16]. | Incubate NPs with serum, then isolate and measure zeta potential and size. A change indicates corona formation. | Pre-functionalize NPs with stealth coatings (e.g., PEG) or tune surface charge to minimize non-specific protein adsorption. |
Problem 2: Inconsistent or Low Biomolecule Loading Efficiency
Potential Causes and Solutions:
| Cause | Diagnostic Experiment | Solution |
|---|---|---|
| Suboptimal Electrostatic Driving Force: The surface charge of the NP is not sufficiently opposite to the biomolecule's charge at the working pH [16]. | Determine the isoelectric point (pI) of the biomolecule. Measure zeta potential of NP and biomolecule at the working pH. | Adjust the pH of the loading solution to ensure opposite net charges or select/engineer a NP surface functionalization with a stronger complementary charge. |
| Steric Hindrance: Polymer coatings or dense functional groups physically block binding sites [16]. | Use a technique like isothermal titration calorimetry (ITC) to study binding affinity. Low affinity suggests steric issues. | Use a different functionalization strategy (e.g., direct covalent coupling of small charged molecules) or a linker with a longer chain. |
| Incorrect Functionalization Density: Too few functional groups lead to low capacity; too many can cause steric issues or conformational changes in the biomolecule [16]. | Characterize the surface group density via spectroscopic methods (XPS) or acid-base titration. | Optimize the functionalization protocol (concentration, time, temperature) to achieve the desired density. |
Problem 3: Poor Colloidal Stability in a Specific pH Range
Potential Causes and Solutions:
- Cause: The pH is close to the isoelectric point (pI) of the nanoparticles or the stabilizing coating, resulting in a net neutral surface and loss of electrostatic stabilization [16].
- Solution: Characterize the zeta potential of your NPs across a broad pH range to identify their pI. Formulate and store the dispersion at a pH sufficiently far from this pI (e.g., at least 2 pH units away) to maintain a high surface charge magnitude.
Table 1: Impact of Surface Functionalization on Ti3C2 MXene Properties
Data from ab initio calculations on the effects of surface terminations on Ti3C2 MXene for photothermal applications [20].
| MXene Type | Thermal Conductivity (W/mK) | AM1.5 G Solar Absorptivity (%) | Near-Infrared Light Absorptivity (%) | Key Electronic Effect |
|---|---|---|---|---|
| Ti3C2 (pristine) | 20 - 80 | 15.65 % | Not Specified | Dense packed electronic states near Fermi level |
| Ti3C2F2 | ~3x increase | Not Specified | 19.36 % | Enhanced electronic thermal conductivity |
| Ti3C2(OH)2 | ~3x increase | Not Specified | Not Specified | Enhanced electronic thermal conductivity |
| Ti3C2O2 | ~2x increase | Not Specified | 9.75 % | Reduced light absorption |
Table 2: Ion Intercalation Effects on MXene Interlayer Spacing and Performance
Data on intercalation engineering for energy storage applications [22].
| Intercalated Species | MXene Matrix | Interlayer Spacing Change | Performance Improvement |
|---|---|---|---|
| Mn²⁺ | V2CTx | 0.73 nm → 0.95 nm | Capacity: 530 mAh·g⁻¹, Capacity retention: 84% after 2000 cycles [22] |
| Na⁺ (NaOH treatment) | Ti3C2Tx | Not Specified | Specific capacitance increased from 61.3 F·g⁻¹ to 113.4 F·g⁻¹ [22] |
| DMSO | Ti3C2Tx | 19.5 Å → 26.8 Å | Facilitated exfoliation and mitigation of restacking [22] |
| NH4⁺ | Ti3C2Tx | 19.8 Å → 24.5 Å | Lithium-ion storage capacity increased from 100 to 168 mAh·g⁻¹ [22] |
Experimental Protocols
Protocol 1: Surface Functionalization of Nanoparticles with Charged Polymers for Enhanced Biomolecule Adsorption
Principle: Coating nanoparticles with charged polymers (e.g., Polyethyleneimine - PEI) creates a highly charged surface that enhances the electrostatic adsorption of oppositely charged biomolecules like DNA or RNA [16].
Materials:
- Nanoparticles (e.g., gold, silica, polymeric NPs)
- Cationic polymer (e.g., PEI, Chitosan, Poly-L-lysine)
- Appropriate buffer (e.g., MES, HEPES)
- Purified water
- Centrifuge, sonication bath, dynamic light scattering (DLS)/zeta potential analyzer.
Step-by-Step Method:
- NP Preparation: Purify and characterize the starting nanoparticles. Determine the initial zeta potential and hydrodynamic diameter via DLS.
- Polymer Solution Preparation: Dissolve the cationic polymer in a suitable buffer at a concentration of 1-2 mg/mL.
- Incubation: Add the polymer solution dropwise to the nanoparticle suspension under vigorous stirring or sonication. Typical mass ratios of polymer to NP range from 1:1 to 1:5.
- Reaction: Allow the reaction to proceed for a predetermined time (e.g., 30-120 minutes) at room temperature with continuous mixing.
- Purification: Centrifuge the functionalized nanoparticles to remove unbound polymer. Resuspend the pellet in the desired buffer. Repeat this wash step 2-3 times.
- Characterization: Measure the final zeta potential (should shift positively) and size of the polymer-coated NPs to confirm successful functionalization.
Protocol 2: Evaluating Electrostatic Interaction Energy via Surface Element Integration (SEI) Method
Principle: For soft or nano-sized particles where the Derjaguin approximation is invalid, the SEI method provides a more accurate evaluation of electrostatic interaction energy by integrating the interaction between discrete surface elements, accounting for particle curvature [18].
Materials:
- Numerical data for the electrostatic potential distribution between the particles (from modified PB theory, accounting for ion size, correlations, etc.)
- Computational software (e.g., MATLAB, Python with SciPy) for numerical integration.
Step-by-Step Method:
- Define Geometry: Model the two interacting soft, spherical particles as core-shell structures with defined radii, core charge, and shell charge density.
- Solve Modified PB Equation: Compute the spatial distributions of ion densities and electrostatic potential in the interaction space using a Poisson-Boltzmann theory corrected for ion size, ion correlations, and dielectric decrement [18].
- Calculate Disjoining Pressure: Derive the pairwise disjoining pressure from the potential and ion distributions.
- SEI Integration: Perform a numerical integration over the surfaces of the particles. The interaction energy ( U(h) ) at separation ( h ) is given by: ( U(h) = \iint_{\text{surface}} E[\rho(\mathbf{s}), h] \, dS ) where ( E ) is the interaction energy per unit area between planar sections, and ( \rho(\mathbf{s}) ) is the local curvature at surface element ( \mathbf{s} ) [18].
- Generate Energy Profile: Repeat the calculation for different separation distances ( h ) to construct the full electrostatic interaction energy profile.
The Scientist's Toolkit: Research Reagent Solutions
Table 3: Essential Materials for Surface Functionalization and Electrostatic Studies
| Reagent / Material | Function / Application | Key Consideration |
|---|---|---|
| Polyethyleneimine (PEI) | Cationic polymer for creating positively charged NP surfaces; enhances adsorption of DNA/RNA [16]. | Branched vs. linear structures offer different charge densities and steric properties. |
| Chitosan | Biocompatible cationic polysaccharide for NP coating and biomolecule adsorption [16]. | Solubility is only achieved in acidic conditions (protonation of amines). |
| (3-Aminopropyl)triethoxysilane (APTES) | Silane coupling agent for introducing primary amine (-NH₂) groups on silica and metal oxide NPs [16]. | Reaction requires anhydrous conditions and controlled humidity for monolayer formation. |
| Diazonium Salts | Versatile reagents for covalent functionalization of carbon-based materials and MXenes; tail groups tune surface energy and selectivity [21]. | The diazonium chemistry and tail group (hydrophilic/hydrophobic) determine the final surface properties. |
| DMSO (Dimethyl Sulfoxide) | Organic molecule used as an intercalant for MXenes to expand interlayer spacing and prevent restacking [22]. | Polar sulfinyl group (S=O) forms hydrogen bonds with surface -OH or -O groups on MXenes. |
Experimental and Conceptual Workflows
Diagram 1: Workflow for Optimizing Nano-Bio Interfaces via Surface Functionalization
Diagram 2: DLVO Theory and Advanced Conceptual Framework
Surface Charge Modification Techniques and Their Impact on Conductivity
This technical support center provides targeted guidance for researchers optimizing surface functionalization to achieve specific electrical conductivity in materials. The content focuses on practical troubleshooting and detailed methodologies, framed within the context of a broader thesis on controlling material properties through surface charge modification for applications in advanced electronics, biomedicine, and energy technologies.
Troubleshooting Guides
Guide 1: Addressing Inconsistent Conductivity Measurements After Surface Functionalization
Problem: Measured electrical conductivity values vary significantly between samples or deviate from expected results after surface modification.
Solution: Follow this systematic troubleshooting workflow to identify and resolve the source of inconsistency.
Detailed Resolution Steps:
- Verify Surface Group Uniformity: Use surface characterization techniques such as X-ray Photoelectron Spectroscopy (XPS) and Fourier-Transform Infrared Spectroscopy (FTIR) to confirm the distribution and bonding of functional groups. Inconsistent coverage directly causes conductivity variations [20].
- Control Measurement Environment: Regulate ambient conditions, particularly humidity and temperature, during electrical measurements. Moisture absorption can significantly alter the measured conductivity of surface-modified materials.
- Confirm Functionalization Stoichiometry: Precisely control precursor concentrations, reaction solution pH, and reaction times. Deviations in these parameters lead to varying degrees of functionalization and inconsistent electronic structure modifications [20].
- Validate Measurement Technique: Use the same measurement methodology (e.g., Hall-effect, four-point probe) for all samples to allow valid comparisons. Note that different techniques can yield varying results; for instance, reported Ti3C2 MXene conductivity values vary from 2.0×10⁵ S/m to 8.0×10⁵ S/m depending on the measurement method used [20].
Guide 2: Managing Unintended Side Reactions During Surface Modification
Problem: Surface functionalization processes yield unintended byproducts or alter material properties in ways not predicted by the proposed reaction pathway.
Solution: Implement controls to identify and prevent common side reactions during surface charge modification.
Detailed Resolution Steps:
- Prevent Ambient Oxidation: Conduct functionalization reactions in inert atmosphere glove boxes or chambers when possible, especially for oxygen-sensitive materials like Ti3C2 MXene. Research shows that introduction of O atoms can significantly reduce infrared light absorption to 9.75%, negatively impacting performance in photothermal applications [20].
- Remove Reaction Byproducts: Implement rigorous washing protocols with appropriate solvents. Use characterization techniques like UV-Vis spectroscopy and mass spectrometry to verify complete byproduct removal.
- Control Reaction Kinetics: Optimize reaction temperature and control precursor addition rates to favor desired reaction pathways over competitive side reactions.
Frequently Asked Questions (FAQs)
Q1: How do different surface functional groups quantitatively affect thermal and electrical conductivity?
The impact varies significantly by specific functional group, as demonstrated in MXene materials:
Table 1: Quantitative Impact of Surface Functionalization on Ti3C2 MXene Properties
| Functional Group | Thermal Conductivity Change | Electrical Conductivity | Key Optical Property | Recommended Applications |
|---|---|---|---|---|
| F atoms | Increases up to ~3x | Metallic character maintained | Excellent NIR absorption (up to 19.36%) | Photothermal therapy, Solar energy harvesting [20] |
| OH groups | Increases up to ~3x | Metallic character maintained | Enhanced specific photothermal performance | Biomedical applications, Sensors [20] |
| O atoms | Increases up to ~2x | Metallic character maintained | Significantly reduced light absorption (9.75%) | Applications where high IR transparency is needed [20] |
| Bare Ti3C2 | Baseline (20-80 W/mK) | High (2.0-8.0×10⁵ S/m) | Notable sunlight absorptivity (15.65%) | Broad photothermal applications [20] |
Q2: What are the essential characterization techniques for verifying successful surface charge modification?
A comprehensive approach requires multiple techniques:
- X-ray Photoelectron Spectroscopy (XPS): Confirms elemental composition and chemical bonding of surface groups
- FTIR Spectroscopy: Identifies specific functional groups through vibrational signatures
- Four-Point Probe Measurement: Quantifies electrical conductivity changes precisely
- Kelvin Probe Force Microscopy (KPFM): Maps surface potential and charge distribution at nanoscale
- UV-Vis-NIR Spectroscopy: Evaluates optical property changes resulting from surface modification
Q3: What common pitfalls affect experimental reproducibility in surface functionalization?
Key issues include:
- Ambient exposure: Oxygen and moisture sensitivity of many conductive materials
- Incomplete characterization: Relying on a single method rather than multiple complementary techniques
- Measurement inconsistency: Using different electrical measurement methods between experiments
- Insufficient controls: Failing to include appropriate reference samples in each experiment
Detailed Experimental Protocols
Protocol 1: Surface Functionalization of Conductive Materials for Enhanced Photothermal Properties
Objective: To functionalize Ti3C2 MXene surfaces with F and OH groups to enhance photothermal conversion efficiency while maintaining electrical conductivity.
Materials:
- Ti3C2 MXene precursor (Ti3AlC2 MAX phase)
- Hydrofluoric acid (HF, 48-50% solution) or lithium fluoride/hydrochloric acid mixture
- Functionalization precursors (based on target groups)
- Inert atmosphere glove box
- Centrifuge and vacuum filtration system
Procedure:
- MXene Synthesis: Etch Ti3AlC2 MAX phase in HF solution (or LiF/HCl) at 35-40°C for 24-48 hours with continuous stirring to obtain multilayer Ti3C2.
- Delamination: Centrifuge and wash the resulting sediment until supernatant pH >5. Intercalate with dimethyl sulfoxide followed by sonication in deionized water under argon atmosphere.
- Controlled Functionalization:
- For F-functionalization: React with ammonium fluoride solution (1M) at 60°C for 6 hours
- For OH-functionalization: Treat with sodium hydroxide solution (0.1M) at room temperature for 2 hours
- Purification: Centrifuge at 8000 rpm for 15 minutes and wash with deoxygenated water until neutral pH. Repeat 3-5 times.
- Characterization: Confirm successful functionalization using XPS (F1s, O1s regions) and FTIR spectroscopy. Measure electrical conductivity using four-point probe method.
Technical Notes:
- Conduct all steps after etching under inert atmosphere to prevent unwanted oxidation [20]
- Optimize reaction time and temperature for specific conductivity targets
- The introduction of O atoms should be minimized in photothermal applications as it reduces light absorption [20]
Protocol 2: Fabrication of Electrically Conductive Hydrogels for Drug Delivery
Objective: To synthesize electrically conductive "SMART" hydrogels for on-demand drug delivery applications.
Materials:
- Conductive polymer (PEDOT, Ppy, or PANI)
- Crosslinking agent (e.g., poly(ethylene glycol) diacrylate)
- Photoinitiator (Irgacure 2959)
- Therapeutic drug candidate
- Electrochemical workstation or potentiostat
Procedure:
- Polymer Preparation: Dissolve conductive polymer (PEDOT:PSS, 1-2% w/v) in aqueous solution with gentle stirring.
- Composite Formation: Add crosslinker (PEGDA, 5-10% w/v) and photoinitiator (0.1% w/v) to the polymer solution. Mix with drug molecule (concentration based on therapeutic window).
- Hydrogel Fabrication: Pour solution into mold and expose to UV light (365 nm, 5-10 mW/cm²) for 5-15 minutes to crosslink.
- Electrical Characterization: Connect hydrogel to electrochemical workstation. Measure impedance spectroscopy (1 Hz-1 MHz) and DC conductivity.
- Drug Release Testing: Apply controlled electrical stimuli (e.g., 0.5-1.0 V, pulsed waveform) and sample release medium at predetermined intervals for HPLC analysis.
Technical Notes:
- Tune electrical conductivity by varying the ratio of conductive polymer to hydrogel matrix [23]
- Electrical stimulation parameters (voltage, waveform, duration) must be optimized for specific drug molecules
- These systems enable higher drug loading with on-demand delivery capability [24]
Research Reagent Solutions
Table 2: Essential Materials for Surface Charge Modification Research
| Reagent/Material | Function | Application Examples |
|---|---|---|
| Ti3C2 MXene | Base conductive 2D material | Photothermal therapy, Conductive composites, Energy storage [20] |
| PEDOT:PSS | Conductive polymer hydrogel matrix | Neural interfaces, Drug delivery systems, Biosensors [23] |
| Polypyrrole (PPy) | Electrically responsive polymer | Tissue engineering scaffolds, Controlled drug release [23] |
| Hydrofluoric Acid (HF) | MXene etching agent | Selective etching of Al from Ti3AlC2 MAX phase [20] |
| Ammonium Fluoride | Fluorination agent | Introducing F functional groups on MXene surfaces [20] |
| PEGDA Crosslinker | Hydrogel matrix formation | Creating 3D networks in conductive hydrogels [24] |
Advanced Functionalization Methods and Their Biomedical Implementations
AI-Driven Surface Design and Machine Learning Optimization
Frequently Asked Questions (FAQs)
Q1: What are the most common causes of inconsistent conductivity results in functionalized surfaces, and how can I resolve them? Inconsistent conductivity often stems from uncontrolled surface functionalization and poor quality control. To resolve this, implement machine learning-driven quality control like the XGBoost model, which achieved 97.06% prediction accuracy for surface characteristics. This approach identifies critical parameter interactions affecting conductivity, enabling proactive adjustments. Bayesian optimization platforms like Ax can systematically tune these parameters for optimal results [25] [26].
Q2: How can I tune surface functionalization to selectively enhance specific electronic or thermal properties? Surface functionalization significantly alters electronic structure and properties. For Ti3C2 MXenes, introducing F and OH groups nearly triples thermal conductivity while maintaining excellent light absorptivity (15.65-19.36%). However, O atoms reduce infrared light absorption to 9.75%, making them undesirable for photothermal applications. Use diazonium salts with specific tail groups to precisely control surface energy and electronic interactions for target applications [20] [21].
Q3: My ML models for property prediction are overfitting despite having sufficient data. What optimization strategies should I implement? Overfitting indicates poor model generalization despite sufficient data. Implement regularization methods (Ridge, LASSO, elastic nets) that add penalties as model complexity increases. The dropout method, which randomly removes units in hidden layers, is particularly effective. Also apply resampling methods or hold back validation data. Ensure your feature representation properly captures structural relationships using graph neural networks that represent atoms as nodes and interatomic relations as edges [27] [28].
Q4: What experimental parameters most significantly impact surface roughness and conductivity in additive manufacturing? Infill density, print speed, nozzle temperature, and layer height significantly impact surface characteristics. A full factorial experimental design examining these parameters found that machine learning optimization using XGBoost achieved R² of 97.06% and MSE of 0.1383 for roughness prediction, significantly outperforming traditional regression methods. These parameters directly affect surface morphology and subsequent functionalization effectiveness [25].
Troubleshooting Guides
Problem: Unpredictable Property Outcomes After Surface Functionalization
Symptoms: Large variations in conductivity measurements, inconsistent performance across batches, inability to reproduce literature results.
Diagnosis and Solution: This indicates poor control of functional group distribution and density. Implement these steps:
Precise Functionalization Control: Use diazonium chemistry with systematically modulated tail groups. Hydrophilic (sulfanilic acid) and hydrophobic (4-octylaniline, 4-(heptadecafluorooctyl)aniline) groups enable tunable gas selectivity through controlled surface energy adjustment [21].
Computational Verification: Perform ab initio calculations to predict how different functional groups (F, OH, O) affect electronic structure and thermal properties before experimental work. For Ti3C2 MXenes, these calculations reveal that F and OH groups enhance both thermal conductivity and light absorption [20].
Adaptive Experimentation: Deploy Bayesian optimization through platforms like Ax to efficiently navigate complex parameter spaces. This approach uses Gaussian processes as surrogate models to suggest optimal configurations while quantifying uncertainty, particularly valuable with limited data [26].
Problem: Machine Learning Models Failing to Generalize to New Surface Compositions
Symptoms: Accurate predictions on training data but poor performance on new material systems, inconsistent recommendations across similar experiments.
Diagnosis and Solution: This suggests inadequate feature representation or dataset bias. Implement these corrective actions:
Enhanced Feature Engineering: Move beyond simple descriptors to graph-based representations where atoms are nodes and interatomic relations are edges. Graph Neural Networks (GNNs) excel at capturing geometric features critical for property prediction [27].
Data Augmentation: Apply transfer learning from related material systems or use few-shot learning techniques. These approaches leverage pre-trained models to predict molecular properties and optimize lead compounds even with limited target-specific data [29].
Regularization Framework: Implement comprehensive regularization using dropout methods and validation holding. Monitor performance metrics including logarithmic loss, F1 score, and confusion matrices to detect overfitting early [28].
Problem: Inefficient Optimization of Multiple Conflicting Properties
Symptoms: Improving conductivity degrades thermal performance, difficulty balancing surface roughness with mechanical properties, extended optimization cycles.
Diagnosis and Solution: This represents a multi-objective optimization challenge requiring specialized approaches:
Pareto Optimization: Use frameworks that generate Pareto frontiers illustrating tradeoffs between metrics. Ax platform successfully applies this for simultaneous improvement of model accuracy while minimizing resource usage, and for trading off size and performance in natural language models [26].
Multi-Task Learning: Implement neural architectures with multiple output nodes where each node corresponds to a specific property or task to be predicted. This enables coordinated optimization of interrelated properties [28].
Constraint Implementation: Apply constrained optimization techniques for tuning systems where certain parameters must remain within boundaries. This approach successfully optimizes key metrics while avoiding regressions in others for recommender systems [26].
Experimental Protocols & Methodologies
Protocol 1: ML-Optimized Surface Functionalization for Target Conductivity
Objective: Precisely control surface chemistry to achieve target electronic/thermal conductivity through machine learning-guided functionalization.
Materials:
- Base substrate (e.g., Ti3C2 MXene sheets)
- Diazonium salts with varying tail groups (hydrophilic/hydrophobic)
- Solvent system appropriate for substrate
- Characterization equipment (FTIR, XPS, conductivity probe)
Methodology:
Surface Preparation: Prepare clean, standardized substrate surfaces to ensure consistent functionalization baseline.
Functionalization Screening: Apply diazonium salts with systematically varied tail groups using controlled reaction conditions. Include both hydrophilic (sulfanilic acid) and hydrophobic (4-octylaniline, 4-(heptadecafluorooctyl)aniline) variants [21].
Property Mapping: Measure resulting conductivity, thermal properties, and surface characteristics for each functionalization approach.
Model Training: Implement XGBoost regression to predict properties based on functionalization parameters. Use dataset of 81+ experiments with roughness image data and property measurements [25].
Bayesian Optimization: Apply Ax platform with Gaussian process surrogate models to identify optimal functionalization parameters for target conductivity, using expected improvement acquisition functions to guide experimentation [26].
Validation: Verify predictions through experimental testing of recommended parameter sets.
Protocol 2: ab initio Guided Surface Design
Objective: Use computational predictions to guide experimental surface functionalization for target electronic/thermal properties.
Materials:
- DFT computation resources (VASP software)
- Projector augmented wave (PAW) pseudopotentials
- Generalized gradient approximation (GGA) exchange-correlation treatment
- Experimental validation setup
Methodology:
Structure Optimization: Derive two-dimensional structures from original crystal planes, achieving final parameters consistent with crystal databases [20].
Electronic Structure Calculation: Compute band structures, density of states, and phonon dispersions for systems with varying surface terminations (O, F, OH groups).
Property Prediction: Calculate thermal conductivity (20-80 W/mK range) and optical absorption (AM1.5 G absorptivity up to 19.36%) for different functionalized surfaces [20].
Experimental Correlation: Synthesize surfaces with predicted optimal functionalization and validate properties experimentally.
Iterative Refinement: Use discrepancies between prediction and experiment to refine computational models.
Research Reagent Solutions
Table: Essential Materials for AI-Driven Surface Design Experiments
| Reagent/Material | Function/Application | Key Characteristics |
|---|---|---|
| Ti3C2 MXene Base Substrate | Platform for surface functionalization studies | High electrical conductivity, tunable surface chemistry, operable at room temperature [20] [21] |
| Diazonium Salts | Covalent surface functionalization | Enable tail-group modulation for tunable selectivity; hydrophilic/hydrophobic variants available [21] |
| VASP Software | ab initio quantum mechanical calculations | DFT framework with PAW pseudopotentials for predicting functionalization effects [20] |
| Ax Platform | Bayesian optimization of experiments | Adaptive experimentation using Gaussian processes; handles multi-objective optimization [26] |
| Graph Neural Networks | Materials representation for ML | Captures geometric features by representing atoms as nodes and interatomic relations as edges [27] |
Workflow Visualization
AI-Driven Surface Design Workflow
Surface Functionalization Impact
Table: Performance Metrics for ML Optimization in Surface Design
| Optimization Method | Accuracy/Prediction Metrics | Error Metrics | Application Context |
|---|---|---|---|
| XGBoost Model | R²: 97.06% | MSE: 0.1383 | Surface roughness prediction for 3D printed components [25] |
| Traditional Regression | R²: 95.72% | MSE: 0.224 | Surface roughness prediction (baseline comparison) [25] |
| Bayesian Optimization (Ax) | Efficient configuration search | Handles 100+ parameters | Hyperparameter optimization, architecture search [26] |
| ab initio Prediction | Thermal conductivity: 20-80 W/mK | Validated experimentally | Ti3C2 MXene with surface functionalization [20] |
Table: Surface Functionalization Effects on Material Properties
| Functionalization Type | Thermal Conductivity Change | Light Absorption Characteristics | Recommended Applications |
|---|---|---|---|
| F Groups | Increases ~3x | Near-infrared: 19.36% | Photothermal conversion, solar energy [20] |
| OH Groups | Increases ~3x | Good overall absorption | General photothermal applications [20] |
| O Groups | Increases ~2x | IR absorption reduced to 9.75% | Avoid in photothermal applications [20] |
| Diazonium with tail groups | Tunable conductivity | Selective gas interaction | Gas sensors with tailored selectivity [21] |
Polymer Wrapping and Coating Strategies for Controlled Conductivity
Troubleshooting Guides
Inconsistent Electrical Conductivity in Composite
Problem: Measured electrical conductivity of the polymer composite is inconsistent, shows high batch-to-batch variation, or fails to reach the percolation threshold at expected filler loading.
Solution:
- Verify Filler Dispersion and Exfoliation: Poor or inconsistent exfoliation of flaky conductive fillers (like graphite or graphene) is a primary cause. Implement strategies like microsphere hybridization to promote in-situ exfoliation during melt processing [30]. The relative concentration and size-to-diameter ratio (SDR) between flaky and spherical fillers are critical parameters to control [30].
- Check for Process-Induced Porosity: Voids and air pockets at the polymer-filler interface can severely disrupt conductive pathways. This is often due to poor chemical compatibility (dewetting) between the binder and filler phases [31]. Ensure proper surface functionalization of fillers to improve compatibility with the polymer matrix [31].
- Optimize the Conductive Network Architecture: Conductive networks can be anisotropic due to filler orientation during processing. Using spherical fillers as a template can help build a more isotropic, 3D interconnected network, which enhances electron transport and reduces the electrical percolation threshold [30].
Poor Coating Adhesion or Uniformity
Problem: The conductive coating delaminates, cracks, or shows poor adhesion to the substrate. It may also exhibit non-uniform thickness, leading to variable conductivity.
Solution:
- Optimize Polymer-Solid Interface: The properties of the buried polymer-solid interface are crucial for adhesion [32]. Characterize the interface using techniques like atomic force microscopy (AFM) or X-ray reflectivity (XRR) to understand the structure and dynamics of the adsorbed polymer layer [32].
- Improve Interfacial Interactions: Strong interfacial interactions, including irreversible chain adsorption, can significantly affect the mechanical and electrical properties of the final composite [32]. Investigate both physisorption (dipolar forces, van der Waals) and chemisorption (covalent bonding) strategies to enhance adhesion [32].
- Refine Coating Process Parameters: For film coatings, inter- and intra-batch uniformity is critical [33]. Use computational modeling or experimental design (DoE) to optimize operational parameters such as spray rate, pan speed, and temperature to ensure a consistent, uniform coat [33].
Suboptimal Thermal Conductivity
Problem: The composite material does not achieve the desired thermal transport properties, even with high loading of conductive fillers.
Solution:
- Enhance Phonon Transport Pathways: Thermal conductivity relies on efficient phonon transport. A continuous 3D filler network is typically required [30]. Research shows that forming a 3D network via in-situ exfoliation of flaky fillers like graphite, facilitated by spherical fillers, can simultaneously boost electron and phonon transport [30].
- Address Network Isotropy: Anisotropic filler orientation leads to directional thermal conductivity. To achieve more uniform multidirectional thermal conductivity, use hybrid filler systems (e.g., flaky graphite with hollow glass microspheres) to suppress preferential orientation and create isotropic pathways [30].
- Mitigate Interfacial Thermal Resistance: The high interfacial area in highly filled polymers is a major challenge [31]. Focus on minimizing the "thermal contact resistance" at the filler-matrix interface by ensuring excellent compatibility and adhesion [30] [31].
Frequently Asked Questions (FAQs)
Q1: What is the fundamental difference between an intrinsically conductive polymer and a conductive composite? A1: Intrinsically Conductive Polymers (ICPs), such as PEDOT:PSS, polyaniline (PANI), and polypyrrole (PPy), possess a conjugated molecular backbone that allows for inherent electron delocalization and conductivity [34] [35]. In contrast, conductive polymer composites (CPCs) achieve conductivity by dispersing conductive fillers (e.g., carbon black, carbon nanotubes, metal particles) into an otherwise insulative polymer matrix. Conductivity in CPCs occurs via percolation, where a continuous network of interconnected fillers forms [35].
Q2: How can I lower the electrical percolation threshold in my composite material? A2: Reducing the percolation threshold allows for high conductivity at lower filler loadings, which preserves mechanical properties and reduces cost. Effective strategies include [30]:
- Volume Exclusion/Extrusion: Incorporating inert particles (like hollow glass microspheres) to increase the effective concentration of conductive fillers in the remaining polymer matrix.
- Double Percolation: Selectively localizing conductive fillers in one phase or at the interface of a bicontinuous polymer blend.
- Segregated Networks: Creating a continuous filler network at the boundaries of polymer granules, achieved through methods like solid compression molding or latex mixing.
Q3: Are there sustainable or biodegradable options for conductive polymer coatings? A3: Yes, the development of sustainable conductive polymers is an emerging trend. Research areas include biodegradable functional coatings and the use of biodegradable conductive polymers [36] [35]. While performance may not yet match traditional materials, this is an active area of innovation driven by environmental considerations.
Q4: My application requires both EMI shielding and thermal management. Can one material provide both? A4: Absolutely. Conductive polymer composites are well-suited for this dual functionality. Efficient electrically conductive networks are also highly effective for electromagnetic interference (EMI) shielding [34] [35]. Furthermore, optimizing the 3D filler network for electron transport often simultaneously enhances phonon transport for thermal conductivity, as demonstrated in composites with exfoliated graphite networks [30].
Experimental Protocols & Data
Protocol: Optimizing Conductive Networks via Microsphere Hybridization
This protocol is based on research demonstrating the enhancement of thermal and electrical transport pathways in polymer composites [30].
1. Objective: To construct efficient 3D conductive networks in a poly (phenylene sulfide) PPS/graphite flake (FG) composite by adding insulative hollow glass microspheres (HGμS) to promote in-situ exfoliation and reduce anisotropy.
2. Materials:
- Polymer Matrix: Polyphenylene sulfide (PPS) pellets.
- Conductive Filler: Natural flaky graphite (FG), average diameter 23 μm (600 mesh).
- Spherical Template: Hollow glass microspheres (HGμS), e.g., Im30K or S38HS.
- Equipment: Melt compounder (e.g., twin-screw extruder), hot press, thermal diffusivity analyzer, impedance analyzer.
3. Methodology:
- Pre-composite Preparation: Prepare base PPS/FG composites with high filler loading (e.g., 30, 50, and 60 wt% FG) via melt compounding.
- Hybrid Composite Fabrication: Add varying weight fractions (x) of HGμS to the pre-composites. The notation 50/50-x denotes a starting material of 50 wt% PPS and 50 wt% FG, with x wt% HGμS added relative to the total PPS+FG weight.
- Melt Processing: Process the PPS/FG/HGμS mixture under controlled shear and temperature in the melt compounder. The HGμS stacking creates a 3D template that confines FG and induces exfoliation.
- Characterization:
- Electrical Conductivity: Measure to determine the percolation threshold and observe the effect of HGμS.
- Thermal Diffusivity: Measure to quantify the enhancement in thermal transport.
- Structural Analysis: Use techniques like SEM or synchrotron SAXS to observe filler exfoliation and network formation [30].
4. Key Parameters to Optimize:
- Relative Concentration (φF2H): The ratio of FG to HGμS concentration. At low HGμS, a dilution effect dominates; optimal exfoliation occurs at intermediate to high φF2H [30].
- Size-to-Diameter Ratio (SDR): The ratio of the size of FG to the diameter of HGμS. A lower SDR (e.g., 0.6 vs. 1.3) reduces the electrical percolation threshold and promotes a denser FG network [30].
Quantitative Data on Conductive Polymer Materials and Markets
Table 1: Key Intrinsically Conductive Polymers (ICPs) and Their Applications
| Material | Full Name/Description | Common Applications |
|---|---|---|
| PEDOT:PSS | Poly(3,4-ethylenedioxythiophene) polystyrene sulfonate | Transparent conductors, antistatic coatings, flexible displays, organic electronics [34] [35] |
| PANI | Polyaniline | Corrosion protection, sensors, printed circuit boards [35] |
| PPy | Polypyrrole | Biosensors, supercapacitors, actuators [35] |
Table 2: Global Conductive Polymers Market Drivers and Challenges (2025-2035 Outlook)
| Aspect | Key Details |
|---|---|
| Primary Growth Drivers | Increasing demand in electronics, energy storage (batteries, supercapacitors), and EMI shielding; growth in electric vehicles and lightweight materials [34] [35]. |
| Major Application Segments | Electronics (EMI shielding, PCBs, flexible displays), Automotive (lighting, body panels, controls), Aerospace, Medical devices, Sensors & Wearables [34] [35]. |
| Key Technical Challenges | Material cost optimization, processing complexity, ensuring performance consistency, meeting environmental regulations [34] [35]. |
The Scientist's Toolkit: Research Reagent Solutions
Table 3: Essential Materials for Conductive Polymer and Coating Research
| Item | Function / Relevance |
|---|---|
| PEDOT:PSS | A commercially available, water-dispersible ICP; the benchmark for transparent conductive coatings [35]. |
| Carbon Black | A low-cost, carbon-based filler used for antistatic applications and to achieve electrical percolation in composites [35]. |
| Carbon Nanotubes (CNTs) | High-aspect-ratio fillers (SWCNT, MWCNT) used to create conductive networks at very low loadings; excellent for EMI shielding and strength enhancement [35]. |
| Graphene & Graphite Flakes | 2D carbon fillers for high electrical and thermal conductivity. Flaky graphites can be exfoliated to improve network efficiency [35] [30]. |
| Hollow Glass Microspheres (HGμS) | Insulative, spherical particles used as an inert filler to manipulate the architecture of conductive networks, promote exfoliation, and reduce percolation threshold [30]. |
| Hydrophilic Matrices (e.g., HPMC) | Polymers like Hydroxypropyl Methylcellulose used in controlled-release drug coatings; viscosity is used to tailor the release profile [37]. |
Workflow and Conceptual Diagrams
Ligand Displacement and Molecular Complex Functionalization
Troubleshooting Guides and FAQs
Frequently Asked Questions
Q1: My ligand displacement reaction is thermodynamically favorable but proceeds extremely slowly. What factors should I investigate? The rate of ligand substitution is governed by kinetics, not just thermodynamics. This is often related to the Crystal Field Stabilization Energy (CFSE) of the metal complex. Complexes with high CFSE (e.g., Cr³⁺, V²⁺) are typically inert and react slowly, whereas those with zero or low CFSE (e.g., Cr²⁺, Cu²⁺) are labile and react rapidly. Check the d-electron configuration of your metal center. Furthermore, ensure that the incoming ligand is present in sufficient concentration and that the solvent does not competitively inhibit the desired displacement [38].
Q2: For surface functionalization aimed at enhancing conductivity, how do I choose the optimal functional group? The choice of functional group profoundly impacts the electronic structure of the material. For example, in Ti₃C₂ MXenes, functionalization with F and OH groups can nearly triple thermal conductivity due to enhanced electronic thermal conductivity. In contrast, the introduction of O atoms, while still doubling thermal conductivity, can significantly reduce light absorption, which may be detrimental for photothermal applications. The key is that different groups (F, OH, O) tune the electronic properties and electron-phonon scattering differently. Select a functional group that aligns with your target conductivity type (electronic vs. thermal) and application needs [20].
Q3: What are the best practices for characterizing the success and permanence of a surface functionalization process? A combination of techniques is recommended. For covalent grafting, spectroscopic methods like FTIR or XPS can confirm the formation of new chemical bonds (e.g., amide bonds). The stability of the functionalization can be assessed by testing the material's properties, such as zeta potential, solubility, or contact angle, before and after rigorous washing or exposure to relevant environments. A permanent modification, such as those achieved with plasma-based covalent bonding, will show no significant change in these properties after testing [39] [40].
Q4: I am encountering issues with the aggregation of nanomaterials after surface functionalization, which hinders their performance. How can I mitigate this? Aggregation is a common challenge, often due to incomplete surface coverage or the use of functional groups that do not provide sufficient steric or electrostatic repulsion. To address this, consider:
- Initial Surface Homogenization: Ensure the starting material has a uniform surface chemistry before the final functionalization step. This provides a consistent platform for subsequent reactions.
- Tailored Functional Groups: Choose functional groups that enhance dispersibility in your target solvent. For instance, carboxylated or hydroxylated nanodiamonds show improved aqueous stability and reduced aggregation.
- Advanced Techniques: Plasma-based functionalization can graft a high density of functional groups, creating a more uniform and stable surface that resists aggregation [39].
Troubleshooting Common Experimental Issues
| Problem | Possible Cause | Solution |
|---|---|---|
| Low displacement reaction rate | High CFSE of metal center making the complex inert. | Choose a different metal ion with lower CFSE, increase reaction temperature, or use a catalyst [38]. |
| Low concentration of incoming ligand. | Increase the concentration or add the ligand in a controlled, slow manner. | |
| Unstable surface functionalization | Non-covalent or weak interactions used. | Employ covalent grafting strategies (e.g., amide bond formation, plasma-induced bonding) for a permanent, stable layer [39] [40]. |
| Inconsistent conductivity results after functionalization | Mixed or poorly controlled surface terminations. | Use a precise functionalization method (e.g., diazonium salt chemistry, controlled plasma treatment) to ensure a uniform layer. For MXenes, prefer -F or -OH over -O for better photothermal conductivity [20] [21]. |
| Poor dispersibility of functionalized material | Incomplete surface coverage or aggregation. | Perform initial surface homogenization. Use functional groups that improve solubility (e.g., -COOH for water) [39]. |
| Low drug loading efficiency on nanocarrier | Lack of or inappropriate surface functional groups. | Functionalize the surface with specific groups (e.g., -COOH) that can be conjugated to targeting ligands like transferrin to improve receptor-mediated uptake and loading [39]. |
Key Experimental Protocols and Data
Protocol 1: Ligand Displacement in a Dinuclear Manganese Complex
This protocol is based on a study demonstrating ligand displacement for fixing manganese, relevant to cellular metal ion transport [41].
Objective: To synthesize a trinuclear manganese complex by displacing solvating ligands from a Mn²⁺ species using pre-organized carbonyl groups from a dinuclear Mn³⁺ complex.
Materials:
- Dinuclear manganese(III) complex of an N-(carboxymethyl)-N-[3,5-bis(α,α-dimethylbenzyl-2-hydroxybenzyl)]glycine (HDA) ligand.
- Manganese(II) salt (e.g., MnCl₂).
- Methanol.
- Water.
Methodology:
- Dissolve the dinuclear Mn³⁺ complex in a mixed solvent of methanol and water.
- Add a solution of the Mn²⁺ salt to the stirring solution of the dinuclear complex.
- The appropriately positioned carbonyl groups on the dinuclear complex will displace the solvating ligands (H₂O, CH₃OH) from the Mn²⁺ ion.
- This coordination leads to the cyclization of two carboxyl groups around the Mn²⁺ ion, forming a stable trinuclear complex.
- Recover the product by filtration or crystallization. The structure was confirmed using X-ray diffraction (triclinic P1, a = 13.172(3) Å, b = 15.897(3) Å, c = 19.059(4) Å) [41].
Protocol 2: Covalent Surface Functionalization of MXenes for Tunable Gas Sensing
This protocol details a versatile strategy for covalently functionalizing Ti₃C₂Tₓ MXenes using diazonium salts to tune gas selectivity [21].
Objective: To graft specific tail groups onto MXene surfaces to modulate their surface energy and impart selective gas adsorption properties.
Materials:
- Ti₃C₂Tₓ MXene dispersion.
- Diazonium salts with desired tail groups (e.g., sulfanilic acid for hydrophilic, 4-octylaniline for hydrophobic).
- Mild acidic aqueous solution (e.g., HCl).
- Solvent (e.g., water, ethanol).
Methodology:
- Prepare a stable dispersion of Ti₃C₂Tₓ MXene sheets in an appropriate solvent.
- In a separate vessel, generate the diazonium salt in situ from the chosen aniline derivative under mild acidic conditions.
- Slowly add the diazonium salt solution to the MXene dispersion under constant stirring. The reaction typically proceeds at or near room temperature.
- Allow the reaction to continue for a predetermined time to control the grafting density.
- Purify the functionalized MXenes by repeated centrifugation and washing to remove unreacted species.
- The resulting material can be drop-casted or spin-coated to form sensing films. Density functional theory (DFT) calculations can be used to confirm enhanced gas adsorption energies [21].
Quantitative Data on MXene Surface Functionalization Effects:
| Material System | Functionalization / Treatment Key Property Change | Quantitative Effect | Research Context |
|---|---|---|---|
| Ti₃C₂ MXenes [20] | Introduction of F, OH groups Thermal Conductivity Increased ~3x | From base value to ~3x base value | Photothermal conversion |
| Introduction of O atoms Thermal Conductivity Increased ~2x | From base value to ~2x base value | Photothermal conversion | |
| Ti₃C₂ AM1.5 G Light Absorptivity 15.65% | 15.65% | Solar energy harvesting | |
| Ti₃C₂F₂ Near-IR Light Absorptivity 19.36% | 19.36% | Near-IR photothermal applications | |
| Ti₃C₂Tₓ MXenes [22] | NaOH Treatment (Na⁺ intercalation) Specific Capacitance Increased from 61.3 to 113.4 F·g⁻¹ | +85% increase | Energy storage (Supercapacitors) |
| V₂CTₓ MXenes [22] | Mn²⁺ intercalation (KOH treatment) Interlayer Spacing Increased from 0.73 nm to 0.95 nm | +30% increase | Lithium-ion batteries |
| Nanodiamonds (NDs) [39] | Oxidation (O-functionalization) Cytotoxicity Improved cytotoxicity vs. raw NDs | Notable improvement | Biocompatibility for drug delivery |
| Transferrin conjugation on carboxylated NDs Targeted Delivery Successful internalization in HeLa cells | Confirmed efficacy | Targeted cancer therapy |
The Scientist's Toolkit: Research Reagent Solutions
| Reagent / Material | Function in Experiment | Key Characteristic |
|---|---|---|
| Diazonium Salts [21] | Covalent grafting of specific tail groups onto material surfaces (e.g., MXenes). | Enables precise tuning of surface energy (hydrophilic/hydrophobic) for applications like selective gas sensing. |
| Silane Coupling Agents [39] | Creating covalent siloxane linkages with surface silanols (e.g., on silica gels). | Imparts greater hydrophobicity or introduces functional groups (amino, epoxy) for chromatography or composite interfaces. |
| Plasma + Organic Chemistry [40] | Dry, single-step permanent covalent functionalization of virtually any substrate. | Allows grafting of complex biomolecules (antibodies, peptides) while maintaining biofunctionality; solvent-free and scalable. |
| Intercalation Agents (e.g., DMSO, K⁺) [22] | Inserting ions or molecules between MXene layers to expand interlayer spacing. | Prevents restacking, facilitates ion diffusion, and enhances electrochemical performance in energy storage devices. |
| PEDOT:CHC/Silk Hydrogel [42] | Serves as an electroresponsive matrix and drug reservoir in smart wound dressings. | Exhibits high drug encapsulation efficiency (>90%) and allows electrically programmable drug release. |
| Dinuclear Metal Complexes [41] | Acts as a pre-organized receptor for metal ions via ligand displacement. | Models biological metal ion sequestration and can be used to synthesize higher-order coordination polymers. |
Peptide-Conjugated Surfaces for Targeted Drug Delivery
This technical support center provides a curated knowledge base for researchers developing peptide-conjugated surfaces for targeted drug delivery systems. The guidance is framed within the broader thesis context of optimizing surface functionalization for enhanced target conductivity research, a critical parameter for biosensing and active targeting applications. The following sections offer detailed troubleshooting guides, frequently asked questions (FAQs), and standardized experimental protocols to address common challenges encountered in designing, functionalizing, and characterizing these advanced biomaterials. The information is specifically tailored to support the work of researchers, scientists, and drug development professionals in achieving reproducible and high-performance systems.
Troubleshooting Guides & FAQs
Frequently Asked Questions (FAQs)
Q1: What are the primary advantages of using peptide conjugation for drug delivery surfaces? Peptide conjugation enhances drug delivery surfaces by providing specific bio-recognition capabilities, facilitating targeted therapeutic interventions, and improving the structural integrity of the biomaterial [43]. Peptides act as targeting ligands, such as the RGD motif which binds to integrin αvβ3 overexpressed in tumor cells, enabling selective drug delivery to cancerous tissues while minimizing impact on healthy cells [44] [45].
Q2: How can I improve the stability of peptides on conjugated surfaces? Peptides are susceptible to enzymatic degradation and have short half-lives [46]. Stability can be improved by several strategies:
- Structural Modifications: Incorporate D-amino acids instead of L-amino acids, or use hydrocarbon stapling or retro-inverso strategies [46].
- Conjugation with Stabilizing Moieties: Covalently attach polyethylene glycol (PEG) to reduce proteolysis and immunogenicity, or lipids to enhance membrane permeability and resistance to proteolysis [47].
- Use of Cyclic Peptides: Cyclic RGD peptides, for instance, bind more strongly to integrin αvβ3 and are more stable than their linear counterparts [44].
Q3: What are the best practices for storing and reconstituting peptides for conjugation?
- Reconstitution: Dissolve lyophilized peptides by gradually adding the appropriate solvent (e.g., sterile water, saline, or specific buffers) to the powder to prevent clumping. Use gentle agitation or inversion—not vigorous shaking—to avoid aggregation or degradation. Allow 15-30 minutes for complete dissolution [48].
- Storage: For long-term storage, reconstituted peptides should be stored at -20°C or -80°C. Repeated freeze-thaw cycles should be avoided as they can compromise peptide stability. For short-term storage, peptides can be kept at 4°C and used promptly [48].
Q4: My peptide-conjugated surface shows low binding efficiency to the target. What could be wrong? Low binding efficiency can result from several factors:
- Incorrect Peptide Orientation: The bioactive site of the peptide may be sterically hindered. Ensure site-specific conjugation strategies (e.g., using thiol-maleimide chemistry for cysteine-terminated peptides) are used [47] [49].
- Low Peptide Density: The number of peptide ligands on the surface might be insufficient for effective multivalent interactions. Optimization of conjugation chemistry and reactant concentrations is needed [49].
- Loss of Peptide Activity: The conjugation process or storage conditions may have degraded the peptide. Verify peptide integrity post-conjugation using analytical techniques like HPLC [48].
- Nonspecific Interactions: The surface may not be adequately protected. Using PEG coatings or other anti-biofouling agents can minimize nonspecific protein adsorption and improve target-specific binding [49].
Troubleshooting Common Experimental Issues
Table 1: Troubleshooting Common Problems with Peptide-Conjugated Surfaces
| Problem | Potential Causes | Recommended Solutions |
|---|---|---|
| Peptide Aggregation | High peptide concentration, unsuitable solvent, improper mixing [48]. | Use lower concentrations, increase solvent volume, choose compatible solvents, avoid vigorous shaking, and filter the solution if necessary [48]. |
| Low Conjugation Efficiency | Inadequate reactive groups, suboptimal pH, insufficient reaction time, steric hindrance [47]. | Activate surface functional groups (e.g., with EDC/NHS for carboxyl groups), optimize pH and reaction duration, use spacer arms (e.g., PEG chains) to reduce steric hindrance [47] [49]. |
| High Nonspecific Binding | Lack of anti-fouling properties on the surface [49]. | Co-surface functionalization with PEG or other hydrophilic, non-adhesive polymers to create a bio-inert background [49]. |
| Poor Colloidal Stability of Nanocarriers | Surface charge is near neutral, insufficient steric stabilization [50]. | Functionalize with charged molecules or polymers like chitosan or poly-L-lysine. PEGylation provides effective steric stabilization [50]. |
| Unexpected Cytotoxicity | Material cytotoxicity is concentration-dependent [50]. Leaching of unconjugated reagents. | Ensure thorough purification of conjugates post-reaction. For materials like MXenes, confirm working concentrations are below cytotoxic thresholds (e.g., < 200 μg/mL for Ti3C2Tx) and consider surface modification with biocompatible polymers (e.g., PEG, chitosan) to reduce toxicity [50]. |
Experimental Protocols for Key Processes
Protocol: Functionalization of MXene Nanoparticles with RGD Peptide for Targeted Photothermal Therapy
This protocol details the synthesis of tumor-targeting RGD–MXene nanoconjugates, adapted from a recent study, for applications in photothermal therapy and conductivity research [44].
1. Principle: This experiment aims to create uniform nano-sized MXene particles and functionalize their surface with cyclo(–RGDyK) peptides. The RGD peptide binds with high affinity to integrin αvβ3, a receptor overexpressed on various cancer cells, thereby conferring active targeting capabilities to the MXene nanomaterial. The enhanced photothermal conversion efficiency of the nanoparticles is then evaluated [44].
2. Materials: Table 2: Key Research Reagent Solutions
| Reagent/Material | Function/Description | Supplier/Example |
|---|---|---|
| Ti3C2 MXene flakes | Core photothermal nanomaterial with high near-infrared absorption. | Haydale Technologies Co., Ltd. (e.g., MXNTI3C2TX-FLN) [44]. |
| Cyclo(–RGDyK) Peptide | Targeting ligand for integrin αvβ3. | AnaSpec, USA (Product# AS-61183) [44]. |
| (3-Aminopropyl)triethoxysilane (APTES) | Silane coupling agent to introduce amine groups onto the MXene surface. | Sigma-Aldrich (Product# 440140) [44]. |
| 1-(3-Dimethylaminopropyl)-3-ethylcarbodiimide (EDC) | Carbodiimide crosslinker for activating carboxyl groups. | Supplier in Japan (as cited) [44]. |
| N-Hydroxysuccinimide (NHS) | Stabilizes the EDC-activated intermediate, forming an amine-reactive NHS ester. | Sigma-Aldrich (Product# 130672) [44]. |
| N-Succinimidyl 3-(2-pyridyldithio)propionate (SPDP) | A heterobifunctional crosslinker for introducing cleavable disulfide bonds. | Common reagent, available from multiple suppliers (e.g., Thermo Fisher) [47]. |
| Dithiothreitol (DTT) | Reducing agent for cleaving disulfide bonds. | Common reagent, available from multiple suppliers [49]. |
3. Step-by-Step Workflow:
Diagram 1: MXene-RGD Conjugation Workflow. This diagram outlines the key synthetic and characterization steps for creating targeted nanoconjugates.
Step 1: Size Control of MXene Particles
- Prepare an aqueous dispersion of MXene flakes at a concentration of 1 mg/mL.
- Subject the dispersion to ultrasonication at a frequency of 40 kHz for 1 hour to break down the flakes into smaller particles.
- Centrifuge the resulting solution at 3,500 rpm and 4°C for 1 hour. The larger microparticles will form a pellet.
- Carefully extract the supernatant, which contains the desired nano-sized MXene particles.
- Characterization: Use Dynamic Light Scattering (DLS) to measure the hydrodynamic size and polydispersity index of the nanoparticles [44].
Step 2: Surface Functionalization with Amine Groups
- Disperse the MXene nanoparticles in an appropriate anhydrous solvent.
- Introduce (3-Aminopropyl)triethoxysilane (APTES) to the dispersion under controlled conditions (e.g., nitrogen atmosphere). This reaction functionalizes the MXene surface with primary amine groups (-NH₂), which are necessary for subsequent conjugation [44].
- Characterization: Confirm successful amination using Fourier-Transform Infrared Spectroscopy (FTIR) to detect amine-related peaks or X-ray Photoelectron Spectroscopy (XPS) to identify the nitrogen signal.
Step 3: Peptide Conjugation via EDC/NHS Chemistry
- Activate the carboxyl group on the RGD peptide (e.g., on the glutamic acid residue in the RGDyK sequence) by reacting it with a mixture of EDC and NHS in a buffer for 15-30 minutes. This forms an amine-reactive NHS ester.
- Purify the activated peptide if necessary to remove excess crosslinkers.
- Add the activated RGD peptide to the amine-functionalized MXene nanoparticle dispersion. Allow the reaction to proceed for several hours under gentle agitation.
- Purification: Purify the resulting RGD-MXene nanoconjugates (MXene@RGD) via repeated centrifugation and washing cycles to remove unbound peptides and reaction by-products.
- Characterization: Verify conjugation and peptide integrity using analytical HPLC and Mass Spectrometry (MS). Determine the peptide loading capacity [44].
Step 4: Final Characterization
- Use Transmission Electron Microscopy (TEM) or Scanning Electron Microscopy (SEM) to analyze the morphology and confirm the nanoscale dimensions of the final conjugates [44].
Protocol: Creating a Reversible Peptide-Conjugated Gold Sensor Surface
This protocol describes the immobilization of thiolated nanoparticles on a gold surface and their reversible conjugation with a cysteine-modified peptide, serving as a model for reusable biosensors in conductivity research [49].
1. Principle: This method involves creating a stable, non-fouling monolayer on a gold surface using PEG-based nanoparticles. A cysteine-modified neurotensin peptide (NTS(8-13)) is then conjugated to these nanoparticles via a reversible disulfide bond. This allows the peptide layer to be cleaved off using a reducing agent, enabling the sensor surface to be regenerated and reused for multiple detection cycles [49].
2. Materials:
- Methacrylated telechelic PEG polymers (PEG-diMA, e.g., 2, 6, 10 kDa)
- Tetra-thiol crosslinker (e.g., pentaerythritol tetrakis(3-mercaptopropionate))
- Cysteine-modified NTS(8-13) peptide (Sequence: RRPYIL-Cys)
- Gold-coated substrates (e.g., glass slides, QCM chips)
- Dithiothreitol (DTT) solution
- UV light source for polymerization [49]
3. Step-by-Step Workflow:
Diagram 2: Reversible Sensor Conjugation Cycle. This diagram illustrates the process of creating a reusable biosensor surface with a cleavable peptide layer.
Step 1: Synthesis of Thiolated PEG-NPs
- Synthesize thiol-functionalized nanoparticles by radically crosslinking methacrylated PEG (PEG-diMA) using an excess of a tetra-thiol crosslinker under UV light irradiation. The excess thiol ensures free thiol (-SH) groups are available on the nanoparticle periphery [49].
Step 2: Immobilization of NPs on Gold Surface
- Incubate the gold substrate with the synthesized thiolated PEG-NP solution.
- The thiol groups on the NPs will form semi-covalent bonds with the gold surface, creating a stable, smooth monolayer coating of 80-120 nm thickness, as characterized by techniques like AFM or SEM [49].
Step 3: Reversible Conjugation of Peptide
- Incubate the NP-immobilized gold surface with the cysteine-modified NTS(8-13) peptide.
- A disulfide exchange reaction will occur, forming a reversible disulfide bond between the NP's thiol and the peptide's cysteine thiol.
- Characterization: Surface Plasmon Resonance (SPR) or Quartz Crystal Microbalance (QCM) can be used to confirm peptide conjugation by measuring the mass change on the surface [49].
Step 4: Surface Regeneration and Reuse
- To regenerate the surface, treat the peptide-conjugated sensor with a solution of the reducing agent Dithiothreitol (DTT).
- DTT will cleave the disulfide bond, releasing the peptide from the NP surface.
- The thiolated NP-modified gold surface is now ready for a new cycle of peptide conjugation. This regeneration process has been demonstrated to work effectively for at least two cycles [49].
The Scientist's Toolkit: Essential Materials and Reagents
Table 3: Essential Research Reagent Solutions for Peptide-Conjugated Surfaces
| Category & Item | Primary Function | Key Considerations |
|---|---|---|
| Crosslinking Chemicals | ||
| EDC (1-Ethyl-3-(3-dimethylaminopropyl)carbodiimide) | Activates carboxyl groups for conjugation to primary amines. | Often used with NHS to form a more stable amine-reactive ester. Reactions are pH-sensitive and can be inefficient at neutral pH [47]. |
| Sulfo-SMCC (Sulfosuccinimidyl 4-(N-maleimidomethyl)cyclohexane-1-carboxylate) | A heterobifunctional crosslinker that targets amine groups (via NHS ester) and thiol groups (via maleimide). | Ideal for site-specific conjugation, e.g., linking a cysteine-containing peptide to an amine-coated surface [47]. |
| SPDP (N-Succinimidyl 3-(2-pyridyldithio)propionate) | A heterobifunctional crosslinker for introducing cleavable disulfide bonds into conjugates. | Allows for controlled release of the peptide or drug under reducing conditions [47]. |
| Surface Materials | ||
| Gold Surfaces/ Nanoparticles | Provide a platform for immobilizing thiol-containing ligands via stable Au-S bonds. | Mimic biosensor platforms; excellent for SPR and QCM studies. Require clean, well-prepared surfaces [49]. |
| MXenes (e.g., Ti3C2) | 2D nanomaterials with high photothermal conversion efficiency and conductivity for therapy and sensing. | Biocompatibility is concentration-dependent. Surface modification (e.g., with PEG) is often required to reduce toxicity and improve stability [44] [50]. |
| PEG-based Polymers | Impart "stealth" properties, reduce non-specific binding, improve solubility, and increase circulation half-life. | Molecular weight impacts performance; low MW may not prevent fouling, while high MW may cause steric hindrance. ~5-6 kDa is often optimal [47] [49]. |
| Targeting Peptides | ||
| RGD-based Peptides (e.g., Cyclo(RGDyK)) | Bind to integrin αvβ3, a receptor overexpressed on tumor cells and endothelial cells, enabling active targeting. | Cyclic peptides generally offer higher stability and binding affinity compared to linear versions [44] [45]. |
| Cell-Penetrating Peptides (CPPs) (e.g., TAT) | Facilitate the cellular uptake of conjugated cargo across biological membranes. | Rich in basic amino acids (Arg, Lys). The number and spatial arrangement of arginine residues are crucial for uptake efficiency [46] [45]. |
Experiment-in-Loop Bayesian Optimization for Parameter Tuning
Troubleshooting Guides and FAQs
Frequently Asked Questions
Q1: My Bayesian Optimization (BO) campaign seems to be stuck in a local optimum and isn't exploring new areas of the parameter space. What acquisition function strategies can help? This is a common challenge in balancing exploration and exploitation. The Threshold-Driven UCB-EI Bayesian Optimization (TDUE-BO) method is designed specifically for this issue. It begins the optimization campaign using the Upper Confidence Bound (UCB) acquisition function, which prioritizes exploration of uncertain regions. The system then dynamically monitors model uncertainty and automatically switches to the Expected Improvement (EI) function, which focuses on exploiting known promising areas, once uncertainty reduces to a certain threshold. This hybrid policy ensures a comprehensive sweep of the design space before honing in on optimal parameters [51].
Q2: For optimizing a new surface functionalization reaction, how do I choose the right surrogate model for my Bayesian Optimization loop? The choice of surrogate model depends on your design space and data characteristics. Benchmarking studies across experimental materials science show that:
- Gaussian Process (GP) with an anisotropic kernel (Automatic Relevance Detection) is highly robust. It assigns independent length scales to each input dimension, helping it identify the most sensitive parameters in your functionalization process [52].
- Random Forest (RF) performs comparably to anisotropic GP in many scenarios and has advantages. It is non-parametric, has lower computational complexity, and requires less effort in initial hyperparameter tuning, making it a strong alternative [52].
- The combination of Gaussian Processes with Morgan fingerprints (using a Tanimoto kernel) has been shown to perform particularly well in molecular discovery contexts, which is relevant for conductivity optimization [53].
Q3: My experimental measurements are noisy, leading to unstable model predictions. How can I make the BO process more robust to noise? Bayesian Optimization can effectively handle noisy observations through its probabilistic framework. When using a Gaussian Process surrogate, the noise level is explicitly incorporated and learned as a kernel hyperparameter (often as a "white noise" kernel). This allows the model to filter out measurement noise, preventing it from overfitting to spurious data points. The acquisition functions (like Expected Improvement) are also computed over the posterior distribution, which inherently accounts for this uncertainty, guiding the experiment towards points that are promising even in the presence of noise [54] [55].
Q4: I have access to both quick, approximate conductivity tests and slow, high-fidelity measurements. How can I use both efficiently? A Multifidelity Bayesian Optimization (MF-BO) approach is ideal for this. MF-BO leverages data from multiple experimental fidelities (e.g., low-fidelity screening and high-fidelity validation) within a single optimization loop. The algorithm uses a cost-weighted acquisition function to automatically decide whether to evaluate a new parameter set with a cheap, low-fidelity assay or to invest resources in a high-fidelity measurement for a promising candidate. This strategy can substantially accelerate the discovery of optimal parameters by weighing the costs and benefits of different experiment types [53].
Troubleshooting Common Experimental Workflow Issues
| Problem | Symptoms | Possible Causes & Diagnostic Steps | Solutions |
|---|---|---|---|
| Poor Model Fit | The surrogate model predictions consistently disagree with new experimental results. High error on validation data points. | 1. Inadequate Search Space: Parameter ranges may be too narrow. 2. Incorrect Kernel/Surrogate Choice: The kernel may not capture the complexity of the response surface. 3. Lack of Initial Data: The model was trained with too few initial random samples. | Expand the parameter search space based on domain knowledge. Switch to a more flexible surrogate model (e.g., from GP with RBF to Matérn kernel) or use Random Forest. Increase the number of initial, randomly selected experiments before starting the BO loop [52] [56]. |
| Slow Convergence | The optimization requires many iterations to find a good solution. The best-found parameter set does not improve for several cycles. | 1. Over-Exploration: The acquisition function is too biased towards exploration. 2. High-Dimensional Space: The parameter space has too many dimensions, making search difficult. | For UCB, reduce the kappa parameter. For EI or PI, ensure they are configured for a noisy setting. Consider using a hybrid acquisition policy like TDUE-BO that dynamically balances exploration and exploitation [51]. Use dimensionality reduction techniques if possible. |
| High Experimental Cost | The budget is exhausted before finding an optimum. The cost of high-fidelity experiments limits the number of iterations. | 1. Uniform Use of Expensive Assays: Relying solely on high-cost experiments. 2. Inefficient Batch Selection: Not selecting experiments that provide synergistic information. | Implement a Multifidelity (MF-BO) approach to incorporate cheaper, lower-fidelity data [53]. Use a batch selection method (e.g., Monte Carlo-based) that selects multiple experiments per iteration to reduce total campaign time [53]. |
Quantitative Data and Methodologies
Performance Comparison of Surrogate Models
The following table summarizes benchmarked performance of common surrogate models across five experimental materials science domains, using acceleration factor (how much faster than random search) and enhancement factor (performance improvement over the best random sample) as metrics [52].
| Surrogate Model | Key Characteristics | Typical Performance (vs. Random Search) | Recommended Use Case |
|---|---|---|---|
| Gaussian Process (GP) with Isotropic Kernel | Simple kernel; same length scale for all features. | Less robust; lower acceleration and enhancement. | Not generally recommended for complex material spaces [52]. |
| Gaussian Process (GP) with Anisotropic Kernel (ARD) | Automatic Relevance Detection; individual length scales per feature. | Most robust; high acceleration and enhancement. | Default choice for complex, high-dimensional parameter spaces where feature sensitivity varies [52]. |
| Random Forest (RF) | Non-parametric; lower time complexity; no distribution assumptions. | Comparable to GP with ARD; a close alternative. | Excellent for mixed parameter types (continuous/categorical); faster computation on larger datasets [52]. |
Experimental Fidelity Cost Structure
This table outlines the relative cost structure used in a successful Multifidelity BO campaign for drug molecule discovery, which can be adapted for cost-aware optimization in other experimental domains [53].
| Experimental Fidelity | Example Experiment | Relative Cost (Time/Materials) | Key Function in MF-BO Loop |
|---|---|---|---|
| Low Fidelity | Computational docking scores. | 0.01 | Rapidly screens large areas of parameter/chemical space to identify promising regions [53]. |
| Medium Fidelity | Single-point percent inhibition assays. | 0.20 | Provides more reliable data on pre-selected candidates from the low-fidelity screen [53]. |
| High Fidelity | Dose–response IC50 values. | 1.00 | Delivers the ground-truth measurement for final validation and model updating on the most promising candidates [53]. |
Detailed Experimental Protocol: Multifidelity Bayesian Optimization
Objective: To efficiently discover surface functionalization parameters that maximize electrical conductivity by integrating data from multiple experimental fidelities.
Methodology Summary: This protocol is adapted from a successful autonomous discovery platform for drug molecules [53]. The core idea is to use a cost-weighted acquisition function (Targeted Variance Reduction) to guide the selection of both the next candidate material and the optimal fidelity at which to evaluate it.
Define Search Space and Fidelities:
- Search Space: Define the multidimensional parameter space for surface functionalization (e.g., reactant concentrations, temperature, time, dopant types).
- Experimental Fidelities: Establish at least two experimental tiers:
- Low-Fidelity: A rapid, inexpensive proxy for conductivity (e.g., surface plasmon resonance shift, quick resistance measurement with high error).
- High-Fidelity: The definitive, costly conductivity measurement (e.g., 4-point probe measurement under controlled conditions).
Initialize the Model:
- Collect a small initial dataset by running a few experiments (e.g., 5-10% of a typical budget) across the defined parameter space at various fidelities. This helps the model learn the initial relationship between parameters, fidelities, and the output.
Iterative MF-BO Loop:
- Surrogate Modeling: Train a surrogate model (e.g., Gaussian Process with Tanimoto kernel for chemical spaces) on all data collected so far. The model will learn to predict both the mean and variance of the outcome for any parameter set at any fidelity.
- Cost-Weighted Acquisition: Use the Targeted Variance Reduction acquisition function. This function evaluates all possible molecule-fidelity pairs and selects the one that maximizes the expected improvement per unit cost at the highest fidelity.
- Experiment Execution: Synthesize and test the selected parameter set at the recommended experimental fidelity.
- Data Integration: Add the new experimental result (parameters, fidelity, measured conductivity) to the dataset.
- Repeat steps a-d until the experimental budget is exhausted or a performance target is met.
Experimental Workflows and Signaling Pathways
Bayesian Optimization Core Loop
Multifidelity Optimization Strategy
The Scientist's Toolkit: Research Reagent Solutions
| Category | Item / Solution | Function in Experiment |
|---|---|---|
| Computational Surrogates | Gaussian Process (GP) Regression | Probabilistic model that serves as a cheap proxy for the expensive experiment, predicting outcome mean and uncertainty for any parameter set [53] [52]. |
| Random Forest (RF) | An alternative non-parametric surrogate model, effective for mixed data types and less computationally demanding than GP for larger datasets [52]. | |
| Acquisition Functions | Expected Improvement (EI) | Guides experiment selection towards parameters that are likely to improve upon the current best result (exploitation) [51] [55]. |
| Upper Confidence Bound (UCB) | Guides experiment selection towards parameters with high uncertainty, promoting exploration of the search space [51] [55]. | |
| Thompson Sampling (TS) | A probabilistic strategy for selecting experiments, particularly effective in multi-objective optimization (TSEMO) [55]. | |
| Experimental Framework | Multifidelity Bayesian Opt. (MF-BO) | A framework that intelligently combines data from cheap/low-fidelity and expensive/high-fidelity experiments to optimize outcomes under a limited budget [53]. |
| Molecular Representation | Morgan Fingerprints | A method for numerically representing molecular structure, which can be used with a Tanimoto kernel in a GP for molecular property optimization [53]. |
Irradiation-Based Surface Modification Without Chemical Additives
Troubleshooting Common Experimental Challenges
Q1: My polymer samples show inconsistent electrical conductivity improvements after ion irradiation. What could be the cause?
Inconsistent conductivity often stems from unoptimized or unstable ion irradiation parameters. The key factors to control are ion fluence and energy.
- Cause: The relationship between ion fluence and conductivity is not linear. Excessively high fluence can cause polymer degradation (chain scission) instead of the desired carbonization and conjugation, leading to poor or inconsistent results [57].
- Solution: Conduct a fluence series experiment to identify the optimal window for your specific polymer. For instance, research on CR-39 polymer showed that a significant conductivity improvement from 10⁻⁹ to 10⁻⁷ S/cm was achieved at a specific, lower graphite ion fluence, while higher fluences were less effective [58].
- Verification: Use Raman spectroscopy to verify the formation of conductive structures, such as graphitic clusters, within the polymer matrix [57].
Q2: After successful modification, the conductivity of my samples degrades over time. How can I improve stability?
Conductivity degradation is typically due to post-irradiation ageing effects where free radicals react with atmospheric oxygen [57].
- Cause: Residual free radicals generated during irradiation can continue to react, leading to oxidation and a breakdown of the conductive pathways formed during treatment [57].
- Solution: Perform post-irradiation annealing in an inert atmosphere (e.g., nitrogen or argon). This allows radicals to recombine and stabilize the modified structure without oxidative interference [57].
- Prevention: Store irradiated samples in a vacuum or inert environment immediately after processing and prior to any electrical characterization.
Q3: I am observing excessive surface damage, including cracking and ablation, on my polymer films during laser irradiation. How can I prevent this?
Excessive damage indicates that the energy input exceeds the material's ablation threshold.
- Cause: The laser fluence or irradiance is too high for the specific polymer, causing violent material removal rather than controlled modification [59].
- Solution: Systemically reduce the laser fluence. Utilize a laser source with a shorter pulse duration (e.g., nanosecond or picosecond pulses) to achieve precise energy deposition with less thermal damage to the surrounding material [59].
- Process Control: For laser processes, ensure a uniform beam profile and, if possible, perform the irradiation in a controlled atmosphere to manage plasma formation and its effects on the surface [58].
Q4: My surface wettability/hydrophilicity measurements are inconsistent after UV treatment. What factors should I control?
Inconsistent wettability is frequently linked to contamination and the time-dependent hydrophobic recovery of the polymer surface.
- Cause: Surface contamination from handling or storage can mask the induced hydrophilicity. Furthermore, polymer chains can slowly reorientate, burying the polar groups created by UV radiation, a phenomenon known as hydrophobic recovery [60] [61].
- Solution: Clean samples rigorously with solvents (e.g., ethanol, isopropanol) and use plasma cleaning immediately before UV treatment and measurement. Perform wettability measurements (contact angle) as soon as possible after modification to minimize the effects of ageing [61].
- Optimization: Ensure the UV source emits at the correct wavelength (e.g., UVC at 172-184 nm is highly effective for surface activation) and that the sample is positioned at a consistent distance [60].
Frequently Asked Questions (FAQs)
Q: What are the primary mechanisms by which irradiation improves electrical conductivity in polymers? A: Irradiation, particularly with ions, deposits energy that breaks chemical bonds (chain scission) and creates free radicals. These radicals can lead to the formation of new, cross-linked networks and, crucially, the creation of carbon-enriched clusters with conjugated double bonds. These clusters can form interconnected pathways that allow for electron transport, thereby increasing conductivity [57] [62].
Q: Can I use irradiation to modify the surface of a polymer without affecting its bulk properties? A: Yes, this is a key advantage of many irradiation techniques. Ion, laser, and UV irradiation primarily interact with the surface layers of a material. For example, the energy of ions is deposited within a specific penetration depth (range), which can be on the order of micrometers, allowing for surface-specific property changes while the bulk material remains unaffected [57].
Q: How do I choose between ion, laser, and gamma irradiation for my application? A: The choice depends on the desired outcome, material, and available facilities.
- Ion Irradiation: Excellent for precise, near-surface modification, including grafting, cross-linking, and inducing significant conductivity changes. Effectiveness depends on ion species, energy, and fluence [57].
- Laser Irradiation: Ideal for localized processing, patterning, and texturing. It can be used for annealing, hardening, and creating microstructures that influence properties like conductivity and wettability [59].
- Gamma Irradiation: Has high penetration depth and is often used for bulk modification like sterilization. It can also induce cross-linking and generate radicals for subsequent surface grafting in the presence of specific media [62].
Q: Is it possible to achieve multifunctional surfaces (e.g., conductive and antibacterial) with a single irradiation process? A: While a single process can impart multiple properties, it is challenging. Ion or laser irradiation can create nanoscale surface topographies (hillocks, ripples) that may physically inhibit bacterial adhesion while simultaneously altering conductivity [58] [57]. However, for robust antibacterial efficacy, irradiation is often combined with other strategies, such as creating a surface that allows for the subsequent immobilization of antimicrobial agents [63].
Table 1: Conductivity Enhancement via Different Irradiation Methods
| Polymer/Substrate | Irradiation Method | Key Parameters | Conductivity Change | Reference Context |
|---|---|---|---|---|
| CR-39 Polymer | Graphite Ion Implantation | Energy: 710 keV; Fluence: ~26x10¹² ions/cm² | Increased from ~10⁻⁹ S/cm to ~10⁻⁷ S/cm | [58] |
| (PVC/HDPE)/ZnO Nanocomposite | Gamma Irradiation | Dose: 25 kGy; Media: Water | Significant enhancement in AC conductivity; Improved electric field distribution | [62] |
| General Polymers | Ion Irradiation | Varies by ion (e.g., N⁺, Ar⁺) and fluence | Formation of conductive carbon clusters; Conductivity increases with optimal fluence | [57] |
Table 2: Optimizing Ion Irradiation Parameters for Surface Properties
| Target Property | Recommended Ion Type | Energy Range | Fluence Consideration | Notes |
|---|---|---|---|---|
| High Electrical Conductivity | Heavy Ions (e.g., Ar⁺, C⁺) | Medium to High (keV-MeV) | Moderate to High (requires carbon cluster formation) | Aromatic polymers (e.g., PI, PET) often show better results [57]. |
| Improved Hydrophilicity | Light Ions (e.g., N⁺) | Low to Medium | Low to Moderate | Over-irradiation can lead to surface degradation and cracking [57]. |
| Cross-linking (Mechanical Stability) | Medium/Heavy Ions | Medium | Moderate | Electronic stopping power is a key driver for cross-linking [57]. |
Essential Experimental Protocols
Protocol 1: Ion Implantation for Enhancing Polymer Conductivity
This protocol is adapted from studies on modifying CR-39 polymer with graphite ions [58].
- Sample Preparation: Clean polymer samples (e.g., CR-39) ultrasonically in ethanol and deionized water. Dry in an oven or under a nitrogen stream.
- Irradiation Setup: Utilize an ion implanter capable of delivering ions at energies of hundreds of keV (e.g., 710 keV as used for graphite ions).
- Parameter Definition:
- Ion Species: Choose based on desired modification (e.g., C⁺ for graphitization).
- Energy: Define based on SRIM (Stopping and Range of Ions in Matter) software simulations to achieve the desired penetration depth.
- Fluence: Perform a series of experiments across a range (e.g., 10¹² to 10¹⁶ ions/cm²) to identify the optimum. Start with lower fluences to avoid excessive damage.
- Irradiation: Conduct the implantation under a vacuum. Monitor the ion beam current to ensure consistent fluence delivery.
- Post-Processing: Anneal samples at a moderate temperature (e.g., 100-200°C) in a nitrogen atmosphere to stabilize the formed conductive structures and annihilate residual radicals [57].
- Characterization:
- Electrical: Use a four-point probe or impedance analyzer to measure sheet resistance/conductivity.
- Structural: Use Raman spectroscopy to detect the D and G bands indicative of disordered and graphitic carbon.
- Morphological: Use atomic force microscopy (AFM) or confocal microscopy to analyze surface topography [58].
Protocol 2: Gamma Irradiation for Functionalization and Conductivity in Media
This protocol is based on the functionalization of polymer nanocomposites in different media [62].
- Nanocomposite Preparation: Prepare the polymer composite (e.g., (PVC/HDPE) with 5 wt% ZnO nanoparticles) using melt blending and hot press molding.
- Selection of Media: Choose a medium based on the desired functionalization (e.g., water for hydrophilic C=O group introduction, silicon oil for hydrophobic treatment).
- Irradiation Process:
- Submerge the prepared composite samples in the selected medium (water, sodium silicate, paraffin wax, or silicon oil).
- Irradiate the entire assembly using a Co-60 gamma source at a predetermined dose (e.g., 25 kGy) and dose rate (e.g., 0.67 kGy/h).
- Post-Irradiation Cleaning: After irradiation, remove samples from the medium and rinse thoroughly with appropriate solvents to remove any residual medium.
- Characterization:
- Chemical: Use FTIR to identify new functional groups (e.g., C=O peak at ~1723 cm⁻¹ for samples irradiated in water/sodium silicate).
- Electrical: Measure AC conductivity to quantify enhancement.
- Application Testing: Perform application-specific tests, such as oil adsorption capacity [62].
The Scientist's Toolkit: Key Research Reagent Solutions
Table 3: Essential Materials for Irradiation-Based Surface Modification
| Material/Reagent | Function in Experiment | Specific Application Example |
|---|---|---|
| CR-39 Polymer | A common track-etchant polymer substrate known for its well-defined response to ion irradiation. | Used as a model system for studying ion-induced conductivity changes and surface morphology alterations [58]. |
| ZnO Nanoparticles | A functional nanofiller that can enhance the piezoelectric and electronic properties of polymer composites. | Incorporated into PVC/HDPE blends to form nanocomposites; their properties and dispersion are further modified by gamma irradiation [62]. |
| Yttria-Stabilized Zirconia (YSZ) | A high-performance ceramic with excellent mechanical and biocompatibility properties. | Subject to UV laser and other irradiation treatments to enhance its surface energy, hydrophilicity, and bioactivity for implant applications [61]. |
| Polyimide (e.g., Kapton) | An aromatic polymer with high thermal and radiation stability, often used as a "gold film" standard in irradiation studies. | Investigated for its durability and property changes (electrical, mechanical) under various ion beams for aerospace and electronic applications [57]. |
Experimental Workflow and Troubleshooting Diagrams
Overcoming Functionalization Challenges and Performance Optimization
Addressing Stability and Reproducibility Issues in Surface Layers
Frequently Asked Questions (FAQs)
FAQ 1: What are the most common causes of non-specific binding on my sensor surface, and how can I minimize it? Non-specific binding occurs when molecules other than your target analyte attach to the sensor surface, creating unwanted background noise and inaccurate data. This is a prevalent challenge in surface-based assays. You can minimize it through several strategies [64]:
- Surface Blocking: After immobilizing your ligand, use blocking agents like ethanolamine, casein, or BSA to occupy any remaining active sites on the sensor chip.
- Optimized Surface Chemistry: Select a sensor chip with chemistry tailored to your experiment. For instance, CM5 chips with carboxymethylated dextran can help prevent undesired adsorption.
- Buffer Optimization: Incorporate additives like surfactants (e.g., Tween-20) into your running buffer to reduce hydrophobic interactions. Ensure the buffer's ionic strength and pH are optimal for your specific molecular interaction.
- Tuned Flow Conditions: Adjust the flow rate during the experiment. A moderate flow rate ensures efficient analyte delivery without causing turbulence that can lead to non-specific adsorption.
FAQ 2: My experiments suffer from poor reproducibility. What steps can I take to achieve more consistent results? Reproducibility issues often stem from inconsistencies in surface preparation, sample handling, or environmental conditions [64].
- Standardize Surface Preparation: Ensure your sensor chip activation and ligand immobilization protocols are consistent. Carefully monitor and control the time, temperature, and pH during these steps.
- Implement Rigorous Controls: Always include negative controls (e.g., an irrelevant ligand or a non-binding analyte) to validate the specificity of your interactions and identify system-level variations.
- Pre-condition and Stabilize Chips: Perform pre-conditioning cycles with buffer flow to stabilize a new or stored sensor chip and remove contaminants. Properly regenerate the surface between analysis cycles to prevent carryover.
- Control Environmental Factors: Perform experiments in a temperature- and humidity-controlled environment, as fluctuations can impact sensor performance and molecular interactions.
FAQ 3: I am observing a significant drift or instability in the baseline signal. What could be causing this? Baseline drift can be caused by several factors related to the surface, buffer, or instrument [64].
- Incomplete Surface Regeneration: Residual material left on the surface from a previous analysis cycle can cause a gradual shift. Ensure you are using an effective regeneration buffer and protocol that thoroughly cleans the surface without damaging the immobilized ligand.
- Buffer Incompatibility: Certain buffer components may be incompatible with the sensor chip chemistry or the ligand, leading to an unstable signal. Test different buffer formulations for compatibility.
- Instrument Calibration: Drift can indicate an instrument needing maintenance or calibration. Perform baseline stabilization tests and follow the manufacturer's recommended calibration procedures.
FAQ 4: How can I improve the stability and functionality of functionalized nanoparticles in complex biological media? For nanoparticles used in biomedical applications, surface functionalization is key to improving stability and biocompatibility [5].
- Use Covalent Surface Modification: Grafting polymers like polyethylene glycol (PEG) creates a hydrophilic layer that reduces protein adsorption (opsonization) and prevents aggregation.
- Employ Biocompatible Coatings: Functionalizing the surface with molecules like human serum albumin can make the nanoparticles appear more "self" to the body, reducing immune clearance and toxicity.
- Conduct Thorough Characterization: After each functionalization step, use techniques like Dynamic Light Scattering (DLS) and ζ-potential analysis to monitor changes in size and surface charge, which are critical indicators of colloidal stability [5].
Troubleshooting Guide
Problem 1: Non-Specific Binding
| Symptom | Possible Cause | Solution |
|---|---|---|
| High response signal in reference flow cell or with negative control analytes. | Inadequate blocking of unreacted active groups on the sensor surface. | Use a different or higher concentration of blocking agent (e.g., ethanolamine) [64]. |
| Running buffer promotes non-specific interactions. | Add a surfactant like Tween-20 (0.005-0.01%) to the buffer or increase ionic strength [64]. | |
| Sensor chip surface chemistry is unsuitable for the analyte. | Switch to a different chip type (e.g., from CM5 to a less charged surface like C1) [64]. |
Problem 2: Low Signal Intensity
| Symptom | Possible Cause | Solution |
|---|---|---|
| Weak binding signal despite sufficient analyte concentration. | Low ligand immobilization density. | Optimize ligand concentration and coupling time during immobilization to achieve a higher density [64]. |
| Ligand has lost activity due to harsh immobilization conditions. | Use a gentler, non-covalent immobilization strategy (e.g., streptavidin-biotin) [64]. | |
| The interaction itself is very weak. | Use a high-sensitivity sensor chip and increase the analyte concentration within a non-saturating range [64]. |
Problem 3: Poor Reproducibility
| Symptom | Possible Cause | Solution |
|---|---|---|
| Significant variation in binding responses between replicate experiments. | Inconsistent ligand immobilization levels. | Standardize the activation, coupling, and blocking steps. Pre-concentrate the ligand if possible [64]. |
| Sensor surface is not fully regenerated. | Optimize the regeneration solution and contact time to fully remove analyte without damaging the ligand [64]. | |
| Sample or buffer degradation over time. | Prepare fresh buffers and samples for each experiment and use consistent storage conditions [64]. |
Experimental Protocols for Key Surface Analyses
Protocol 1: Ligand Immobilization via Amine Coupling
This is a standard method for covalently attaching proteins or other molecules containing primary amines to a carboxymethylated dextran sensor chip [64].
Key Reagents:
- Sensor Chip CM5
- EDC (N-Ethyl-N'-(3-dimethylaminopropyl)carbodiimide)
- NHS (N-hydroxysuccinimide)
- Ligand (in low-sodium buffer, pH
- Ethanolamine hydrochloride (blocking solution)
Methodology:
- Dilute and Dialyze: Dilute your ligand to a concentration of 5-100 µg/mL in a low-salt buffer (e.g., 10 mM sodium acetate, pH 4.0-5.5). The pH should be below the ligand's isoelectric point (pI) to ensure a positive charge for pre-concentration.
- Activate Surface: Inject a 1:1 mixture of EDC and NHS (e.g., 0.4 M EDC / 0.1 M NHS) over the sensor chip surface for 7 minutes. This activates the carboxyl groups on the dextran matrix.
- Immobilize Ligand: Inject your diluted ligand solution for 7-15 minutes. The positively charged ligand will be electrostatically attracted to the negatively charged dextran matrix, facilitating covalent binding.
- Block Residual Groups: Inject ethanolamine hydrochloride (e.g., 1 M, pH 8.5) for 7 minutes to deactivate and block any remaining NHS-esters.
- Wash and Stabilize: Perform several short injections of your running buffer to wash the surface and stabilize the baseline before beginning analyte binding experiments.
Protocol 2: Assessing Biocompatibility and Uptake of Functionalized Nanoparticles
This protocol outlines the key steps for evaluating the cytotoxicity and cellular uptake of surface-functionalized nanoparticles, which is critical for drug delivery and biomedical applications [5].
Key Reagents:
- Functionalized Nanoparticles (e.g., PEGylated, albumin-coated)
- Target Cell Line
- Cell Culture Media and Reagents
- MTT or WST-1 Cell Viability Assay Kit
- Flow Cytometer or Confocal Microscope
Methodology:
- Cell Seeding: Seed your target cells in a 96-well plate (for viability) or a multi-well chamber slide (for imaging) and culture until they reach 70-80% confluency.
- Nanoparticle Exposure: Treat the cells with a range of concentrations of your functionalized nanoparticles. Include controls (untreated cells and cells treated with non-functionalized NPs).
- Incubate: Incubate for a predetermined time (e.g., 4-24 hours) at 37°C and 5% CO₂.
- Viability Assay (Biocompatibility):
- Add MTT or WST-1 reagent to the wells according to the manufacturer's instructions.
- Incubate for 1-4 hours to allow formazan crystal formation.
- Measure the absorbance using a microplate reader. Cell viability is calculated relative to untreated control cells.
- Uptake Analysis:
- For Flow Cytometry: If NPs are fluorescently labeled, trypsinize the cells, wash, and resuspend in buffer. Analyze cell-associated fluorescence using a flow cytometer.
- For Confocal Microscopy: Fix the cells, stain the nucleus and cytoskeleton, and mount the slides. Image using a confocal microscope to visualize the intracellular location of the nanoparticles.
The Scientist's Toolkit: Research Reagent Solutions
Table: Essential Materials for Surface Functionalization and Analysis
| Item | Function/Application | Key Considerations |
|---|---|---|
| Sensor Chip CM5 | A versatile chip with a carboxymethylated dextran matrix for covalent immobilization of ligands via amine, thiol, or carbonyl chemistry [64]. | Ideal for most protein-protein interaction studies. Ligand charge and pI must be considered for pre-concentration. |
| Streptavidin (SA) Sensor Chip | For capturing biotinylated ligands. Provides a stable, oriented, and reversible immobilization strategy [64]. | Excellent for studying antibodies, DNA, or any biotin-tagged molecule. Requires highly pure, biotinylated ligand. |
| NTA Sensor Chip | For capturing His-tagged proteins via nickel chelation. Useful for studying recombinant proteins [64]. | The interaction can be sensitive to reducing agents and chelators in the buffer. |
| EDC/NHS Crosslinkers | Activate carboxyl groups on sensor chips (like CM5) for covalent coupling to primary amines on ligands [64]. | Freshly prepare the mixture before use. Optimization of concentration and activation time is crucial. |
| PEG-based Crosslinkers | (e.g., DSP, DSS) Used to functionalize nanoparticles or other surfaces, adding a spacer arm that improves accessibility and reduces steric hindrance [5]. | The length of the PEG chain can influence binding efficiency and biocompatibility. |
| Diazonium Salts | Used for covalent functionalization of nanomaterials like MXenes and graphene. The tail group (hydrophilic, hydrophobic) can be modulated to tune selectivity [21]. | Enables precise control over surface energy and interaction with target analytes, such as in gas sensing [21]. |
| Tween-20 | A non-ionic detergent added to running buffers (typically at 0.005-0.01%) to reduce non-specific hydrophobic binding to the sensor surface [64]. | Higher concentrations can disrupt some biological interactions. |
Experimental Workflow and Surface Interaction Diagrams
Surface Optimization Workflow
Surface Binding Mechanisms
Minimizing Non-specific Binding and Fouling in Complex Media
Troubleshooting Guide: Common Experimental Challenges
1. Problem: High Background Signal on Biosensor
- Possible Cause: Incomplete blocking of non-specific sites on the sensor surface. [65] [66]
- Solutions:
- Increase the concentration of protein in the blocking buffer or optimize the blocking time and temperature. [65]
- Switch to a different blocking buffer. For example, when working with phosphoproteins, avoid milk and use BSA in Tris-buffered saline instead. [65]
- Add a detergent such as Tween 20 to the blocking and wash buffers to a final concentration of 0.05% to minimize background. [65]
2. Problem: Non-specific or Diffuse Bands in Western Blot
- Possible Cause: Primary antibody concentration is too high, leading to off-target binding. [65] [66]
- Solutions:
3. Problem: Weak or No Signal
- Possible Cause: Inefficient transfer of proteins to the membrane or insufficient antigen present. [65]
- Solutions:
- After transfer, stain the gel with a total protein stain to check transfer efficiency. [65]
- For low molecular weight antigens, add 20% methanol to the transfer buffer to improve binding. For high molecular weight antigens, add 0.01–0.05% SDS to help move proteins onto the membrane. [65]
- Load more protein onto the gel or increase antibody concentrations. [65]
4. Problem: Loss of Fouling Resistance After Surface Functionalization
- Possible Cause: The functionalization chemistry compromises the non-fouling properties of the surface material. [67]
- Solutions:
- Select surface platforms that maintain ultra-low fouling after functionalization. For instance, poly(carboxybetaine acrylamide) (pCBAA) brushes retained low fouling (~20 ng/cm² from blood plasma) after antibody attachment, whereas poly(2-hydroxyethyl methacrylate) (pHEMA) lost its resistance. [67]
- For alkanethiolate self-assembled monolayers (AT-SAMs), a post-functionalization block with covalently bound BSA can reduce fouling. [67]
Frequently Asked Questions (FAQs)
Q1: What are the primary methods to reduce non-specific adsorption (NSA) in biosensing? Methods are broadly categorized as passive or active. [68] Passive methods aim to prevent NSA by coating the surface with physical blockers (e.g., BSA, casein) or chemical layers that create a hydrophilic, neutral boundary. [68] Active methods dynamically remove adsorbed molecules post-functionalization using transducers (electromechanical or acoustic) or hydrodynamic flow to generate surface shear forces. [68]
Q2: Why might my functionalized sensor surface still foul in complex media like blood plasma? The choice of surface platform is critical. Not all low-fouling materials retain their properties after the chemical steps required to attach biorecognition elements. For example, activating the hydroxyl groups on pHEMA for immobilization can cause it to lose its fouling resistance entirely, whereas zwitterionic surfaces like pCBAA can maintain ultra-low fouling after functionalization. [67]
Q3: How can I enhance conductivity in an otherwise insulating surface functionalization layer? Incorporating conductive nanomaterials is an effective strategy. A demonstrated approach involves embedding gold nanoparticles (AuNPs) between two layers of an insulating plasma polymer. The AuNPs provide efficient pathways for electron transport, significantly enhancing the overall electrochemical response of the layered construction. [2]
Quantitative Data: Performance of Functionalized Surface Platforms
The table below summarizes the fouling resistance and performance of different surface platforms after functionalization, as measured by Surface Plasmon Resonance (SPR) in undiluted human blood plasma. [67]
| Surface Platform | Chemistry Type | Fouling After Functionalization (ng/cm²) | Key Characteristics After Functionalization |
|---|---|---|---|
| pCBAA Brush | Zwitterionic polymer | ~20 ng/cm² | Maintains ultra-low fouling; high biorecognition capability. [67] |
| pHEMA Brush | Hydroxy-functional polymer | Loses resistance | Fouling resistance is lost after activation of hydroxyl groups. [67] |
| AT-SAM (OEG-based) | Mixed COOH/OH alkanethiolate | High (poor resistance) | Fouling resistance becomes poor in undiluted samples. [67] |
| AT-SAM + BSA Block | Mixed COOH/OH alkanethiolate | Reduced to ~20 ng/cm² | Fouling is reduced, but biorecognition capability is often poor. [67] |
Experimental Protocols
Protocol 1: Functionalizing a Surface with a Non-fouling Peptide Monolayer
This protocol is adapted from methods used to screen non-fouling peptides on glass beads. [69]
Surface Preparation and Amination:
- Clean glass beads (or your substrate) by refluxing in hydrochloric acid overnight, followed by treatment with a piranha solution (conc. sulfuric acid : 30% hydrogen peroxide, 3:1 v/v) for 30 minutes. Rinse thoroughly with water and methanol, then dry. [69]
- Silanize the clean, dry beads by reacting with an epoxide silane (e.g., γ-glycidoxypropyltrimethoxysilane, GPTMS) in anhydrous toluene at 80°C for 18 hours. [69]
- Couple a linker molecule (e.g., tetraethyleneglycol diamine, PEO4-Bis Amine) to the epoxide-functionalized surface in anhydrous acetonitrile at 80°C for 18 hours. This provides accessible primary amines for peptide synthesis. [69]
Solid-Phase Peptide Synthesis:
- Perform peptide synthesis directly on the amine-functionalized beads using standard Fmoc chemistry. [69]
- Use a peptide synthesizer or manual synthesis with couplings involving Fmoc-protected amino acids, HBTU, HOBt, and DIPEA in DMF. [69]
- After synthesizing the desired sequence, acetylate the terminal amine using acetic anhydride/pyridine/DMF. [69]
- Cleave and deprotect side chains using a trifluoroacetic acid (TFA)-based cleavage cocktail. [69]
Protein Adsorption Assay:
- Wash the peptide-coated beads with phosphate-buffered saline (PBS). [69]
- Incubate the beads with a solution of fluorescently labeled protein (e.g., Alexa Fluor 488-conjugated fibrinogen at 0.5 mg/mL) for 60 minutes. [69]
- Wash the beads several times with PBS to remove unbound protein. [69]
- Analyze using confocal microscopy to quantify protein adsorption based on fluorescence. [69]
Protocol 2: Incorporating Gold Nanoparticles for Enhanced Conductivity
This protocol is adapted from work on enhancing the conductivity of plasma polymer-functionalized electrodes. [2]
Deposit the Base Polymer Layer:
- Deposit a thin film of plasma-polymerized poly(2-methyl-2-oxazoline) (MePOx) or similar onto a gold electrode substrate using a plasma reactor. Typical conditions: 30-second deposition at a specific ignition power and working pressure. [2]
Immobilize Gold Nanoparticles (AuNPs):
- Synthesize carboxyl-functionalized AuNPs (e.g., 16 nm or 68 nm diameter) by reducing chloroauric acid with trisodium citrate and functionalizing with mercaptosuccinic acid. [2]
- Incubate the POx-coated electrode with the AuNP solution for 24 hours. The unique chemistry of the POx film will covalently bind the COOH-functionalized AuNPs. [2]
- Rinse the surface thoroughly with water and dry under a stream of nitrogen gas. [2]
Deposit the Top Polymer Layer:
- Deposit a second, top layer of the plasma polymer (e.g., MePOx) using the same parameters as the first layer. This top layer provides a surface for subsequent immobilization of recognition elements while the embedded AuNPs enhance electron transport. [2]
Electrochemical Characterization:
- Use Electrochemical Impedance Spectroscopy (EIS) in a solution containing a redox couple (e.g., potassium ferricyanide/ferrocyanide) to measure the charge transfer resistance (Rct) and confirm enhanced conductivity. [2]
Visualization: Mechanisms and Workflows
Non-specific Adsorption Mechanisms
Conductive Nanoparticle Enhancement Strategy
The Scientist's Toolkit: Research Reagent Solutions
| Item | Function / Application |
|---|---|
| Poly(carboxybetaine acrylamide) (pCBAA) | A zwitterionic polymer brush that provides an ultra-low fouling surface platform and retains its fouling resistance after functionalization with biorecognition elements. [67] |
| Carboxy-functionalized Gold Nanoparticles (AuNPs) | Used to enhance electron transport through insulating polymer films in electrochemical biosensors, improving signal sensitivity. [2] |
| Tetraethyleneglycol diamine (PEO4-Bis Amine) | A hydrophilic linker used in surface amination to provide a spacer for subsequent peptide synthesis or biomolecule conjugation. [69] |
| Azure Chemi Blot Blocking Buffer | An engineered blocking buffer designed to reduce non-specific binding and high background in Western blotting, as an alternative to milk or BSA. [66] |
| Dursan Coating | A silicon-based, inert coating for HPLC flow paths that reduces protein carryover and fouling, and provides corrosion resistance. [70] |
| Cyclic RGD Peptide | A targeting ligand that binds to integrin αvβ3 overexpressed on tumor cells; used to functionalize nanomaterials for targeted drug delivery or photothermal therapy. [44] |
Optimizing Biomolecule Orientation and Packing Density
Frequently Asked Questions (FAQs)
FAQ 1: What are the primary factors affecting the packing density of biomolecules on a surface? The primary factors are the immobilization strategy, surface chemistry of the sensor chip, and the properties of the biomolecule itself (e.g., its size, charge, and available functional groups). Covalent immobilization can lead to higher density but may cause random orientation, while directed immobilization (e.g., via biotin-streptavidin) often provides a more uniform layer but may have a lower maximum density. The concentration of the ligand during immobilization and the efficiency of the coupling chemistry are also critical [64].
FAQ 2: How does biomolecule orientation impact the performance of a biosensor? Improper orientation can sterically block the active site of the biomolecule, reducing its accessibility to analytes in solution. This leads to a lower effective binding capacity, weaker signal intensity, and can distort kinetic measurements by masking the true association and dissociation rates. Optimizing orientation is therefore crucial for achieving high sensitivity and accurate data [64].
FAQ 3: What are common signs of non-specific binding in my experiment? Common signs include a significant response signal in control flow cells (without the ligand), an unstable or drifting baseline, and a poor fit of the binding data to a 1:1 kinetic model. A high response level that does not return to the original baseline after a regeneration step can also indicate non-specific adsorption of the analyte to the sensor surface [64].
FAQ 4: My baseline is unstable and drifting. What could be the cause? Baseline drift can be caused by several factors, including improper surface regeneration leading to a buildup of residual material, buffer incompatibility with the sensor chip (e.g., certain detergents or salts causing instability), or temperature fluctuations in the instrument or laboratory environment. Inefficient washing during surface preparation can also leave contaminants that contribute to drift [64].
Troubleshooting Guides
Issue 1: Low Signal Intensity
Symptoms: Weak binding response, poor signal-to-noise ratio, difficulty in quantifying interactions.
| Potential Cause | Diagnostic Steps | Solution |
|---|---|---|
| Low ligand density [64] | Check immobilization level response (RU); test different ligand concentrations during coupling. | Optimize ligand concentration for immobilization; use a sensor chip with higher binding capacity. |
| Poor immobilization efficiency [64] | Verify pH of coupling buffers; test different immobilization chemistries (e.g., amine vs. thiol coupling). | Adjust activation/coupling buffer pH to be optimal for the ligand; consider a different coupling chemistry. |
| Suboptimal orientation [64] | Compare binding capacity before and after optimization; use a technique that allows orientation control. | Switch to a directed immobilization strategy (e.g., use His-tagged ligands on an NTA chip). |
| Weak interaction affinity | Perform a concentration series; ensure analyte is not degraded. | Increase analyte concentration if possible; use a high-sensitivity sensor chip [64]. |
Issue 2: Non-Specific Binding
Symptoms: High response in reference cell, inconsistent kinetic data, poor data fitting.
| Potential Cause | Diagnostic Steps | Solution |
|---|---|---|
| Unblocked active sites | Run a negative control with a non-binding analyte. | Use blocking agents like ethanolamine, BSA, or casein to occupy unused active sites [64]. |
| Inappropriate surface chemistry | Test different sensor chip types. | Switch to a sensor chip with a low non-specific binding profile (e.g., C1, HPA) [64]. |
| Suboptimal buffer conditions | Vary ionic strength and include additives. | Add non-ionic detergents (e.g., Tween-20) to the running buffer; optimize salt concentration [64]. |
Issue 3: Poor Reproducibility
Symptoms: Significant variation in binding responses between replicate experiments or different sensor chips.
| Potential Cause | Diagnostic Steps | Solution |
|---|---|---|
| Inconsistent surface activation/immobilization | Carefully monitor and standardize immobilization times, temperature, and reagent lots. | Establish a strict, documented protocol for surface preparation and ligand coupling [64]. |
| Surface contamination | Inspect sensor chips for damage or debris; run a sensorgram of a blank buffer injection. | Ensure thorough cleaning and conditioning of the sensor chip before immobilization [64]. |
| Analyte or ligand degradation | Analyze sample purity via SDS-PAGE or other methods before the experiment. | Freshly prepare and properly store samples; characterize sample quality before each experiment [64]. |
Experimental Protocols
Protocol 1: Optimizing Ligand Immobilization Density for Kinetic Analysis
Principle: Achieving an optimal ligand density is critical for avoiding mass transport limitations and steric hindrance, which can distort kinetic measurements [64].
Materials:
- SPR instrument
- Appropriate sensor chip (e.g., CM5 for covalent coupling)
- Ligand molecule
- Coupling reagents (e.g., EDC and NHS for amine coupling)
- Running buffer (e.g., HBS-EP)
- Regeneration solution
Procedure:
- Surface Activation: Activate the sensor chip surface using a standard EDC/NHS injection [64].
- Ligand Scouting: Dilute the ligand to a series of concentrations (e.g., 1, 5, 10, and 20 µg/mL) in a low-salt coupling buffer (e.g., sodium acetate, pH 4.0-5.5).
- Immobilization: Inject each ligand concentration for a fixed time (e.g., 5-7 minutes) over separate flow cells and record the resulting immobilization level (Response Units, RU).
- Blocking: Deactivate any remaining active esters with an injection of ethanolamine [64].
- Kinetic Evaluation: Test a standard analyte at a single concentration and a fixed flow rate (e.g., 30 µL/min) over flow cells with different ligand densities.
- Analysis: Compare the sensorgrams. An optimal density shows a binding curve that fits well to a 1:1 model. A density that is too high may show a characteristic "mass transport-limited" shape (very fast, sharp association). Select the density that provides the best kinetic data.
Protocol 2: Directed vs. Random Immobilization for Orientation Control
Principle: This protocol compares two common strategies to maximize the availability of active binding sites.
Materials:
- SPR instrument
- CMS sensor chip
- NTA sensor chip (for His-tag capture) or SA sensor chip (for biotin capture)
- Ligand with and without affinity tag (e.g., His-tag or biotin)
- Coupling reagents
Procedure:
- Random Immobilization (Control):
- On a CM5 chip, perform a standard amine coupling procedure with the untagged ligand [64].
- Record the final immobilization level (RU).
- Directed Immobilization (Test):
- Binding Capacity Assay:
- For both surfaces, inject the same, saturating concentration of analyte.
- Record the maximum binding response (RU) for each surface.
- Data Analysis:
- Calculate the binding capacity by dividing the analyte response (RU) by the ligand response (RU). A higher ratio for the directed immobilization method indicates more efficient binding due to better orientation.
The Scientist's Toolkit: Research Reagent Solutions
| Item | Function | Example Use Case |
|---|---|---|
| CM5 Sensor Chip | A dextran-coated gold surface for general covalent coupling via amine, thiol, or other chemistries. | Immobilizing proteins, antibodies, or other biomolecules with available amino groups [64]. |
| NTA Sensor Chip | Surface coated with nitrilotriacetic acid for capturing His-tagged molecules via chelated Ni²⁺ ions. | Directed immobilization of recombinant proteins containing a His-tag, ensuring a uniform orientation [64]. |
| SA Sensor Chip | Surface coated with streptavidin for capturing biotinylated ligands. | Highly stable capture of biotinylated DNA, RNA, or proteins; ideal for reusable surfaces [64]. |
| EDC/NHS Chemistry | Crosslinkers for activating carboxyl groups on the sensor surface for covalent coupling to primary amines. | Standard amine coupling for proteins and other amine-containing ligands [64]. |
| HBS-EP Buffer | A common running buffer (HEPES, NaCl, EDTA, surfactant) providing ionic strength and reducing non-specific binding. | Standard buffer for most SPR experiments in drug discovery and biomolecular interaction analysis [64]. |
| Ethanolamine | A small amine-containing molecule used to block unreacted ester groups after covalent coupling. | Deactivating the surface after amine coupling to prevent non-specific binding [64]. |
Experimental Workflow and Decision Pathways
Optimization Workflow for Surface Functionalization
Surface Functionalization Optimization Pathways
Strategies for Key Surface Properties
Balancing Electrical Conductivity with Thermal Management
In the development of advanced materials for applications ranging from electronics to drug development, achieving an optimal balance between high electrical conductivity and effective thermal management is a paramount challenge. This technical support center is framed within the broader thesis that surface functionalization is a critical strategy for optimizing target conductivity. As researchers push the boundaries of material performance, they often encounter specific, recurring experimental challenges. This guide provides targeted troubleshooting advice and detailed methodologies to help scientists navigate these complexities and achieve reproducible, high-quality results in their conductivity research.
Frequently Asked Questions (FAQs)
Q1: How does surface functionalization with carboxyl groups improve the performance of thermal interface materials?
Surface functionalization of graphene with carboxyl groups (COOH) significantly enhances the performance of silicone-based thermal greases. Research demonstrates that this improvement stems from two primary mechanisms:
- Enhanced Compatibility and Dispersion: The carboxyl groups form hydrogen bonds with the silicone matrix, leading to superior dispersion of the graphene filler and stronger interfacial bonding [71].
- Reduced Thermal Boundary Resistance: This improved interfacial connection lowers the thermal boundary resistance between the graphene and the silicone. The result is a dramatic 230% increase in thermal conductivity, achieving 6.049 W·m⁻¹·K⁻¹ with only 1 wt% of functionalized graphene, compared to the pristine material [71].
Q2: What are the key differences between AC and DC methods for measuring conductivity, and when should I use each?
The choice between AC (Alternating Current) and DC (Direct Current) methods depends on the material type and the specific information required.
- DC Method: This is a common approach where a constant voltage or current is applied, and the resulting current or voltage is measured. It is suitable for electronic conductors like metals and semiconductors [72].
- AC (Impedance Spectroscopy) Method: This method uses a sinusoidal signal across a range of frequencies. It is superior for ionic conductors or mixed conductors, as it minimizes the effects of electrode polarization—a phenomenon where charge carriers accumulate at electrodes and distort DC measurements. Furthermore, the AC method can distinguish between different conduction mechanisms (e.g., grain vs. grain boundary conductivity) within a single sample [72].
Table 1: Comparison of Conductivity Measurement Methods
| Feature | DC Method | AC (Impedance) Method |
|---|---|---|
| Principle | Applies DC voltage/current | Applies a sinusoidal AC signal at varying frequencies |
| Best For | Electronic conductors (metals, semiconductors) | Ionic and Mixed Ionic-Electronic Conductors (MIECs) |
| Key Advantage | Simple setup and interpretation | Minimizes electrode polarization; deconvolutes different resistance contributions (bulk, grain boundary) |
| Key Limitation | Prone to artifacts from electrode polarization in ionic materials | More complex data analysis and instrumentation |
Q3: What experimental strategies can be used to enhance electrical conductivity in semiconductor materials like LiFePO₄?
For materials like LiFePO₄, which suffer from intrinsically low electronic conductivity, two synergistic strategies are highly effective:
- In-Situ Carbon Coating: Enveloping active material particles with a conductive carbon layer (e.g., graphene, graphitic carbon) creates a multidimensional network for electron transport. This is most effective when the carbon is bonded chemically to the material surface, for instance, through Fe-O-C bonds, rather than by simple physical mixing [73].
- Ion Doping: Introducing metal or non-metal ions into the crystal lattice of the host material can reduce its band gap width, generate charge carriers, and create lattice defects that scatter phonons, thereby also reducing thermal conductivity in thermoelectric applications [73].
Q4: How can surface engineering be used to improve the thermoelectric properties of a material?
Thermoelectric performance, quantified by the figure of merit (zT), requires a delicate balance of high electrical conductivity and Seebeck coefficient with low thermal conductivity. Surface engineering is a powerful tool to achieve this. For example, functionalizing the surface of Lead Sulfide (PbS) nanocrystals with Cu₂S molecular complexes introduces nanoscale defects, dislocations, and strain fields. These microstructural changes simultaneously:
- Enhance electrical conductivity by optimizing charge carrier concentration and mobility.
- Reduce lattice thermal conductivity by intensifying phonon scattering. This synergistic effect resulted in a near doubling of the zT value to 1.05 at 867 K for the surface-treated PbS compared to the pristine sample [74].
Troubleshooting Common Experimental Issues
Problem: Inconsistent or Lower-Than-Expected Thermal Conductivity Measurements in Composite Materials
Potential Cause 1: Poor Filler Dispersion and Agglomeration. Nanoparticles like graphene tend to agglomerate, leading to poor interfacial contact and increased phonon scattering at interfaces, which reduces thermal conductivity.
- Solution: Implement surface functionalization of the filler material. For graphene, carboxyl functionalization has been proven to improve compatibility with a polymer matrix (e.g., silicone grease) via hydrogen bonding, leading to more uniform dispersion [71].
- Prevention: Use high-shear mixing techniques (e.g., high-energy ball milling) during composite fabrication to break up agglomerates and ensure homogeneous distribution [71].
Potential Cause 2: High Thermal Boundary Resistance (TBR). Even with good dispersion, weak bonding at the filler-matrix interface creates a significant barrier to heat flow.
- Solution: Employ coupling agents or functional groups that form strong chemical bonds with both the filler and the matrix. The formation of covalent or strong hydrogen bonds can dramatically lower TBR [71].
- Verification: Use theoretical models (e.g., Nan or Murshed models) to estimate TBR and interfacial thermal conductivity (Ki) from your experimental data [71].
Problem: Unstable Electrical Conductivity in Ionic or Mixed Conductor Samples During Testing
- Potential Cause: Electrode Polarization. This is a common issue when using DC methods or low-frequency AC measurements on ionic conductors. It causes an artificial drop in measured conductivity.
- Solution: Switch to the AC impedance spectroscopy method. Perform measurements over a wide frequency range (e.g., 1 Hz to 10 MHz) and analyze the high-frequency response to isolate the bulk conductivity of the material, which is free from polarization effects [72].
- Verification: Plot a Nyquist diagram (Imaginary vs. Real impedance). The high-frequency intercept of the semicircle(s) with the real axis gives the bulk resistance, which is used to calculate the true DC conductivity [72].
Problem: Achieving a Balance Between High Electrical Conductivity and Low Thermal Conductivity in Thermoelectric Materials
- Potential Cause: Coupled Electronic and Phonon Transport. In many materials, the electrons that carry charge also carry heat, making it difficult to decouple electrical and thermal properties.
- Solution: Introduce phonon-scattering centers that do not severely disrupt electron transport. Surface functionalization to create nanoscale defects, dislocations, and strain fields (e.g., Cu₂S on PbS) is highly effective. These features scatter heat-carrying phonons more effectively than charge-carrying electrons, leading to a net increase in the thermoelectric figure of merit (zT) [74].
- Experimental Protocol: Utilize a ligand displacement process to attach functional molecular complexes to nanocrystals. Subsequent annealing can incorporate dopants and create the desired nanoscale defect structures within the material bulk [74].
Experimental Protocols & Data Presentation
Protocol 1: Enhancing Thermal Conductivity via Carboxyl Functionalization of Graphene
This protocol is adapted from research on silicone thermal grease composites [71].
1. Materials and Reagents:
- Pristine graphene flakes
- Concentrated H₂SO₄ and HNO₃ acids (3:1 ratio)
- Commercial silicone grease
- Solvents (e.g., deionized water, acetone)
2. Functionalization Procedure:
- Step 1: Treat pristine graphene with a H₂SO₄:HNO₃ (3:1) mixture at 70°C for 3 hours under reflux.
- Step 2: Cool, wash repeatedly with deionized water until neutral pH is achieved, and dry to obtain graphene-COOH.
- Step 3: Incorporate the graphene-COOH into silicone grease using a high-energy ball milling technique. Vary the concentration of graphene-COOH (e.g., 0.5 wt%, 1.0 wt%) to study its effect.
3. Characterization and Measurement:
- Thermal Conductivity: Measure using a standardized transient plane source method.
- Dispersion Quality: Analyze using Scanning Electron Microscopy (SEM).
- Functional Group Confirmation: Use Raman spectroscopy.
Table 2: Quantitative Data: Impact of Graphene Functionalization on Thermal Conductivity [71]
| Material Composition | Thermal Conductivity (W·m⁻¹·K⁻¹) | Enhancement vs. Pure Silicone Grease |
|---|---|---|
| Pure Silicone Grease | ~1.83 (Baseline) | - |
| Silicone Grease + 1 wt% Pristine Graphene | 3.142 | ~72% |
| Silicone Grease + 1 wt% Graphene-COOH | 6.049 | 230% |
Diagram 1: Graphene functionalization and composite fabrication workflow.
Protocol 2: Surface Engineering of PbS for Enhanced Thermoelectric Performance
This protocol is based on the surface treatment of lead sulfide nanocrystals [74].
1. Materials and Reagents:
- Oleate-capped PbS nanocrystals (synthesized via colloidal synthesis).
- Cu₂S molecular complexes.
- Solvents (e.g., hexane, methanol).
2. Surface Treatment Procedure:
- Step 1: Synthesize PbS NCs by injecting a sulfur-oleylamine solution into a lead oleate precursor at high temperature.
- Step 2: Perform ligand displacement by treating the oleate-capped PbS NCs with the Cu₂S molecular complexes. This replaces the original organic ligands.
- Step 3: Anneal and sinter the surface-treated powder. This process incorporates Cu into the PbS matrix and forms the final dense material with integrated nanoscale defects.
3. Characterization and Measurement:
- Structural Analysis: Use Transmission Electron Microscopy (TEM) and X-ray Diffraction (XRD) to confirm nanocrystal size, morphology, and the presence of defects/strain.
- Electrical Transport: Measure electrical conductivity (σ) and Seebeck coefficient (S) using a standard four-probe system in a ZEM (Seebeck Coefficient/Electrical Resistance Measuring System).
- Thermal Transport: Measure total thermal conductivity (κ_tot) using the laser flash method.
Table 3: Thermoelectric Performance Data for Surface-Engineered PbS [74]
| Material Sample | Electrical Conductivity (σ) | Lattice Thermal Conductivity (κ_L) at 867 K | Figure of Merit (zT) at 867 K |
|---|---|---|---|
| Pristine PbS | Baseline | Baseline | ~0.53 |
| PbS - 1.0% Cu₂S | Enhanced | 0.60 W·m⁻¹·K⁻¹ | 1.05 |
Diagram 2: Surface engineering logic for improved thermoelectric properties.
The Scientist's Toolkit: Key Research Reagents & Materials
Table 4: Essential Materials for Conductivity and Thermal Management Research
| Research Reagent / Material | Primary Function in Experiments | Key Consideration |
|---|---|---|
| Graphene (& derived forms) | High-conductivity filler for composite materials to enhance electrical and thermal properties. | Surface functionalization (e.g., -COOH) is often critical to ensure dispersion and reduce interface resistance [71]. |
| Carboxyl Functionalization Agents (H₂SO₄/HNO₃) | To introduce -COOH groups onto carbon nanomaterial surfaces, improving matrix compatibility. | Handling requires care due to the use of strong, corrosive acids [71]. |
| LiFePO₄ (Lithium Iron Phosphate) | A safe, stable cathode material for Li-ion batteries with intrinsic low conductivity. | Model material for studying conductivity enhancement via carbon coating and doping [73]. |
| Carbon Coating Precursors (e.g., Glucose, Graphene Oxide, ZIF-8) | To create a conductive carbon network on particle surfaces, facilitating electron transport. | In-situ coating methods provide superior and more uniform coverage than ex-situ mixing [73]. |
| Dopant Sources (e.g., Cu₂S, Ag, Na salts) | To alter the electronic band structure and charge carrier concentration of a host material. | The choice of dopant and its concentration must be carefully optimized to avoid detrimental effects on mobility [74] [73]. |
| Phase Change Materials (e.g., Paraffin/ZnO-functionalized Diatomite) | To provide passive thermal management through energy absorption/release during phase transitions. | Functionalization with nanoparticles (e.g., ZnO) can significantly enhance thermal conductivity and add functionalities like UV resistance [75]. |
Solving Aggregation and Dispersion Challenges in Nanoparticle Systems
Frequently Asked Questions (FAQs)
Q1: Why is achieving a uniform nanoparticle dispersion so critical for electrochemical biosensors? Achieving uniform dispersion is critical because agglomeration drastically reduces the effective surface area of nanoparticles, which directly diminishes their intended function. In electrochemical biosensors, this leads to inefficient electron transport, higher charge transfer resistance, and poor biosensor sensitivity. Proper dispersion ensures maximum surface area for electron transport and catalytic activity, which is essential for achieving low detection limits and accurate readings [76] [2].
Q2: What are the primary forces that cause nanoparticles to aggregate? The primary driver of nanoparticle aggregation is van der Waals attraction, a powerful attractive force at the nanoscale that acts to minimize the system's surface energy. Counteracting this attraction requires the introduction of repulsive forces, which can be:
- Electrostatic Repulsion: Achieved when nanoparticles possess the same surface charge, causing them to repel each other.
- Steric Repulsion: Created by coating nanoparticles with polymer chains or dispersant molecules that create a physical barrier, preventing particles from coming close enough for van der Waals forces to dominate [76] [77].
Q3: My nanoparticle sample has a high polydispersity index (PdI). What does this indicate? A high PdI indicates that your sample has a broad size distribution and is not monodisperse. It suggests the presence of agglomerates or a mixture of different particle sizes. For reference, monodisperse latex standards can have PdI values as low as 0.03. High PdI often signals issues with your dispersion protocol or stability and can lead to inconsistent experimental results, especially in sensing applications where uniformity is key [78].
Q4: How does surface functionalization help prevent aggregation and improve performance? Surface functionalization chemically modifies the nanoparticle surface to enhance stability and introduce new properties. Strategies include:
- Charged Groups: Introducing charged functional groups (e.g., -COOH) to increase electrostatic repulsion between particles.
- Polymer Grafts: Grafting polymer chains or using dispersants to create steric hindrance.
- Targeting Moieties: Attaching specific biomolecules (e.g., RGD peptides) for targeted applications like drug delivery. This not only improves dispersion stability but can also tailor the nanoparticles for specific functions, such as enhancing conductivity or enabling targeted cancer therapy [76] [79] [44].
Q5: What is the difference between intensity, volume, and number distributions in Dynamic Light Scattering (DLS)? These are different ways of representing the same particle size data, each emphasizing different aspects:
- Intensity Distribution: Is weighted based on the scattering intensity of the particles. Larger particles scatter much more light and are therefore emphasized in this distribution. This is the primary and most robust result from DLS and is best for detecting trace large aggregates.
- Volume Distribution: Is a calculated distribution that converts intensity to an equivalent spherical volume.
- Number Distribution: Is a calculated distribution that represents the proportion of particles in each size class by number. It emphasizes the species with the highest particle count, which are often the smaller particles [78].
Troubleshooting Guides
Poor Dispersion and Rapid Aggregation
Problem: Nanoparticles form clumps or settle quickly in the solvent, leading to inhomogeneous samples.
| Possible Cause | Diagnostic Steps | Solution |
|---|---|---|
| Insufficient Energy Input | Check if sonication time or power is too low. | Implement a controlled sonication protocol. Use bath or probe sonication to deliver adequate energy to break apart agglomerates. Monitor temperature to avoid damaging sensitive nanomaterials [76]. |
| Lack of Repulsive Forces | Measure the zeta potential. A value near 0 mV indicates low electrostatic stabilization. | Introduce electrostatic or steric stabilizers. Functionalize the surface with charged groups or use polymeric dispersants/dispersants (e.g., Triton X-100) to create a repulsive barrier. Test dispersant alone to ensure it doesn't form micelles [76] [78]. |
| Incompatible Solvent | Observe if aggregation occurs immediately upon mixing. | Select a dispersion medium with favorable surface interactions. Choose a solvent whose polarity matches the nanoparticle surface. For example, polar nanoparticles disperse better in polar solvents [76]. |
| Irreversible Aggregation During Drying | Attempt to redisperse a dried powder—if it doesn't readily disperse, capillary forces have caused hard agglomeration. | Use surface modification to protect nanoparticles before drying. Employ mixed silane alkoxides or resorcinarene-capping agents to shield nanoparticles, making them easier to redisperse from a dried state [77]. |
Inconsistent Conductivity in Functionalized Electrodes
Problem: Electrodes coated with nanoparticle-enhanced films show variable or unexpectedly high charge transfer resistance.
| Possible Cause | Diagnostic Steps | Solution |
|---|---|---|
| Low Nanoparticle Surface Coverage | Use microscopy (SEM, AFM) to visualize the distribution of nanoparticles on the electrode surface. | Maximize the binding density of conductive nanoparticles (e.g., AuNPs). The primary factor for enhancing conductivity through an insulating polymer matrix is to create abundant pathways for electrons to tunnel. Optimize incubation time and concentration for nanoparticle binding [2]. |
| Poor Electrical Contact | Perform conductive Atomic Force Microscopy (c-AFM) to map current flow at the nanoscale. | Ensure strong covalent binding between nanoparticles and the functionalized surface. Use linker chemistry that creates robust bonds (e.g., the reaction between COOH-functionalized AuNPs and plasma-deposited polyoxazoline films) to ensure efficient electron transfer [2]. |
| Non-Uniform Functionalization Layer | Use spectroscopic methods (e.g., XPS) to check the homogeneity of the surface coating. | Optimize the plasma polymerization or functionalization process parameters. Control factors like ignition power and precursor pressure to create a uniform, reactive surface for subsequent nanoparticle attachment [2]. |
Inaccurate Sizing from Dynamic Light Scattering (DLS)
Problem: DLS results show unexpected large sizes or poor data quality.
| Possible Cause | Diagnostic Steps | Solution |
|---|---|---|
| Presence of Large Aggregates or Dust | Check the correlation function and the "spikes" in the measurement monitor. | Centrifuge the sample briefly or use filtration to remove large, unwanted contaminants. Ensure cuvettes are clean and dust-free [78]. |
| Air Bubbles in the Sample | Visually inspect the cuvette after loading. | Tap the cuvette gently to dislodge bubbles or use degassed solvents. Air bubbles can cause large size peaks in the distribution [78]. |
| Sample is Too Concentrated | Check the measured count rate; values that are too high can cause non-linear detector response. | Dilute the sample and re-measure. The recommended count rate for DLS is typically between 100-500 kilo counts per second (kcps) [78]. |
| Incorrect Optical Model | Note the particle size; for larger particles (>100 nm), the scattering profile is not isotropic. | When converting intensity to volume/number distributions, use the correct refractive index and absorption values for the material. The intensity distribution itself is always correct, regardless of these parameters [78]. |
Experimental Protocols
Protocol: Surface Functionalization of Gold Nanoparticles for Enhanced Conductivity
This protocol details the synthesis and carboxyl-functionalization of Gold Nanoparticles (AuNPs) for incorporation into a layered electrode construction to enhance electron transport through an insulating polymer matrix [2].
1. Synthesis of Citrate-capped AuNPs:
- Reflux 50 mL of 0.01% chloroauric acid (HAuCl4) with vigorous stirring.
- Rapidly add either 1 mL (for ~68 nm particles) or 0.3 mL (for ~16 nm particles) of 1% trisodium citrate solution.
- Continue boiling and stirring under reflux for 20 minutes. The solution will change color, indicating nanoparticle formation. Allow the colloidal suspension to cool to room temperature.
2. Functionalization with Carboxyl Groups:
- To the stirring AuNP colloid, add 0.02 M sodium hydroxide and 0.01 M mercaptosuccinic acid.
- Allow the mixture to stir overnight at room temperature.
- The resulting AuNPs will be capped with -COOH groups, enabling their covalent attachment to functionalized surfaces.
3. Immobilization on Plasma Polymerized Polyoxazoline (POx) Films:
- Deposit a thin film of plasma polymerized polyoxazoline (e.g., from 2-methyl-2-oxazoline precursor) onto a gold electrode substrate.
- Incubate the POx-coated electrode in the carboxyl-functionalized AuNP solution for 24 hours.
- Rinse the electrode thoroughly with Milli-Q water and dry under a gentle stream of nitrogen gas.
Protocol: Evaluating Dispersion Stability and Aggregation Fate
This method uses tandem analytical techniques to quantitatively assess the dispersion stability and aggregation behavior of metal nanoparticles (MNPs) under simulated turbulent conditions [80].
1. Sample Preparation and Turbulent Mixing Simulation:
- Prepare aqueous samples by diluting weighed amounts of MNPs (e.g., Ag, Cu, Ti) in 50 mL of Millipore water. Do not adjust the initial pH (typically ~6).
- Subject the samples to ultrasonication using a bath sonicator (e.g., 40 kHz) for varying residence times (e.g., 0.25, 0.5, 1, 2, and 4 hours) to simulate turbulent mixing.
2. Suspension Characterization:
- Dynamic Light Scattering (DLS): At each time interval, measure the hydrodynamic size, polydispersity index (PdI), and zeta potential using a particle analyzer. Perform at least three consecutive measurements per sample.
- Ultraviolet-Visible (UV-Vis) Spectroscopy: Collect absorption spectra over a wavelength range (e.g., 340–1000 nm). A higher and more stable absorbance indicates better dispersion.
3. Nanoparticle Quantification:
- Inductively Coupled Plasma Atomic Emission Spectroscopy (ICP-AES): Filter the dispersion samples through a 0.22 µm filter to remove large aggregates.
- Analyze the filtrate using ICP-AES to determine the concentration of dispersed elemental metal. Compare this to the initial concentration to calculate the percentage of nanoparticles that remain dispersed over time.
Experimental Workflow and Signaling Pathways
Nanoparticle Functionalization & Conductivity Enhancement Workflow
Nanoparticle Aggregation and Stabilization Mechanisms
Research Reagent Solutions
Table: Essential Materials for Nanoparticle Functionalization and Dispersion
| Reagent / Material | Function / Application | Key Consideration |
|---|---|---|
| Chloroauric Acid (HAuCl₄) | Precursor for synthesizing gold nanoparticles (AuNPs) [2]. | Serves as the gold source in citrate reduction synthesis; concentration determines final nanoparticle size. |
| Trisodium Citrate | Reducing and capping agent in AuNP synthesis [2]. | Amount added controls the size of the resulting AuNPs (less citrate yields larger particles). |
| Mercaptosuccinic Acid | Provides thiol group for binding to Au and -COOH for further conjugation [2]. | Creates a carboxyl-functionalized surface for covalent attachment to reactive polymer films. |
| 2-Methyl-2-Oxazoline | Precursor for plasma-deposited polyoxazoline thin films [2]. | The retained oxazoline ring enables rapid "click-chemistry" type binding with -COOH groups. |
| Polyoxazoline Plasma Polymer | Versatile platform for substrate-independent electrode functionalization [2]. | Film reactivity and resistance are influenced by deposition conditions (power, pressure). |
| Triton X-100 (Surfactant) | Dispersant used to stabilize nanoparticles in suspension [78]. | Can form worm-like micelles at certain concentrations; should be measured alone as a control. |
| Mixed Silane Alkoxides | Surface modifiers used to prevent irreversible aggregation during drying [77]. | Tuning the additive ratio affects reactivity with the NP surface and stability in organic solvents. |
Characterization Techniques and Performance Validation of Functionalized Surfaces
Surface functionalization is a cornerstone technique in nanomaterial science, directly enabling the advanced application of nanoparticles in targeted drug delivery and biosensing. For research aimed at optimizing surface conductivity and biomolecular adsorption, the choice of functionalization method dictates the experimental outcome. This guide provides a comparative analysis of prevalent techniques, offering troubleshooting and methodological support to help you navigate common experimental challenges and select the optimal strategy for your specific research goals.
FAQ: Core Concepts in Functionalization
Q1: What is the primary advantage of electrostatic adsorption over covalent binding for drug loading?
Electrostatic adsorption is a non-covalent interaction that offers a key advantage: reversible and stimuli-responsive loading. This enables controlled release of therapeutic agents (like drugs or nucleic acids) at the target site in response to local environmental triggers such as pH changes. In contrast, covalent bonding provides stable, long-lasting attachment but lacks this facile release mechanism, which is often crucial for effective drug delivery [81] [16].
Q2: How does the "protein corona" affect my functionalized nanoparticles in biological environments?
Upon exposure to biological fluids, nanoparticles rapidly adsorb a layer of proteins, forming a "protein corona." This corona masks the engineered surface and defines the nanoparticle's biological identity, directly influencing its fate in vivo—including cellular uptake, biodistribution, and immune response. The composition of this corona is heavily dependent on the surface charge and hydrophobicity imparted by your functionalization method [81] [16].
Q3: What are the key physical properties of nanoparticles that are altered by surface functionalization?
Surface functionalization primarily modifies the following key properties:
- Superficial Charge: Controlled by introducing charged groups (e.g., amines for positive charge, carboxylates for negative charge), which directly impacts electrostatic adsorption and colloidal stability [81] [5].
- Biocompatibility and Toxicity: Appropriate coatings, such as polymers or biomolecules, can significantly reduce cytotoxicity and improve compatibility with biological systems [5].
- Cellular Uptake Efficiency: Functionalization with specific targeting ligands (e.g., antibodies, peptides) can enhance the selective internalization of nanoparticles by target cells [5].
Troubleshooting Guide: Common Experimental Challenges
Problem 1: Nanoparticle Aggregation During Functionalization
- Potential Cause: Insufficient electrostatic or steric stabilization after surface modification.
- Solution: Introduce steric stabilizers. Consider using charged polymers like polyethyleneimine (PEI) or poly(acrylic acid) (PAA), which provide electrostatic repulsion and a physical barrier against aggregation [81] [16]. Optimize the ionic strength of the buffer, as high salt concentrations can screen surface charges and promote aggregation [81].
Problem 2: Low Biomolecule Loading Capacity
- Potential Cause: Inadequate surface charge density or steric hindrance from the coating.
- Solution: Maximize the density of functional groups. For covalent conjugation, ensure the initial modification step (e.g., silanization with APTES for amine groups) achieves high coverage. For polymer coatings, select polymers with a high charge density and optimize their molecular weight and conformation to maximize binding sites without causing excessive steric blockage [81] [5].
Problem 3: Inconsistent Results Between Batches
- Potential Cause: Poor process repeatability, often stemming from inhomogeneous functionalization or fluctuations in reaction conditions.
- Solution: Implement rigorous process control and characterization at intermediate steps. As demonstrated in immunosensor optimization, use techniques like Atomic Force Microscopy (AFM) and X-ray Photoelectron Spectroscopy (XPS) after each functionalization step to verify the homogeneity and chemical composition of the surface coating. This allows for precise adjustment of chemical conditions before proceeding [82].
Experimental Protocols: Key Methodologies
Protocol 1: Covalent Functionalization of Silica Nanoparticles with Amine Groups
This protocol provides a foundational method for creating a positively charged surface on silica nanoparticles, suitable for subsequent conjugation or electrostatic adsorption of negatively charged biomolecules.
- Principle: Organosilanes, such as (3-aminopropyl)triethoxysilane (APTES), react with surface hydroxyl groups (-SiOH) on silica, forming a covalent bond and presenting primary amine (-NH2) groups on the surface [81] [5].
- Step-by-Step Workflow:
- Activation: Clean and dry silica nanoparticles to ensure maximum availability of surface hydroxyl groups.
- Reaction: Disperse the nanoparticles in a dry, anhydrous solvent (e.g., toluene). Add APTES (2-5% v/v) under an inert atmosphere (e.g., nitrogen or argon).
- Incubation: Reflux the reaction mixture at 70-110°C for 4-6 hours with constant stirring.
- Purification: Centrifuge the functionalized nanoparticles and wash thoroughly with ethanol and deionized water to remove unreacted silane.
- Characterization: Confirm successful functionalization by measuring the zeta potential (shift towards positive values) and via Fourier Transform Infrared Spectroscopy (FTIR) to detect characteristic N-H stretches [81] [5].
Protocol 2: Non-Covalent Functionalization via Polymer Wrapping
This protocol describes coating nanoparticles with charged polymers to enhance electrostatic adsorption and colloidal stability.
- Principle: Charged polymers adsorb onto nanoparticle surfaces through multivalent non-covalent interactions, creating a stable charged layer.
- Step-by-Step Workflow:
- Preparation: Dilute the nanoparticle suspension in a suitable buffer (e.g., 10 mM HEPES, pH 7.4).
- Polymer Addition: Prepare a separate solution of the polymer (e.g., chitosan for a positive charge or PSS for a negative charge) in the same buffer. Add the polymer solution dropwise to the nanoparticle suspension under vigorous vortexing or sonication.
- Incubation: Allow the mixture to incubate at room temperature for 30-60 minutes with gentle stirring.
- Purification: Purify the coated nanoparticles via centrifugation or dialysis to remove free polymer.
- Characterization: Use Dynamic Light Scattering (DLS) to confirm an increase in hydrodynamic diameter and zeta potential measurement to verify the successful charge reversal or modulation [81] [16].
Data Presentation: Comparative Analysis of Functionalization Methods
Table 1: Quantitative Comparison of Common Functionalization Strategies
| Functionalization Method | Binding Mechanism | Stability | Specificity/Loading Capacity | Key Limitations |
|---|---|---|---|---|
| Direct Covalent (e.g., Silanization) [81] | Covalent bond | High (Irreversible) | High control over functional group density | Complex process; can be irreversible; potential chemical instability |
| Polymer Wrapping [81] [16] | Electrostatic, hydrophobic | Medium-High (Reversible) | High capacity; multivalent sites | Thick coating may cause steric hindrance; complex characterization |
| Ligand Exchange [5] | Covalent bond | High | Good for introducing specific functional groups | Limited to certain nanomaterials (e.g., metal oxides) |
| Irradiation-Based [81] | Direct surface modification | Under-explored | Reagent-free; direct charge modulation | Emerging technique; requires specialized equipment |
Table 2: Properties of Common Coating Polymers
| Polymer | Net Charge | Key Function | Example Application |
|---|---|---|---|
| Polyethyleneimine (PEI) [81] [16] | Cationic | Enhances DNA/RNA adsorption; proton-sponge effect for endosomal escape | Gene delivery |
| Chitosan [81] [16] | Cationic | Biocompatible coating; mucoadhesive properties | Mucosal drug delivery |
| Poly(acrylic acid) (PAA) [81] [16] | Anionic | Creates negative surface; pH-responsive behavior | Binding cationic drugs/antibiotics |
| Poly(L-Histidine) (PLH) [83] | Cationic (pH-responsive) | Promotes endosomal escape in acidic environments | Targeted intracellular drug delivery |
The Scientist's Toolkit: Essential Research Reagents
Table 3: Key Reagents for Surface Functionalization
| Reagent | Function | Application Note |
|---|---|---|
| APTES [81] | Silane coupling agent introducing primary amine groups. | Standard for silica and metal oxides. Requires anhydrous conditions. |
| Carboxyethylsilanetriol [81] | Silane coupling agent introducing carboxylic acid groups. | Creates negatively charged surfaces for cation binding. |
| Polyethyleneimine (PEI) [81] [16] | High charge-density cationic polymer. | Excellent for nucleic acid complexation. Can be cytotoxic; branching and MW matter. |
| Chitosan [81] [16] | Natural biodegradable cationic polysaccharide. | Improves biocompatibility; ideal for wound healing and oral delivery. |
| Thio-Carboxylic Acids [5] | Crosslinker for noble metals (Au, Ag). | Forms stable bonds via thiol (-SH) group; carboxyl end available for conjugation. |
Visualizing the Functionalization Strategy Selection Workflow
The following diagram outlines a logical decision-making process for selecting an appropriate surface functionalization strategy based on your research objectives and desired nanoparticle properties.
Troubleshooting Guides
Gel Permeation Chromatography (GPC) Troubleshooting
Common Problem: System Pressure Issues
Pressure abnormalities are among the most frequent issues in GPC analysis and can originate from various components in the system. [84]
Table: GPC Pressure Troubleshooting Guide
| Problem Symptom | Potential Cause | Diagnostic Steps | Solution |
|---|---|---|---|
| Pressure too high [84] | Blocked tubing, injector, or column frit [84] | 1. Check pressure without columns. [84] 2. If high, issue is in pump/autosampler/tubing. [84] 3. If normal, issue is in columns or post-column detectors/tubing. [84] | Replace blocked tubing or needle. Replace or clean pre-column. Clean or replace analytical column frits per manufacturer instructions. [84] |
| Pressure fluctuates excessively | Pump air bubble or failing pump seal | Check for air bubbles in pump solvent lines and purge system. Inspect pump seals for wear. | Prime the pump thoroughly to remove air. Replace worn pump seals. |
| Pressure drops to zero | Major leak or pump failure | Visually inspect all connections for solvent leaks. Check pump status and error messages. | Tighten loose fittings. Replace damaged tubing. Address pump errors. |
Common Problem: Loss of Resolution and Peak Shape Anomalies
A decrease in column performance manifests as broad, tailing, fronting, or double peaks. [84]
Table: GPC Performance Troubleshooting Guide
| Problem Symptom | Potential Cause | Diagnostic Steps | Solution |
|---|---|---|---|
| Broad, asymmetric peaks | Deteriorated column performance [84] | 1. Test plate count and asymmetry for the entire column set. [84] 2. If out of specification, test each column individually. [84] | Replace the specific column causing the problem. Review recently analyzed samples for potential column contamination. [84] |
| Double peaks | Incomplete sample dissolution or aggregation [58] | Re-dissolve and re-analyze the sample. Check for sample compatibility with mobile phase. | Ensure complete sample dissolution, potentially using heated dissolution or different solvents. Use mobile phase additives to suppress aggregation. [58] |
| Peak fronting | Column degradation or dead volume in connections [84] | Check for loose fittings or incorrect ferrule/ fitting types creating dead volume. [84] | Ensure low dead-volume connections with matching stop depth. Replace fittings when changing column brands. [84] |
Common Problem: Detector Baseline Issues
Detector instability can compromise data quality, especially with Refractive Index (RI) detectors. [84]
Table: GPC Detector Troubleshooting Guide
| Problem Symptom | Potential Cause | Diagnostic Steps | Solution |
|---|---|---|---|
| Drifting baseline | Temperature fluctuations, dirty flow cell, or solvent degassing issues [84] | Measure baseline stability with a known good test substance. [84] | Stabilize laboratory environment, protect from air conditioning drafts. Clean the detector flow cell according to manufacturer instructions. Ensure thorough mobile phase degassing. |
| High noise (Low S/N) | Dirty flow cell, lamp failure (UV), or unstable light source [84] | Measure signal-to-noise (S/N) with a known good test substance. [84] | Clean the detector flow cell. Replace old or failing lamps. |
GPC Problem-Solving Workflow
Nuclear Magnetic Resonance (NMR) Troubleshooting for Surface Analysis
Common Problem: Sample-Limited Structural Analysis
A key challenge in analyzing surface-functionalized materials is the low concentration of the surface layer relative to the bulk material. [85]
Table: NMR Troubleshooting Guide for Surface-Functionalized Materials
| Problem Symptom | Potential Cause | Diagnostic Steps | Solution |
|---|---|---|---|
| Weak or no signal from surface layer | Low concentration of surface groups; overwhelming signal from bulk material. [85] | Compare spectra before and after functionalization for subtle changes. | Use Solid-State NMR with Magic Angle Spinning (MAS).[citation:5] Enhance surface area of the substrate to increase total functional group count. |
| Broad, poorly resolved peaks | Restricted molecular motion in solid or gel state. [86] | Determine if the sample is a solid, gel, or in solution. | For gels and solids, employ 1H-13C Cross-Polarization MAS NMR to enhance signal and resolve rigid components. [86] |
| Inconsistent quantification of functional groups | Incomplete reaction or non-uniform surface functionalization. [87] | Use complementary techniques (e.g., ellipsometry, XPS) to measure layer thickness and composition. [85] | Optimize functionalization protocol (concentration, time, temperature). Use a bifunctional crosslinker (e.g., glutaraldehyde) for more stable attachment. [85] |
Transmission Electron Microscopy (TEM) Troubleshooting for Soft Materials
Common Problem: Sample Preparation and Beam Damage
Imaging soft materials, polymers, or biomaterials requires specific preparation to preserve native structure. [86] [85]
Table: TEM Troubleshooting Guide for Soft and Functionalized Materials
| Problem Symptom | Potential Cause | Diagnostic Steps | Solution |
|---|---|---|---|
| Charging or beam damage | The sample is non-conductive and sensitive to the electron beam. | Observe if the sample bubbles, melts, or shifts under the beam. | Use a lower acceleration voltage (e.g., 80-100 kV). Use cryo-TEM techniques, where the sample is vitrified and imaged at liquid nitrogen temperatures. [86] |
| Poor contrast, lack of structural detail | Inherent low atomic number of polymer/biological materials. [86] | Check if support film is clean and if staining was performed. | Use negative staining agents (uranyl acetate, phosphotungstic acid). For higher resolution, use Cryo-TEM to visualize unstained, hydrated structures. [86] |
| Aggregation or non-representative structures | Improper sample deposition or drying artifacts. [85] | Compare different preparation methods (blotting, spraying). | For nanoparticles or vesicles, use vacuum filtration for gentle concentration. [85] For hydrogels, use Cryo-TEM to lock the native structure in place. [86] |
Frequently Asked Questions (FAQs)
1. How can I correlate molecular weight with chemical structure in my polymer sample for conductivity research? The most direct method is to use a hyphenated technique like GPC-NMR. [88] In this setup, the polymer sample is first separated by size using GPC. The separated fractions are then automatically sent to an NMR spectrometer for structural analysis. [88] This allows you to determine, for example, if higher molecular weight fractions have a different chemical composition (e.g., more branching or different comonomer sequences) that could be influencing electronic conductivity. [89] [88]
2. Why is my electrical conductivity measurement inconsistent after surface functionalization, even when my NMR/GPC data looks good? Surface functionalization can be non-uniform. [87] Techniques like NMR and GPC provide bulk or average properties. A surface that is locally over-functionalized or has patchy coverage can create uneven conductive pathways. [58] [87] To diagnose this, use high-resolution surface mapping techniques like Atomic Force Microscopy (AFM) to check for uniformity and Time-of-Flight Secondary Ion Mass Spectrometry (ToF-SIMS) to confirm the surface chemical composition. [85]
3. My polymer gel is too viscous for standard solution NMR. How can I characterize its structure and interactions? For gels and solid-like materials, Magic Angle Spinning (MAS) Solid-State NMR is the appropriate technique. [86] It resolves the broad peaks associated with immobile molecules by spinning the sample at a specific angle to the magnetic field. This method can identify which components form the rigid gel network and which remain mobile, and can characterize non-covalent interactions like hydrogen bonding critical for supramolecular assembly. [86]
4. What is the best way to visualize the nanoscale structure of a conductive polymer blend or composite? Transmission Electron Microscopy (TEM) is ideal for this. [89] [86] It can reveal the dispersion of conductive fillers (like carbon nanotubes), the morphology of crystalline and amorphous regions within the polymer, and the overall nanostructure. [89] For beam-sensitive soft materials, Cryo-TEM is highly recommended as it preserves the native structure without drying artifacts. [86]
5. How can I track the success of each step in my surface functionalization protocol? A combination of techniques is most effective. Spectroscopic Ellipsometry (SE) can precisely measure the increase in thickness after each molecular layer is deposited, confirming successful growth. [85] AFM can track changes in surface topography and roughness. [85] Finally, X-ray Photoelectron Spectroscopy (XPS) or ToF-SIMS can chemically confirm the presence of new functional groups introduced at each step. [85]
Experimental Protocols for Key Characterization Experiments
Protocol 1: GPC Multi-Detection for Conductive Polymer Analysis
Objective: To determine the molecular weight distribution, hydrodynamic size, and branching density of a synthesized conductive polymer.
Materials:
- GPC system equipped with pump, autosampler, and column oven.
- Separation columns: A set of columns with appropriate pore sizes for the polymer's molecular weight range.
- Detectors: Refractive Index (RI), Multi-Angle Light Scattering (MALS), and Viscometer.
- Mobile Phase: Appropriate solvent (e.g., THF, DMF) with 0.02M LiBr to prevent aggregation. Ensure it is filtered and degassed. [58]
- Standards: Narrow dispersity polystyrene or polymethyl methacrylate standards for calibration.
Procedure:
- System Calibration: Run the narrow standards to calibrate the system and determine the inter-detector delay volumes.
- Sample Preparation: Dissolve the polymer sample in the mobile phase at a concentration of 1-2 mg/mL. Filter the solution through a 0.45 µm syringe filter to remove dust or microgels. [84]
- Analysis: Inject the filtered sample. Set the flow rate and column temperature as recommended for the column set.
- Data Analysis:
- The RI detector provides the concentration for each eluting fraction.
- The MALS detector measures the absolute molecular weight (Mw) independently of elution volume, and provides the radius of gyration (Rg).
- The Viscometer measures the intrinsic viscosity.
- By combining data from all detectors, plot the Mark-Houwink plot (log intrinsic viscosity vs. log Mw). The slope reveals information about polymer branching—a lower slope than the linear polymer standard indicates the presence of branching. [89]
Protocol 2: Solid-State NMR for Functionalized Material Surface
Objective: To characterize the chemical structure and bonding at the surface of a material after functionalization for conductivity.
Materials:
- Solid-State NMR spectrometer with Magic Angle Spinning (MAS) capability.
- MAS rotor (e.g., 4mm outer diameter).
- Functionalized material in powder or solid form.
Procedure:
- Sample Loading: Pack the functionalized material tightly into the MAS rotor.
- Data Acquisition:
- For direct observation of the functional groups, a 1H MAS NMR experiment can be run, though resolution may be limited.
- For higher resolution, use Cross-Polarization (CP) MAS. This technique transfers polarization from abundant 1H nuclei to less abundant nuclei like 13C, enhancing their signal and selectively detecting only the rigid (non-mobile) components of the sample. [86] This is ideal for observing molecules rigidly bound to a surface.
- Acquire a 13C CP-MAS NMR spectrum.
- Data Interpretation: Compare the spectrum to that of the unfunctionalized material and the pure functionalizing agent. The appearance of new peaks confirms successful functionalization. The chemical shifts can indicate the nature of the bond between the surface and the functional group (e.g., confirming a Fe-O-C bond in a graphene oxide composite). [73]
Protocol 3: TEM/Cryo-TEM for Nanostructured Conductive Materials
Objective: To visualize the morphology and nanostructure of a conductive polymer or soft composite material.
Materials:
- Transmission Electron Microscope.
- For Cryo-TEM: Vitrification device (plunger), liquid ethane, cryo-holder.
- TEM grids (e.g., copper, 300 mesh) with continuous carbon or holey carbon support film.
- Negative stain (e.g., 1-2% uranyl acetate) if required.
Procedure for Cryo-TEM (for pristine, hydrated structures): [86]
- Grid Preparation: Apply 3-5 µL of the sample suspension to a glow-discharged holey carbon grid.
- Blotting: Gently blot away excess liquid with filter paper to form a thin film (typically <1 µm thick) over the holes.
- Vitrification: Rapidly plunge-freeze the grid into liquid ethane cooled by liquid nitrogen. This vitrifies the water, preventing ice crystal formation.
- Transfer and Imaging: Transfer the vitrified grid under liquid nitrogen to the cryo-holder and insert it into the TEM. Image at a low dose (e.g., 100-200 kV) at temperatures below -170°C.
Procedure for Negative Staining TEM (for enhanced contrast): [85]
- Sample Application: Apply 3-5 µL of sample to a carbon-coated grid. Let adsorb for 1 minute.
- Staining: Wick away excess liquid. Apply a drop of 1-2% uranyl acetate solution for 30-60 seconds.
- Drying: Wick away the stain and allow the grid to air dry completely.
- Imaging: Insert the grid into the TEM and image at an appropriate voltage.
Research Reagent Solutions
Table: Essential Materials for Surface Functionalization and Characterization
| Reagent/Material | Function/Application | Key Consideration |
|---|---|---|
| 3-Aminopropyltriethoxysilane (APTES) | A common silane used to introduce primary amine (-NH2) groups onto silicon or glass surfaces for subsequent biomolecule immobilization. [85] | The quality and concentration of APTES, and control of humidity during deposition, are critical for forming a uniform monolayer versus aggregated multilayers. [85] |
| Graphene Oxide (GO) | Used as a conductive coating material. Its functional groups allow for strong chemical bonding (e.g., Fe-O-C) with substrates like LiFePO4, enhancing interfacial electron transport. [73] | The degree of oxidation and exfoliation impacts conductivity. Can be chemically reduced to improve conductivity further. |
| Lactadherin (LACT) | A recombinant protein used to functionalize surfaces for specific capture of extracellular vesicles (EVs) in diagnostic biosensors, via its binding to phosphatidylserine. [85] | Optimal concentration for surface immobilization must be determined (e.g., 25 µg/mL was found optimal in one study) to maximize capture efficiency. [85] |
| Uranyl Acetate | A common negative stain in TEM preparation. It surrounds and excludes from biological and soft materials, providing high-contrast outlines of structures. [85] | It is radioactive and toxic. Requires careful handling and disposal. Alternatives like phosphotungstic acid can be considered. |
| Deuterated Solvents (e.g., D₂O, CDCl₃) | Essential for NMR spectroscopy as they provide a lock signal for the magnetic field and do not produce a strong interfering signal in the 1H NMR region. | Choice of solvent depends on sample solubility. For hydrogels, D₂O is typically used. Cost can be a factor for large volumes. |
Surface Analysis and Optimization Workflow
Validation of Surface Charge and Functional Group Quantification
Frequently Asked Questions (FAQs)
FAQ 1: Why can't I get a stable, high surface charge density on my polymer films, and how can I improve it? The long-term stability and dissipation of injected surface charges are highly dependent on deep carrier traps within the triboelectric material [90]. Instability often occurs due to a lack of sufficient deep traps to anchor the charges.
- Solution: Utilize a corona discharge system with a three-electrode design for controlled charge injection [90]. This method allows for precise tuning and can achieve a high surface charge density with minimal decay (e.g., only 5% decay after 140 days has been demonstrated on PTFE) [90].
FAQ 2: My surface charge quantification results are inconsistent. What could be wrong with my measurement method? Using a constant transfer coefficient to calculate surface charge density from surface potential measurements is a common source of error. The transfer coefficient inherently changes with the probe's position relative to the sample [90].
- Solution: Employ an iterative regularization strategy to invert the surface potential data. This computational method more accurately characterizes the relationship between the measured potential and the underlying surface charge distribution, accounting for the fact that the potential at any point is a contribution from all charges on the surface [90].
FAQ 3: What is the most effective way to identify and quantify functional groups when analyzing an unknown chemical? Relying on a single spectroscopic method can lead to errors, as each technique provides only partial information. Interpretation is also often subjective and experience-dependent [91].
- Solution: Use a multi-spectroscopic approach combined with machine learning. An Artificial Neural Network (ANN) model trained simultaneously on FT-IR, 1H NMR, and 13C NMR data has been shown to identify 17 common organic functional groups with high accuracy (macro-average F1 score of 0.93), outperforming models using any single spectroscopy type [91].
FAQ 4: How does surface functionalization affect the thermal and optical properties of materials like MXenes for applications in photothermal conversion? The specific atoms or groups used for termination (e.g., -F, -O, -OH) critically tune the material's electronic structure, which in turn governs its performance [20].
- Solution: Select functional groups based on the target property. For instance, ab initio calculations reveal that:
Experimental Protocols for Key Techniques
Table 1: Protocol for Surface Charge Visualization and Quantification [90]
| Step | Description | Key Parameters & Considerations |
|---|---|---|
| 1. Setup | Construct a surface potential measurement platform using a movable electrostatic probe (e.g., Kelvin probe) controlled by stepper motors. | Probe movement follows an "S"-shaped reciprocating motion over the sample surface. |
| 2. Data Acquisition | Scan the sample surface to obtain a surface potential (φ) distribution matrix. | A typical matrix can be 60x60 points (3600 data points total). The output is a linear superimposition of all surface charge effects. |
| 3. Inversion Calculation | Solve for surface charge density (σ) from the potential data using an iterative regularization algorithm. | This step addresses the ill-posed nature of the inversion problem. Avoid using a constant transfer coefficient. Standard Tikhonov regularization can be applied to minimize the residual norm. |
| 4. Charge Tuning (Optional) | Enhance surface charge via corona discharge using a three-electrode design. | This method allows for the injection of stable negative or positive charges, enabling triboelectric polarity tuning. |
Table 2: Protocol for Machine-Learning-Based Functional Group Identification [91]
| Step | Description | Key Parameters & Considerations |
|---|---|---|
| 1. Data Collection | Collect FT-IR, 1H NMR, and 13C NMR spectra for a large set of known compounds. | Use consistent solvents for NMR (e.g., CDCl3). Data can be sourced from public databases like NIST Chemistry WebBook and SDBS. |
| 2. Data Preprocessing | Transform spectral data into a uniform format suitable for machine learning. |
|
| 3. Functional Group Assignment | Label the training data with the presence or absence of specific functional groups. | Use SMARTS strings to programmatically assign 17 common functional groups (e.g., aromatic, alcohol, ketone, amine) to each compound. |
| 4. Model Training | Train an Artificial Neural Network (ANN) model using the multi-spectral data. | Apply stratified K-fold cross-validation (e.g., 5-fold) on the integrated spectral data to prevent overfitting and create a generalized model. |
Research Reagent Solutions
Table 3: Essential Materials for Surface and Functional Group Analysis
| Item | Function / Application |
|---|---|
| Triboelectric Polymers (e.g., PTFE) | Serves as a base material for studying surface charge phenomena and contact electrification. Known for its ability to hold a stable negative charge [90]. |
| Corona Discharge System (Three-Electrode) | Enables controlled injection of single-polarity ions (negative or positive) onto a material's surface to enhance and tune its triboelectric properties [90]. |
| Aminosilanes (e.g., (3-Aminopropyl)triethoxysilane) | Common crosslinkers used to introduce amine groups (-NH₂) onto material surfaces (e.g., silica nanoparticles), providing a reactive site for further biomolecular conjugation [5]. |
| Thio-Carboxylic Acids | Act as bifunctional linkers for functionalizing noble metal surfaces (e.g., gold). The thiol (-SH) group binds to the metal, while the carboxylic acid (-COOH) group is available for further reactions [5]. |
| CDCl3 Solvent | The standard deuterated solvent for acquiring consistent and reproducible ¹H and ¹³C NMR spectra, ensuring chemical shifts are comparable across different samples [91]. |
Experimental Workflow Diagrams
The following diagrams outline the core workflows for the two main techniques discussed in this guide.
Surface Charge Measurement
Functional Group Identification
Troubleshooting Guides
Troubleshooting Conductivity Measurement Errors
Problem: My conductivity readings are lower than expected.
- Potential Cause: Probe Polarization - A charge builds up on the sensors of a two-electrode probe, leading to inaccurate readings [92].
- Solution: Use a conductivity meter with graphite sensors, which are less reactive than stainless steel. For samples with a wide conductivity range, use a four-ring (four-electrode) probe, as it measures voltage rather than current, minimizing polarization effects [92].
Problem: My conductivity readings are erratic and inconsistent.
- Potential Cause: Fringe Field Effect - The electrical field from the probe is being interrupted by the container (e.g., beaker walls) [92].
- Solution: Ensure the conductivity probe is positioned at least one inch away from the sides and bottom of the container during measurement [92].
Problem: The measured values drift constantly or show a sudden large deviation.
- Potential Cause: Contaminated Probe or Sample - Dirt, deposits, or oils on the probe can increase resistance, causing drift. Contamination can also occur from improper rinsing, altering the sample's ionic content [93].
- Solution: Clean the probe regularly. For greasy deposits, use warm water with dishwashing liquid. For lime or iron oxide, use vinegar, citric acid, or dilute hydrochloric acid [93]. Always prime (rinse) the probe with a portion of your sample before taking a measurement to avoid cross-contamination [92].
Problem: My TDS (Total Dissolved Solids) readings seem incorrect.
- Potential Cause: Wrong TDS Conversion Factor - Conductivity is converted to TDS using a specific factor, and using the wrong one gives incorrect results [92].
- Solution: Ensure your meter uses the correct conversion factor for your application. Common factors are 0.5 (based on NaCl) and 0.7 (based on a 442 mixture of salts). Select a meter that allows you to choose the appropriate factor [92].
Problem: The sensor lacks selectivity for my target analyte in a complex mixture.
- Potential Cause: Inherent Material Cross-Sensitivity - The sensing material (e.g., a base metal oxide) responds to multiple gases or ions simultaneously [94].
- Solution: Implement surface functionalization of the sensing material. This can be achieved by decorating with noble metal nanoparticles (e.g., for gas sensors) or covalent attachment of specific ionophores or receptors (e.g., for heavy metal detection) to create a more selective interaction site for your target [95] [94].
Troubleshooting Selectivity and Sensitivity in Functionalized Sensors
Problem: My functionalized sensor has a slow response time.
- Potential Cause: Poor Mass Transport or Inefficient Electron Transfer - The functionalization layer may be too thick, hindering the analyte from reaching the active sites, or the surface modification may not facilitate efficient charge transfer [94].
- Solution: Optimize the functionalization protocol to create a thin, porous layer. Strategies like creating oxygen vacancies in metal oxides or using conductive linkers (e.g., carbon nanotubes) can enhance electron transfer rates and improve response time [95] [94].
Problem: The sensor sensitivity is low after functionalization.
- Potential Cause: Loss of Electrical Conductivity - The functionalization process (e.g., with insulating polymers) can block active sites and reduce the overall conductivity of the sensing material [10].
- Solution: Use functionalization methods that preserve the material's conductivity. For 2D materials like MXenes, select conductive polymers or ligands that do not disrupt the percolation network. Alternatively, use non-covalent functionalization (π-stacking) which can preserve the core material's electronic structure [95] [10].
Problem: The sensor signal does not recover to its baseline.
- Potential Cause: Strong, Irreversible Binding of Analyte - The functional groups on the surface may bind the target molecule too strongly, preventing desorption [94].
- Solution: Fine-tune the affinity of the surface receptors. This may involve using a different functional group with a more moderate binding energy or operating the sensor at a temperature that facilitates desorption after the measurement cycle [94].
Frequently Asked Questions (FAQs)
Q1: What is the core principle behind enhancing selectivity through surface functionalization? The core principle is to move from a non-specific sensing material to one with engineered recognition sites. The base material (e.g., carbon nanotube, metal oxide) provides the transducer function (converting a chemical event into an electrical signal like a change in conductivity). Surface functionalization adds the receptor function by attaching molecules (e.g., antibodies, ionophores, specific polymers) that selectively "bind" or interact with your target analyte, thereby conferring specificity to the sensor [95] [94].
Q2: What are the main strategies for functionalizing carbon-based nanomaterials? The two primary strategies are covalent and non-covalent functionalization [95].
- Covalent functionalization involves forming strong chemical bonds (e.g., using diazonium salts) to attach molecules to the carbon lattice. This creates a stable, permanent modification but can alter the electronic properties of the material [95].
- Non-covalent functionalization relies on weaker interactions like π- stacking, van der Waals forces, or electrostatic interactions. This method is easier to perform and often preserves the intrinsic electrical properties of the nanomaterial, which is crucial for maintaining high sensitivity [95].
Q3: How do I choose the right conductivity probe for my research solution? The choice depends on the expected conductivity range of your samples [92] [96].
- Two-electrode probes are suitable for a defined range but can suffer from polarization at high conductivities.
- Four-ring (electrode) probes are ideal for a wide conductivity range and minimize polarization.
- Inductive (electrodeless) probes are used for harsh chemical conditions or solutions that could coat or foul electrode surfaces [92]. Always match the probe's cell constant to your sample's conductivity for optimal accuracy [96].
Q4: Why is temperature compensation critical in conductivity measurements? The conductivity of a solution is highly temperature-dependent, as ions move faster at higher temperatures, increasing conductivity. Without compensation, a change in sample temperature can be misinterpreted as a change in ionic concentration. Meters with Automatic Temperature Compensation (ATC) adjust the reading to a reference temperature (usually 25°C), providing a consistent and accurate value that reflects only the ionic content [92] [93].
Q5: What emerging strategies are used to solve selectivity challenges in complex environments? Beyond material-level functionalization, two powerful emerging strategies are:
- Sensor Arrays / Electronic Noses: Instead of one perfect sensor, use an array of sensors with slightly different selectivities. The combined response pattern can be analyzed to identify and quantify specific analytes in a mixture [94].
- Machine Learning (ML): ML algorithms are trained on the data from sensor arrays. They can learn to deconvolute the complex signal patterns, dramatically improving the ability to distinguish between similar analytes and mitigate cross-sensitivity issues [94].
Data Presentation
| Solution Type | Conductivity (at 25°C) | Resistivity (at 25°C) |
|---|---|---|
| Ultra-pure water | 0.055 µS/cm | 18 MΩ·cm |
| Deionized water | 0.1 - 10 µS/cm | 0.1 - 10 MΩ·cm |
| Drinking water | 0.5 - 1 mS/cm | 1 - 2 kΩ·cm |
| Potassium Chloride (0.01 M) | 1.4 mS/cm | 0.7 kΩ·cm |
| Wastewater | 0.9 - 9 mS/cm | 0.1 - 1 kΩ·cm |
| Ocean water | 53 mS/cm | - |
| Cell Constant (cm⁻¹) | Optimum Conductivity Range | Typical Application |
|---|---|---|
| 0.01 | 0.055 – 20 µS/cm | Ultra-pure water |
| 0.1 | 0.5 – 200 µS/cm | Deionized water, low-ionic research solutions |
| 1.0 | 10 µS/cm – 200 mS/cm | Drinking water, wastewater, general lab use |
| 10.0 | 1 – 200 mS/cm | Concentrated chemical solutions, brines |
| Strategy | Mechanism | Example Materials | Target Analytes |
|---|---|---|---|
| Catalytic Functionalization | Noble metals catalyze specific redox reactions, enhancing reactivity for a target gas. | Pd, Pt, Au nanoparticles on SMOs* | H₂, CO, VOCs |
| Oxygen Vacancy Engineering | Defects on metal oxide surfaces act as preferential adsorption sites for specific gases. | Doped SnO₂, ZnO, In₂O₃ | NO₂, O₃ |
| Heterojunction Construction | Interface between two materials creates a charge transfer channel selective to certain gases. | SMO-SMO, SMO-2D material composites | NH₃, NO₂ |
| Surface Functionalization | Covalent or non-covalent attachment of receptors provides "lock-and-key" selectivity. | Carbon nanotubes with ionophores; MXenes with polymers | Heavy metals (Pb²⁺), biomarkers |
SMO: Semiconductor Metal Oxide *VOCs: Volatile Organic Compounds
Experimental Protocols
Objective: To covalently attach a specific aryl group to the sidewall of single-walled carbon nanotubes (SWCNTs) to create a selective sensing interface.
Materials:
- Purified SWCNTs
- Aryl diazonium salt of choice (e.g., 4-nitrobenzenediazonium tetrafluoroborate)
- Suitable solvent (e.g., N,N-Dimethylformamide - DMF)
- Electrochemical cell or chemical reducing agent (e.g., hypophosphorous acid)
- Inert atmosphere (Argon or Nitrogen gas)
- Centrifuge and filtration setup
Methodology:
- Preparation: Disperse the SWCNTs in the solvent using mild ultrasonication to create a homogeneous suspension.
- Reaction: In an inert atmosphere, add the aryl diazonium salt to the SWCNT suspension under constant stirring.
- Initiation: For electrochemical functionalization, apply a reducing potential to the SWCNT working electrode to generate aryl radicals. For chemical functionalization, add the reducing agent to the mixture.
- Conversion: The generated aryl radicals attack the sp² carbon lattice of the SWCNTs, forming a covalent C-C bond.
- Work-up: Allow the reaction to proceed for a predetermined time (e.g., 2-24 hours).
- Purification: Isolate the functionalized SWCNTs by repeated centrifugation and washing with fresh solvent to remove unreacted salts and byproducts.
- Characterization: Confirm successful functionalization using techniques like Raman spectroscopy (shift in D/G band ratio), X-ray photoelectron spectroscopy (XPS) for surface composition, and diffusion-ordered NMR spectroscopy (DOSY) [95].
Objective: To deposit noble metal nanoparticles (e.g., Palladium) on a metal oxide (e.g., SnO₂) surface to catalyze and selectively enhance the response to a target gas (e.g., H₂).
Materials:
- Pre-synthesized SnO₂ nanowires or nanopowder
- Palladium precursor salt (e.g., PdCl₂)
- Reducing agent (e.g., Sodium borohydride - NaBH₄) or equipment for sputtering/impregnation
- Deionized water and ethanol
- Ultrasonic bath
Methodology:
- Support Preparation: Disperse the SnO₂ material in deionized water via sonication.
- Impregnation: Add an aqueous solution of the PdCl₂ precursor to the SnO₂ dispersion under vigorous stirring. The goal is to adsorb Pd²⁺ ions onto the SnO₂ surface.
- Reduction: Slowly add a fresh, ice-cold solution of NaBH₄ to reduce the adsorbed Pd²⁺ ions to metallic Pd⁰ nanoparticles. Alternatively, the dried impregnated powder can be calcined at a specific temperature to form nanoparticles.
- Stabilization: Continue stirring for several hours to ensure complete reduction and stabilization of the nanoparticles.
- Purification: Collect the Pd-decorated SnO₂ by centrifugation, followed by repeated washing with water and ethanol to remove residual ions.
- Drying & Annealing: Dry the product in an oven and optionally anneal at a moderate temperature (e.g., 300-400°C) to improve adhesion and crystallinity.
- Characterization: Use Transmission Electron Microscopy (TEM) to confirm nanoparticle size and distribution. Gas sensing tests will show a selectively enhanced response to H₂ compared to the pristine SnO₂ sensor [94].
Experimental Workflow and Signaling Pathways
Diagram: Workflow for Developing a Functionalized Conductivity-Based Sensor
The Scientist's Toolkit: Research Reagent Solutions
Table 4: Essential Materials for Surface Functionalization and Sensing
| Item | Function in Research | Example Use Case |
|---|---|---|
| Carbon Nanotubes (SWCNTs/MWCNTs) | High-surface-area conductive transducer material. | Base substrate for covalent functionalization with diazonium salts to create chemiresistive sensors [95]. |
| Aryl Diazonium Salts | Provides aryl radicals for covalent attachment to carbon surfaces. | Used to graft specific functional groups (e.g., -NO₂, -COOH) onto CNTs to enhance selectivity towards specific ions or gases [95]. |
| Semiconductor Metal Oxides (SMOs) | Base sensing material whose resistance changes upon gas adsorption. | SnO₂ or ZnO nanowires used as the platform for decoration with noble metal nanoparticles for selective gas detection [94]. |
| Noble Metal Salt Precursors | Source for creating catalytic nanoparticles on sensor surfaces. | PdCl₂ or H₂PtCl₆ solutions are used to impregnate SMOs, creating active sites for specific gas dissociation (e.g., H₂ on Pd) [94]. |
| MXenes (e.g., Ti₃C₂Tₓ) | Highly conductive 2D transition metal carbides/nitrides for sensing. | Active material for physical and chemical sensors; can be functionalized with polymers or ligands without losing conductivity [10]. |
| Ionophores | Selective molecular receptors for specific ions. | Covalently linked to carbon nanotubes to create ion-selective electrodes for heavy metals like Pb²⁺ [95]. |
| Conductivity Standard Solutions | Certified reference for calibrating conductivity probes. | Essential for ensuring accuracy in any experiment measuring solution conductivity (e.g., 1413 µS/cm standard) [92] [97]. |
Benchmarking Against Commercial and Traditional Approaches
Frequently Asked Questions
This section addresses common challenges researchers face when benchmarking surface functionalization strategies for conductivity optimization.
Q1: How can I prevent nanoparticle agglomeration in liquid dielectrics during conductivity experiments?
Agglomeration is a common issue that severely impacts colloidal stability and functional performance. Surface modification with specific functional groups is the most effective solution. For graphene oxide in natural ester insulating oil, functionalization with (3-Aminopropyl)triethoxysilane (APTES) provides silanol groups (-Si-OH) and amino groups (-NH2) that enhance interfacial interaction with oil molecules. At an optimized concentration of 0.05 g/L, this approach enables colloidally stable dispersion lasting over 6 months while significantly enhancing dielectric and thermal properties [98].
Q2: What characterization techniques are essential for benchmarking commercial graphene oxide quality?
A comprehensive characterization protocol is crucial for reliable benchmarking. Essential techniques include [99]:
- Raman Spectroscopy: Evaluates structural defects through D/G band intensity ratios
- X-ray Diffraction (XRD): Determines crystallinity and interlayer spacing
- ATR-FTIR Spectroscopy: Identifies functional groups (epoxides, hydroxyls, carboxyls)
- X-ray Photoelectron Spectroscopy (XPS): Provides detailed surface chemistry and elemental composition
- Thermogravimetric Analysis (TGA): Assesses thermal stability
Q3: What statistical approaches ensure rigorous benchmarking of surface modification outcomes?
For statistically rigorous comparisons, implement a methodology specifically designed for small datasets common in surface engineering research. Use analysis of variance (ANOVA) followed by Tukey's test to identify significant differences between modification techniques. Employ stratified data partitioning with cross-validation, dividing datasets into multiple equally-sized partitions where each serves as both training and testing data. This approach reduces bias from arbitrary partition selection and ensures performance improvements are statistically significant rather than marginal [100].
Q4: How can artificial intelligence enhance surface functionalization optimization?
AI and machine learning transform traditional trial-and-error approaches through:
- Predictive Modeling: Machine learning algorithms analyze complex relationships between surface properties and performance metrics
- Molecular Dynamics Simulations: AI-guided simulations provide atomic-level understanding of bioreceptor-substrate interactions
- Material Design: Generative adversarial networks design novel nanomaterials with tailored properties
- Performance Optimization: Neural networks and genetic algorithms predict optimal material compositions and surface architectures [101]
Q5: What key parameters should be tracked when benchmarking conductivity improvements?
When evaluating conductivity enhancements, monitor these critical parameters:
Table: Key Conductivity Benchmarking Parameters
| Parameter | Measurement Technique | Significance |
|---|---|---|
| Breakdown Voltage | Dielectric strength testing | Increased by 23.8% with APTES-functionalized GO [98] |
| Thermal Conductivity | Transient plane source method | Enhanced by 10.9% in nano-modified oils [98] |
| Dielectric Loss | Dielectric spectroscopy | 30.5% reduction in dielectric loss degradation factor [98] |
| Interlayer Spacing | X-ray diffraction | Critical for ion transport in 2D materials [22] |
| Surface Functional Groups | XPS, FTIR | Determines compatibility and interaction with matrices [99] |
Troubleshooting Experimental Issues
Problem: Inconsistent conductivity measurements across experimental replicates
Solution: Implement controlled environmental testing conditions and standardized sample preparation protocols. For MXene materials, maintain inert atmospheres during processing and testing to prevent surface oxidation that variably impacts conductivity. For graphene oxide-based composites, control relative humidity during testing as water absorption significantly alters electrical properties. Ensure consistent sample thickness and pressure application during measurement, as these physical factors profoundly influence recorded conductivity values [22] [99].
Problem: Poor adhesion between functionalized surfaces and substrate materials
Solution: Optimize surface activation pre-treatments and interfacial engineering strategies. For metallic substrates, plasma surface treatment enhances adhesion by increasing surface energy and creating functional sites. For polymer composites, chemical conversion coatings or laser surface engineering improve bonding capacity. When working with 2D materials like MXenes, intercalation engineering with metal ions (K+, Na+, Li+) or organic molecules (DMSO, urea) expands interlayer spacing and creates anchoring sites for improved integration with substrates [22] [102].
Problem: Limited long-term stability of functionalized surfaces
Solution: Implement multi-layer protection strategies combining interface layers, protective encapsulation, and affinity layers. Research demonstrates that copper-based conductive surfaces maintain functionality when protected with optimized architectural approaches including thin interface layers and protective coatings that prevent oxidation while maintaining conductivity. Similarly, MXene materials show enhanced environmental stability when protected with conformal polymer coatings or through strategic surface functionalization that replaces vulnerable groups with more stable alternatives [103] [22].
Experimental Protocols
Protocol 1: APTES Functionalization of Graphene Oxide for Enhanced Conductivity
Materials Required:
- Single-layer graphene oxide (sheet: 0.5-5 μm, thickness: 0.6-1.0 nm)
- (3-Aminopropyl)triethoxysilane (APTES)
- Natural ester insulating oil (e.g., palm oil)
- Solvent (ethanol/water mixture)
Methodology:
- Add 1g graphene oxide to 100ml deionized water and disperse via ultrasonication
- Add 2ml APTES to the solution and adjust pH to 4-5 using acetic acid
- React at 75°C for 4 hours with continuous mechanical stirring
- Centrifuge at 8000 rpm for 10 minutes and collect the solid
- Wash repeatedly with ethanol/water solution to remove unreacted APTES
- Dry at 60°C for 12 hours to obtain APTES-functionalized graphene oxide (AGO)
- Disperse AGO in natural ester oil at optimized concentration (0.05 g/L)
Characterization:
- Confirm functionalization through XRD (shift from 10.80° to 5.28°)
- Validate dielectric performance: 23.8% increase in breakdown voltage
- Measure thermal conductivity: 10.9% enhancement over pure oil [98]
Protocol 2: Intercalation Engineering for MXene Conductivity Optimization
Materials Required:
- Ti3C2Tx or V2CTx MXene flakes
- Intercalation agents (KOH, SnCl4, DMSO, or urea)
- Distilled water and organic solvents
Methodology:
- Prepare MXene suspension in distilled water (1 mg/mL concentration)
- Add intercalation agent (e.g., KOH for K+ intercalation, SnCl4 for Sn4+ intercalation)
- For metal ion intercalation: Treat with 1M KOH for 24 hours with stirring
- For organic molecule intercalation: React with DMSO at 40°C for 16 hours
- Centrifuge and collect expanded MXene material
- Characterize interlayer spacing increase via XRD
Performance Metrics:
- V2CTx with Mn2+ intercalation: Interlayer spacing increases from 0.73 nm to 0.95 nm
- Specific capacity enhancement: 530 mAh·g−1 at 0.1 A·g−1 vs. 100 mAh·g−1 for pristine MXene
- Cycling stability: 84% capacity retention after 2000 cycles [22]
Research Reagent Solutions
Table: Essential Materials for Surface Functionalization Research
| Material/Reagent | Function | Application Examples |
|---|---|---|
| APTES | Silane coupling agent providing silanol and amino functional groups | Graphene oxide functionalization for dielectric oils [98] |
| Graphene Oxide | 2D material with high surface area and tunable functionality | Dielectric and thermal conductivity enhancement [98] [99] |
| MXenes (Ti3C2Tx) | 2D transition metal carbides/nitrides with high conductivity | Energy storage, biomedical applications, conductive composites [22] [44] |
| Cyclic RGD Peptides | Targeting ligands for specific cell recognition | Tumor-targeted drug delivery systems on MXene platforms [44] |
| DMSO | Organic intercalation agent for 2D material expansion | MXene interlayer spacing control (increases c-lattice from 19.5 Å to 26.8 Å) [22] |
Experimental Workflows
Surface Functionalization Optimization Pathway
Material Characterization Pipeline
Quantitative Benchmarking Data
Table: Performance Comparison of Surface Functionalization Approaches
| Functionalization Method | Base Material | Conductivity Improvement | Key Performance Metrics | Stability |
|---|---|---|---|---|
| APTES-GO | Natural ester oil | Thermal: +10.9% [98] | Breakdown voltage: +23.8% [98] | >6 months colloidal stability [98] |
| Metal Ion Intercalation | V2CTx MXene | Specific capacity: 530 mAh·g−1 [22] | Energy density: 415 Wh·kg−1 [22] | 84% retention after 2000 cycles [22] |
| RGD Peptide Functionalization | Ti3C2 MXene | Photothermal conversion efficiency [44] | Tumor targeting accuracy [44] | Biocompatibility at <1000 μg/mL [44] |
| Alkali Treatment | Ti3C2Tx MXene | Specific capacitance: 61.3 to 113.4 F·g−1 [22] | Interlayer spacing expansion [22] | Enhanced cycling stability [22] |
Conclusion
The optimization of surface functionalization for target conductivity represents a transformative approach in biomedical engineering, integrating interfacial chemistry, nanomaterials science, and artificial intelligence to create next-generation therapeutic and diagnostic platforms. Key advancements in AI-driven design, polymer composites, and peptide conjugation have demonstrated significant improvements in biosensor sensitivity, drug delivery precision, and thermoelectric performance. Future directions should focus on developing hybrid functionalization strategies that combine multiple approaches for enhanced performance, expanding the integration of machine learning for predictive optimization, and translating laboratory successes into clinically viable systems. The continued evolution of surface engineering will undoubtedly unlock new possibilities in personalized medicine, point-of-care diagnostics, and targeted therapeutic interventions, ultimately bridging the gap between nanomaterials innovation and clinical application.
References
- 1. Not So Innocent After All: Interfacial Chemistry Determines ... [https://pmc.ncbi.nlm.nih.gov/articles/PMC10953449/]
- 2. Enhancing the conductivity of plasma polymer functionalized ... [https://pubs.rsc.org/en/content/articlehtml/2024/ma/d3ma00641g]
- 3. Charge Transport in Organic Semiconductors - PubMed Central [https://pmc.ncbi.nlm.nih.gov/articles/PMC8928466/]
- 4. Interfacial electrostatic charges promoted chemistry [https://www.sciencedirect.com/science/article/abs/pii/S0001868625000478]
- 5. Nanoparticle Surface Functionalization: How to Improve ... [https://pmc.ncbi.nlm.nih.gov/articles/PMC7726445/]
- 6. Graphene Functionalization: Covalent Vs Non-Covalent [https://www.azonano.com/article.aspx?ArticleID=6097]
- 7. Functionalization and optimization-strategy of graphene oxide ... [https://pmc.ncbi.nlm.nih.gov/articles/PMC7270027/]
- 8. 10 Most Common Surface Quality Mistakes by Manufacturers [https://www.brighton-science.com/blog/10-most-common-surface-quality-mistakes-by-manufacturers]
- 9. Analysis of tunneling conductivity for MXene polymer ... [https://www.nature.com/articles/s41598-025-23304-4]
- 10. Progress towards efficient MXene sensors [https://www.nature.com/articles/s43246-025-00907-y]
- 11. Graphene Oxide and MXene Materials - PMC - PubMed Central [https://pmc.ncbi.nlm.nih.gov/articles/PMC12100715/]
- 12. Graphene in therapeutics delivery: Problems, solutions and ... [https://www.sciencedirect.com/science/article/pii/S0939641116301394]
- 13. Progress and challenges of graphene and its congeners ... [https://pmc.ncbi.nlm.nih.gov/articles/PMC10735213/]
- 14. Challenges and opportunities in the application of carbon ... [https://pubs.rsc.org/en/content/articlelanding/2025/ra/d5ra02939b]
- 15. Challenges and opportunities in the application of carbon ... [https://pmc.ncbi.nlm.nih.gov/articles/PMC12257305/]
- 16. Surface Functionalization of Nanoparticles for Enhanced ... [https://pmc.ncbi.nlm.nih.gov/articles/PMC12348736/]
- 17. 3.3 DLVO theory - Colloid Science [https://fiveable.me/colloid-science/unit-3/dlvo-theory/study-guide/iEfRGldqjrgmgizM]
- 18. Electrostatic interactions between soft nanoparticles ... [https://www.sciencedirect.com/science/article/abs/pii/S0021979724020472]
- 19. Electrostatic attraction between similarly charged species [https://pmc.ncbi.nlm.nih.gov/articles/PMC3859271/]
- 20. Surface functionalization tuned optical and thermal ... [https://www.sciencedirect.com/science/article/abs/pii/S2468023025021182]
- 21. Tail-Group Modulated Covalent Functionalization of ... [https://pubmed.ncbi.nlm.nih.gov/40965175/]
- 22. Progress in Surface and Interface Modification Strategies of ... [https://www.mdpi.com/1996-1944/18/15/3576]
- 23. The Biomedical Applications of Conductive Polymers and ... [https://pmc.ncbi.nlm.nih.gov/articles/PMC10145001/]
- 24. Electrically conductive “SMART” hydrogels for on-demand ... [https://www.sciencedirect.com/science/article/pii/S1818087624001247]
- 25. Machine learning-driven optimization for surface roughness prediction of vertical orientation measurements on 3D printed components - ScienceDirect [https://www.sciencedirect.com/science/article/pii/S2666790825001697]
- 26. Meta releases Ax 1.0 for automated machine learning optimization [https://ppc.land/meta-releases-ax-1-0-for-automated-machine-learning-optimization/]
- 27. AI-driven materials design: a mini-review [https://arxiv.org/html/2502.02905v1]
- 28. Applications of machine learning in drug discovery and ... [https://pmc.ncbi.nlm.nih.gov/articles/PMC6552674/]
- 29. Advances in machine learning for optimizing ... [https://www.sciencedirect.com/science/article/pii/S1570164625000153]
- 30. Optimizing thermal and electrical transport pathways in ... [https://www.sciencedirect.com/science/article/abs/pii/S2452213925000269]
- 31. Challenges and opportunities in manufacturing highly filled ... [https://www.nature.com/articles/s44334-025-00046-9]
- 32. Polymer [https://www.sciencedirect.com/science/article/abs/pii/S0032386124004804]
- 33. Pharmaceutical Coating and Its Different Approaches, a ... [https://pmc.ncbi.nlm.nih.gov/articles/PMC9415771/]
- 34. Global Conductive Polymers Market Report 2025-2035 [https://www.businesswire.com/news/home/20250422575707/en/Global-Conductive-Polymers-Market-Report-2025-2035-Increasing-Demand-Across-Electronics-Energy-Storage-and-EMI-Shielding-Applications---ResearchAndMarkets.com]
- 35. The Global Conductive Polymers Market 2025-2035 [https://www.futuremarketsinc.com/the-global-conductive-polymers-market-2025-2035/]
- 36. Special Issue : Polymer Coatings: Prospects and Challenges [https://www.mdpi.com/journal/polymers/special_issues/640N37KCRP]
- 37. What Is Controlled Release? How it Works and Common ... [https://www.colorcon.com/education-insights/what-is-controlled-release]
- 38. 5.12: Ligand Substitution Reactions [https://chem.libretexts.org/Bookshelves/Inorganic_Chemistry/Introduction_to_Inorganic_Chemistry_(Wikibook)/05%3A_Coordination_Chemistry_and_Crystal_Field_Theory/5.12%3A_Ligand_Substitution_Reactions]
- 39. Surface Functionalization - an overview [https://www.sciencedirect.com/topics/materials-science/surface-functionalization]
- 40. Surface functionalities [https://molecularplasmagroup.com/surface-functionalities/]
- 41. for fixing manganese: relevance to cellular metal... Ligand displacement [https://pubmed.ncbi.nlm.nih.gov/23238775/]
- 42. Hierarchically structured conductive hydrogels for ... [https://pubmed.ncbi.nlm.nih.gov/40268199]
- 43. New updates on peptides and peptide-based biopolymeric ... [https://www.sciencedirect.com/science/article/abs/pii/S0167732225013546]
- 44. Optimizing the Surface Functionalization of Peptide ... [https://pmc.ncbi.nlm.nih.gov/articles/PMC12104560/]
- 45. Peptide–Drug Conjugates as Effective Prodrug Strategies ... [https://pmc.ncbi.nlm.nih.gov/articles/PMC5199637/]
- 46. Strategies for Improving Peptide Stability and Delivery - PMC [https://pmc.ncbi.nlm.nih.gov/articles/PMC9610364/]
- 47. A Guide to the Basics of Peptide Conjugation [https://www.neulandlabs.com/en/insights/stories/peptide-conjugation-common-conjugation-strategies]
- 48. How to Reconstitute Peptides [https://www.jpt.com/blog/reconstitute-peptides/?srsltid=AfmBOorVSQurZUDmwD5OHP_vjxcOZnc5fZsXzlwBpcQ6gW3cqqeCl8Sz]
- 49. Preparation of Nanoparticle-Immobilized Gold Surfaces for ... [https://www.mdpi.com/2218-273X/15/6/767]
- 50. Bioactive surface-functionalized MXenes for biomedicine [https://pubs.rsc.org/en/content/articlehtml/2025/nr/d4nr04260c]
- 51. Accelerating material discovery with a threshold-driven ... [https://www.sciencedirect.com/science/article/pii/S2213846324002414]
- 52. Benchmarking the performance of Bayesian optimization ... [https://www.nature.com/articles/s41524-021-00656-9]
- 53. Bayesian Optimization over Multiple Experimental Fidelities ... [https://pmc.ncbi.nlm.nih.gov/articles/PMC11869128/]
- 54. Targeted materials discovery using Bayesian algorithm ... [https://www.nature.com/articles/s41524-024-01326-2]
- 55. Bayesian Optimization for Chemical Synthesis in the Era of ... [https://www.mdpi.com/2227-9717/13/9/2687]
- 56. Bayesian Optimization: Smarter Hyperparameter Tuning for ... [https://medium.com/@sachinsoni600517/bayesian-optimization-smarter-hyperparameter-tuning-for-machine-learning-8129534b9067]
- 57. Surface modification of polymers by ion irradiation [https://www.sciencedirect.com/science/article/abs/pii/S0168583X23003385]
- 58. Modification in electrical conductivity correlated with ... [https://www.sciencedirect.com/science/article/pii/S2405844024105841]
- 59. Laser Surface Modification [https://www.rp-photonics.com/laser_surface_modification.html]
- 60. Irradiation-based surface modification [https://www.innovent-jena.de/en/amc/skills-expertise/strahlungsbasierte-oberflaechenmodifikation]
- 61. A comprehensive review: surface modification strategies to ... [https://jmsg.springeropen.com/articles/10.1186/s40712-025-00294-9]
- 62. Gamma irradiation induced surface modification of (PVC ... [https://www.nature.com/articles/s41598-023-34583-0]
- 63. Nature-inspired surface modification strategies for ... [https://pmc.ncbi.nlm.nih.gov/articles/PMC11925587/]
- 64. Troubleshooting and Optimization Tips for SPR Experiments [https://www.creative-proteomics.com/resource/troubleshooting-optimization-tips-for-spr-experiments.htm]
- 65. Western Blot Troubleshooting [https://www.thermofisher.com/us/en/home/life-science/protein-biology/protein-biology-learning-center/protein-gel-electrophoresis-information/western-blot-troubleshooting.html]
- 66. Western Blot Troubleshooting: Non-specific bands [https://azurebiosystems.com/blog/western-blot-troubleshooting-what-to-do-about-non-specific-bands/]
- 67. Functionalized ultra-low fouling carboxy- and hydroxy ... [https://www.sciencedirect.com/science/article/abs/pii/S0956566313004879]
- 68. Non-Specific Adsorption Reduction Methods in Biosensing [https://pmc.ncbi.nlm.nih.gov/articles/PMC6603772/]
- 69. Screening Nonspecific Interactions of Peptides without ... [https://pmc.ncbi.nlm.nih.gov/articles/PMC3826821/]
- 70. How To Identify and Prevent Fouling (HPLC) [https://www.silcotek.com/blog/identify-and-prevent-fouling-in-hplc-systems]
- 71. Impact of carboxyl functionalization on the thermal ... [https://www.sciencedirect.com/science/article/abs/pii/S0167577X25011851]
- 72. Review and principles of conductivity ... [https://www.biologic.net/documents/review-and-principles-of-conductivity-measurement-material-science-application-note-2/]
- 73. Research Progress in Strategies for Enhancing the ... [https://www.mdpi.com/1420-3049/29/22/5250]
- 74. Influence of surface engineering on the transport properties ... [https://www.sciencedirect.com/science/article/abs/pii/S0021979724029199]
- 75. ZnO functionalized paraffin/diatomite phase change ... [https://pubs.rsc.org/en/content/articlelanding/2025/ra/d4ra08017c]
- 76. Nanomaterial Dispersion Challenges → Term [https://energy.sustainability-directory.com/term/nanomaterial-dispersion-challenges/]
- 77. Nanoparticle processing: Understanding and controlling ... [https://www.sciencedirect.com/science/article/abs/pii/S0001868619304816]
- 78. Tips and Tricks for Nanoparticles - Zetasize Materials Talks [https://www.malvernpanalytical.com/en/learn/knowledge-center/insights/tips-tricks-for-nanoparticle-characterization]
- 79. Surface functionalization – The way for advanced ... [https://www.sciencedirect.com/science/article/pii/S0010854521000801]
- 80. Dispersion and Aggregation Fate of Individual and Co ... [https://pmc.ncbi.nlm.nih.gov/articles/PMC9572943/]
- 81. Surface Functionalization of Nanoparticles for Enhanced Electrostatic Adsorption of Biomolecules | MDPI [https://www.mdpi.com/1420-3049/30/15/3206]
- 82. Strategy to optimize the surface functionalization of ... [https://www.sciencedirect.com/science/article/pii/S0169433225012449]
- 83. Surface functionalization of graphene nanosheet with poly ... [https://www.nature.com/articles/s41598-022-21619-0]
- 84. Tips & Tricks GPC/SEC: What You Need to Know to Allow ... [https://www.chromatographyonline.com/view/tips-tricks-gpcsec-what-you-need-know-allow-efficient-gpcsec-troubleshooting]
- 85. Design and Optimization of a Biosensor Surface ... [https://pmc.ncbi.nlm.nih.gov/articles/PMC8399133/]
- 86. Advanced Methods for the Characterization of ... [https://pmc.ncbi.nlm.nih.gov/articles/PMC8544384/]
- 87. Surface Functionalization → Term [https://pollution.sustainability-directory.com/term/surface-functionalization/]
- 88. GPC-NMR Analysis for Polymer Characterisation [https://www.intertek.com/analytical-laboratories/nmr/gpc/]
- 89. Techniques Used for Polymer Characterization [https://www.molecularcloud.org/p/techniques-used-for-polymer-characterization]
- 90. Visualization and standardized quantification of surface ... [https://www.nature.com/articles/s41467-024-49660-9]
- 91. Machine-Learning Approach to Identify Organic Functional ... [https://pmc.ncbi.nlm.nih.gov/articles/PMC11966250/]
- 92. 8 Common Mistakes When Taking Conductivity ... [https://blog.hannainst.com/conductivity-mistakes]
- 93. Conductivity meter – 15 solutions to the most common faults [https://en.jumo.pl/web/about-us/blog-pl/conductivity-meter]
- 94. Advancements and Strategies for Selectivity Enhancement ... [https://pmc.ncbi.nlm.nih.gov/articles/PMC12430070/]
- 95. Enhancing the Surface Sensitivity and Selectivity [https://link.springer.com/chapter/10.1007/978-3-319-08648-4_4]
- 96. Conductivity Guide [https://alpha-measure.com/conductivity-guide/]
- 97. Conductivity Probe Troubleshooting and FAQs [https://www.vernier.com/til/1402?srsltid=AfmBOorsn3LLndCKCJXGxoxySMMju4EJ7rqXb1cy9dnSptA1Qb6sgX0v]
- 98. Molecular dynamics study on functional group surface ... [https://www.sciencedirect.com/science/article/abs/pii/S0960148125010754]
- 99. Comparative In-Depth Investigation of Benchmark ... [https://pmc.ncbi.nlm.nih.gov/articles/PMC12250649/]
- 100. Benchmarking deep learning models for surface defect ... [https://link.springer.com/article/10.1007/s10845-025-02672-8]
- 101. AI-Enhanced Surface Functionalization in Biosensors [https://www.sciencedirect.com/science/article/abs/pii/S0165993625003887]
- 102. Surface Treatments Market Share, Trends | Forecast, 2025- ... [https://www.gminsights.com/industry-analysis/surface-treatments-market]
- 103. Strategic approaches to enhance efficiency and ... [https://www.sciencedirect.com/science/article/pii/S2949822824002740]