Sample Preparation for Surface Analysis: An IUPAC Guide for Biomedical Researchers
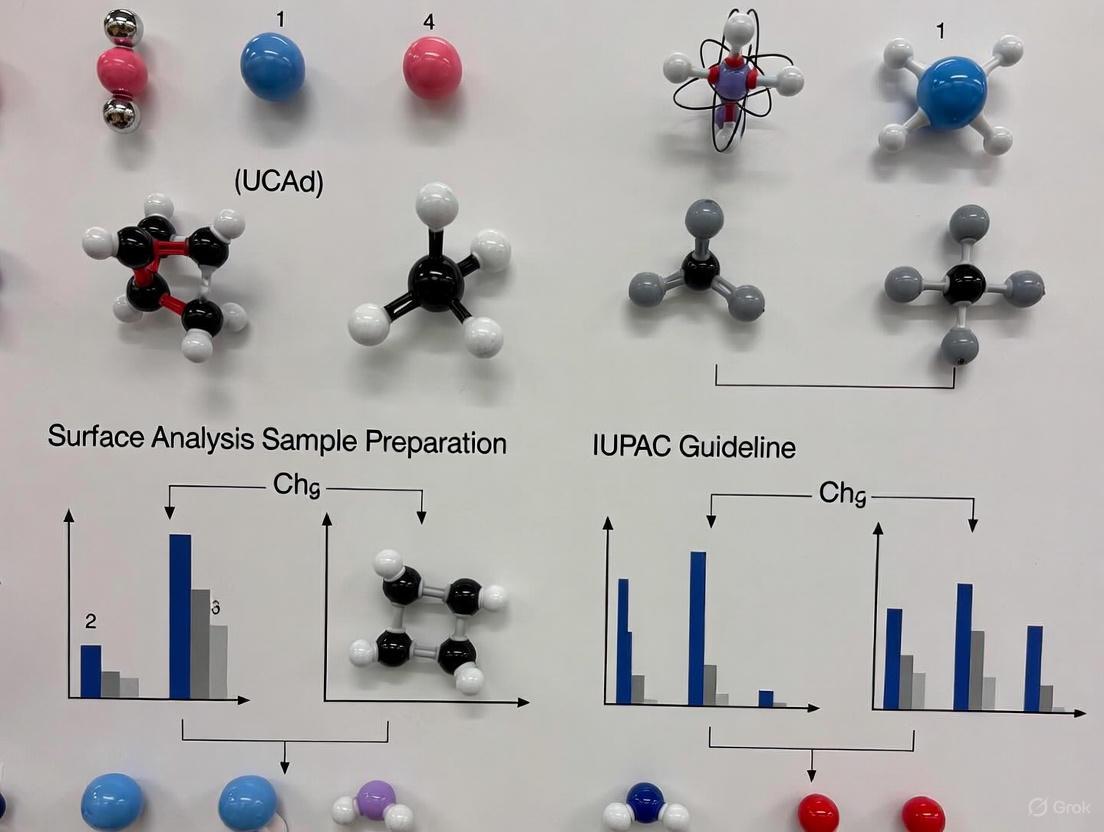
This guide provides a comprehensive overview of sample preparation for surface analysis, tailored for researchers and professionals in drug development and biomedical sciences.
Sample Preparation for Surface Analysis: An IUPAC Guide for Biomedical Researchers
Abstract
This guide provides a comprehensive overview of sample preparation for surface analysis, tailored for researchers and professionals in drug development and biomedical sciences. It covers foundational IUPAC terminology, methodological approaches for techniques like XPS and AES, troubleshooting for common contamination issues, and validation strategies to ensure analytical accuracy. By aligning with the latest IUPAC recommendations, this article serves as a critical resource for obtaining reliable, high-quality surface data that can inform material design, drug delivery systems, and diagnostic tool development.
Understanding Surface Analysis: Core IUPAC Concepts and Definitions
In surface science and analytical chemistry, the precise definition of the "surface" is fundamental to obtaining reliable, reproducible, and meaningful data. The International Union of Pure and Applied Chemistry (IUPAC) provides a critical framework that distinguishes between different surface concepts, recognizing that the term "surface" holds varying meanings depending on context—from general discussion to physical reality and experimental interaction [1]. This nuanced classification system is particularly vital for a thesis focused on sample preparation, as the preparation methodology directly influences which aspect of the surface is being probed and must therefore be documented with utmost precision. Without these standardized definitions, comparing results across different studies, techniques, and laboratories becomes fraught with ambiguity. The IUPAC recommendations establish a common language that enables clear communication among researchers, scientists, and drug development professionals, ensuring that when one discusses the "surface," the specific layer or volume of interest is unequivocally defined [1] [2].
For professionals engaged in drug development, this precision is not merely academic. The interaction of a drug substance with its environment—be it during processing, in a delivery matrix, or at a biological target—is governed by its surface properties. Misinterpreting which "surface" is being analyzed could lead to flawed predictions of stability, bioavailability, or performance. This document outlines the IUPAC classifications and translates them into practical application notes and protocols, providing a rigorous foundation for thesis research and industrial application alike.
IUPAC Surface Classifications: Definitions and Implications
IUPAC recommends a three-tiered classification for the term "surface" to enhance clarity in surface analysis. The distinctions between these definitions are foundational to designing experiments, preparing samples, and interpreting data. The following table summarizes these core classifications.
Table 1: IUPAC Classifications of "Surface" for Analytical Chemistry
| Classification | Formal IUPAC Definition | Key Characteristics | Primary Importance in Analysis |
|---|---|---|---|
| General Surface | The 'outer portion' of a sample of undefined depth [1]. | • Imprecise, qualitative• Used for general discussions• Depth is not specified | Provides a common term for initial, non-specific descriptions of the sample's exterior. |
| Physical Surface | That atomic layer of a sample which, in a vacuum, is the layer 'in contact with' the vacuum; the outermost atomic layer [1]. | • Theoretically ideal• Precisely one atom/molecule deep• Represents the absolute boundary | Critical for theoretical models and understanding fundamental surface interactions and reactivity. |
| Experimental Surface | That portion of the sample with which there is significant interaction with the particles or radiation used for excitation [1]. | • Defined by the analysis technique• A volume, not just a layer• Depth depends on probe and sample | The most practical definition; determines what is actually being measured and must be considered for data interpretation. |
The General Surface
The General Surface is the most colloquial of the three terms. It refers to the vague "outside" of a sample without any specification of its depth or atomic structure [1]. In a thesis context, this term is appropriate for introductory sections or broad-stroke discussions where the exact region of interest has not yet been defined by the analytical technique. For example, one might state, "The general surface of the active pharmaceutical ingredient (API) was contaminated after exposure to ambient laboratory air." This usage signals that a more precise investigation is required to determine the nature and extent of the contamination.
The Physical Surface
The Physical Surface is a rigorous theoretical construct, defined as the outermost atomic layer of a sample [1]. This is the layer that would be in direct contact with a perfect vacuum. In an ideal, defect-free world, this is the region where surface energy, catalytic activity, and adsorption processes initiate. The related concept of a Regular Surface—a perfect surface without heterogeneities or defects—is acknowledged as largely theoretical, though in practice, the term can be applied to local regions of real surfaces where the influence of nearby defects is negligible [3]. Understanding the ideal physical surface is crucial for modeling interfacial phenomena, but it is rarely, if ever, directly measured in its entirety due to the inherent imperfections of real materials and the limitations of analytical probes.
The Experimental Surface
The Experimental Surface is the most critical concept for practicing scientists. It is defined not by a fixed depth, but by the interaction volume between the sample and the analytical probe [1]. This volume is determined by whichever is larger: the depth required for the incoming radiation or particles to cause excitation, or the escape depth for the resulting emitted radiation or particles.
For instance:
- In X-ray Photoelectron Spectroscopy (XPS), the experimental surface is typically the top 5-10 nm, dictated by the escape depth of the photoelectrons.
- In Secondary Ion Mass Spectrometry (SIMS), it can be as shallow as the top 1-2 monolayers for static SIMS or much deeper for dynamic SIMS.
- The concentration of a material within the experimental surface is defined as the amount of the material of interest divided by the total amount of substances in this interaction volume [4].
Therefore, the choice of analytical technique fundamentally defines the "surface" being studied. A sample preparation protocol that is optimal for XPS analysis might be entirely unsuitable for SIMS, precisely because each technique probes a different "experimental surface."
Experimental Protocols for Surface Characterization
The following protocols are adapted from IUPAC recommendations and standard practices for the physical adsorption characterization of porous and finely divided solids, which are common in pharmaceutical development [5].
Protocol: Sample Outgassing for Surface Area Analysis
1. Principle: The removal of pre-adsorbed contaminants (e.g., water vapor, atmospheric gases) from the surface and pores of a solid is essential prior to measuring surface area via gas physisorption. Inadequate outgassing leads to significant underestimation of surface area and pore volume.
2. Equipment & Reagents:
- Manometric (volumetric) gas sorption analyzer (e.g., Anton Paar Autosorb iQ, Quadrasorb) [5].
- High-purity vacuum system (capable of achieving pressures < 1 Pa, preferably with a turbo molecular pump) [5].
- Sample tube.
- Heating mantle with temperature controller.
3. Procedure:
- Weighing: Accurately weigh the clean, dry sample tube. Transfer a sufficient mass of sample (enough to provide a total surface area of >5 m² for the measurement) into the tube. Reweigh to determine the exact sample mass.
- Mounting: Securely attach the sample tube to the outgassing port of the sorption analyzer.
- Microporous Materials (e.g., zeolites, some MOFs): Apply vacuum (pressure < 1 Pa) and heat the sample to a predetermined temperature (e.g., 300°C) for a specified duration (typically several hours to 24 hours). The temperature must be below the decomposition temperature of the material [5].
- Non-Microporous Materials: As an alternative to vacuum, flushing the sample with an inert, dry gas (e.g., nitrogen or helium) at an elevated temperature for a set time may be sufficient [5].
- Cooling: After the outgassing cycle is complete, isolate the sample tube and allow it to cool to ambient temperature under continuous vacuum or inert gas flow.
- Verification: The sample is considered properly outgassed when the pressure rise in the isolated system is negligible over a period of several minutes.
4. Safety Notes:
- Always know the thermal stability of your sample to prevent decomposition or phase changes.
- Use heat-resistant gloves when handling hot equipment.
Protocol: Void Volume Calibration for Volumetric Adsorption
1. Principle: In manometric (volumetric) gas adsorption, the amount adsorbed is the difference between the gas admitted and the gas required to fill the space around the adsorbent (the "void volume"). An accurate void volume determination is critical for all subsequent calculations [5].
2. Equipment & Reagents:
- Manometric gas sorption analyzer.
- High-purity helium (≥99.999%) or the adsorptive gas to be used (e.g., nitrogen, argon).
- Liquid nitrogen or a CryoSync/CryoCooler device.
3. Procedure (Two Methods):
A. Helium Method (Standard):
- After outgassing, immerse the sample tube in a cryostat (e.g., liquid nitrogen at 77 K or a bath set to 87 K for argon).
- Expand a known amount of helium into the sample tube.
- Measure the equilibrium pressure to calculate the void volume, assuming helium adsorption is negligible under these conditions.
- Note: This assumption may be invalid for solids with very narrow micropores (<1 nm) where helium entrapment can occur [5].
B. NOVA (NO Void Analysis) Mode (For Narrow Micropores):
- Perform a multipoint void volume determination on the empty sample cell using the actual adsorptive (e.g., N₂ or Ar) at the analysis temperature prior to the isotherm measurement.
- This calibrated empty-cell volume is then used as a reference, and the "sample volume" is back-calculated during the subsequent sample analysis, avoiding issues with helium [5].
4. Data Analysis:
- The instrument software typically performs these calculations. The researcher must select the appropriate method based on the sample's porosity and document the choice thoroughly.
The Scientist's Toolkit: Essential Research Reagents and Materials
The following table details key materials and their functions in surface preparation and analysis, as informed by the search results.
Table 2: Key Research Reagent Solutions for Surface Analysis
| Item / Reagent | Primary Function in Surface Analysis | Key Considerations & IUPAC Recommendations |
|---|---|---|
| Metal-Organic Frameworks (MOFs) | Sorbent material for sample preparation (e.g., SPE, SPME) to isolate and concentrate analytes from complex liquid samples [6]. | High specific surface area (up to ~7000 m²/g) and tunable pore size; selection depends on target analyte and required selectivity [6]. |
| Nitrogen Gas (N₂), 77 K | Traditional adsorptive for measuring surface area and mesoporosity (2-50 nm) via physisorption isotherms [5]. | Not recommended for micropore analysis due to quadrupole moment causing specific interactions; can lead to inaccurate pore size distributions [5]. |
| Argon Gas (Ar), 87 K | Recommended adsorptive for accurate micropore size analysis [5]. | Lacks a quadrupole moment, minimizing specific interactions with surface functional groups; provides more reliable pore filling data for micropores [5]. |
| Carbon Dioxide (CO₂), 273 K | Recommended adsorptive for characterizing nanoporous carbons with narrow micropores [5]. | Higher temperature than cryogenic N₂/Ar allows faster diffusion into ultramicropores that are kinetically restricted at lower temperatures. |
| Krypton Gas (Kr), 77 K | Recommended adsorptive for analyzing very low surface area materials (< 1 m²) [5]. | Its low saturation vapor pressure at 77 K allows for more accurate measurements of small adsorbed amounts on limited surfaces. |
Workflow and Relationship Visualization
The following diagram illustrates the logical relationship between IUPAC's surface classifications, the analytical process, and the critical choices that define the experimental surface.
Adherence to IUPAC's precise definitions of "surface" is not a mere formality but a cornerstone of rigorous scientific practice in surface analysis. For a thesis centered on sample preparation, this framework provides the necessary lexicon to justify methodological choices and to accurately interpret analytical results. The researcher must be perpetually aware that the "Experimental Surface"—a volume defined by the specific analytical technique and its parameters—is the true subject of measurement. The protocols for sample preparation, such as outgassing and void volume determination, must be executed with an understanding of their impact on this defined region. By systematically applying these classifications and associated standard practices, researchers in both academia and drug development can ensure their findings on surface properties are reliable, reproducible, and meaningful, thereby building a solid foundation for subsequent development and regulatory review.
The Critical Role of Sample Preparation in Analytical Accuracy and Reproducibility
Sample preparation is a foundational step in analytical science, serving as the critical bridge between a raw sample and a reliable, interpretable result. In the context of surface analysis for drug development and chemical research, the accuracy of analytical techniques is fundamentally constrained by the care taken during sample preparation. Contamination, improper handling, or inconsistent presentation can introduce significant errors, leading to irreproducible data and flawed scientific conclusions [7] [8]. This document outlines standardized protocols and best practices to ensure data integrity, with a focus on methodologies relevant to an IUPAC-guided research framework.
Essential Research Reagent Solutions
The following table details key materials and reagents required for proper sample preparation to ensure analytical accuracy.
Table 1: Essential Materials and Reagents for Sample Preparation
| Item Name | Function/Application | Key Considerations |
|---|---|---|
| High-Purity Indium Foil | Substrate for pressing powdered samples for XPS analysis [8]. | Ensures a clean, conductive surface and avoids interference with the sample's elemental composition. |
| Clean Silicon Wafer | Inert substrate for drop-casting sample solutions [8]. | Provides an atomically flat and clean surface for uniform sample deposition. |
| Isopropyl Alcohol (IPA) | Solvent for cleaning tweezers and other tools via sonication [7] [8]. | Effectively removes organic contaminants without leaving significant residues. |
| Powder-free Gloves (Nitrile/PE) | Personal protective equipment to prevent sample contamination [8]. | Prevents introduction of particulates and skin oils onto the sample surface. |
| Sticky Carbon Conductive Tape | Adhesive substrate for mounting certain powders or particles [8]. | Provides conductivity; should be avoided if carbon is an element of interest in the sample. |
| Clean Polystyrene Petri Dishes | Container for sample storage and transport [7] [8]. | Prevents contamination during sample handling and storage prior to analysis. |
Sample Preparation Workflow for Surface Analysis
The process of preparing a sample for surface analysis involves a series of deliberate, sequential steps to preserve the sample's native state and ensure the resulting data is representative and accurate. The following diagram illustrates the core workflow and decision-making process.
Detailed Experimental Protocols
Protocol for Powdered Samples
Powdered samples present a significant challenge due to their high surface area and potential for contamination. The following quantitative data summarizes the primary methods and their criteria for use.
Table 2: Quantitative Comparison of Powder Preparation Methods for XPS
| Preparation Method | Recommended Sample Amount | Typical Particle Size | Key Advantage | Primary Limitation |
|---|---|---|---|---|
| Pressing into Indium Foil | Sufficient to form a monolayer [8] | Not specified | Creates a flat, conductive surface; preferred method [8] | Potential for incomplete coverage or particle shedding. |
| Drop-Casting from Solution | Varies by solubility [8] | Not applicable (dissolved) | Produces a uniform film on a flat substrate (e.g., Si wafer) [8] | Requires a suitable, pure solvent that does not alter sample chemistry. |
| Sprinkling on Carbon Tape | Sufficient for a sparse monolayer [8] | Not specified | Fast and simple for conductive samples [8] | Carbon tape signal may interfere with analysis; not suitable for loose, fine powders. |
Step-by-Step Procedure for Pressing into Indium Foil:
- Material Preparation: Using clean tweezers, cut a piece of high-purity indium foil to approximately 1 cm x 1 cm. Clean the tweezers via sonication in Isopropyl Alcohol (IPA) for 5-10 minutes and allow to air dry in a clean environment [7].
- Sample Application: Place the indium foil on a clean, stable surface. Gently sprinkle a small amount of the powder onto the center of the foil.
- Pressing: Place a second, smaller piece of clean indium foil or a clean glass slide on top of the powder. Apply firm and even pressure to create a flat, compact layer. The goal is a monolayer where particles are immobilized and in electrical contact with the conductive foil [8].
- Final Inspection: Gently tap or use a stream of clean, dry air to remove any loose, unbound particles. Ensure the analysis side is obvious and document this on the sample submission form [7].
Protocol for Bulk Solid Samples
The integrity of bulk solid analysis depends on a pristine surface.
Step-by-Step Procedure:
- Handling: Manipulate the sample only with powder-free nitrile or polyethylene gloves and clean tools to avoid contamination from skin oils or dust [8].
- Cleaning (if applicable): For samples contaminated with salts or electrolytes, rinse gently with distilled water and air dry. For organic contaminants, consider a gentle wash with a suitable solvent like IPA, ensuring the solvent does not react with the sample [8] [9].
- Mounting: Securely mount the sample on an appropriate XPS sample stub using a double-sided conductive adhesive tab or clip. The analysis area must be flat and unobstructed. For magnetic samples, contact the instrument operator in advance as special mounting procedures are required [8].
General Best Practices for All Sample Types
- Consistency is Critical: For all sample types, especially powders, translucent solids, and liquids, maintain consistency in thickness, size, and presentation for each measurement to ensure reproducibility [9].
- Contamination Control: Always use gloves and clean tools. Store and transport samples in clean glass vials, polystyrene Petri dishes, or new aluminum foil. Avoid all other plastic containers and bags [7] [8].
- Pump-down Time: Samples with high surface area (e.g., powders) or those that have been immersed in liquids require longer pump-down times in the vacuum chamber. It is often advisable to load such samples into the instrument's load lock the evening before analysis [8].
Material Selection Logic for Sample Preparation
Choosing the correct preparation materials is paramount to avoid introducing analytical artifacts. The logic below guides the selection of substrates and handling tools based on sample properties.
Adherence to rigorous, standardized sample preparation protocols is not merely a preliminary task but a determinant of analytical success. The methodologies detailed herein, developed within the context of IUPAC-guided research, provide a framework for achieving the accuracy and reproducibility demanded in scientific research and drug development. By systematically controlling for contamination, selecting appropriate materials, and following consistent workflows, researchers can ensure that their analytical results are a true reflection of the sample's properties and not an artifact of its preparation.
Identifying Common Surface Contaminants and Their Impact on Analytical Results
Within the framework of IUPAC guidelines for sample preparation and surface analysis, the control of surface contamination is not merely a procedural step but a fundamental determinant of analytical accuracy [1]. Surface contaminants are defined as impurities that physisorb, bond, or settle on surfaces, adversely affecting the physical and chemical properties of the material and subsequent analytical measurements [10] [11]. These contaminants originate from diverse sources including manufacturing processes, environmental exposure, and improper handling, presenting in both visible and invisible forms with thicknesses ranging from monolayers to layers several nanometers thick [10]. For researchers and drug development professionals, the implications extend beyond analytical interference to encompass regulatory compliance, product safety, and material integrity, particularly when working with potent active pharmaceutical ingredients (APIs) where cross-contamination poses serious health risks [12]. This application note provides a comprehensive framework for identifying, quantifying, and mitigating surface contaminants to ensure analytical reliability in accordance with IUPAC standards for surface characterization.
Surface contaminants can be systematically categorized based on their composition, origin, and physical characteristics. Understanding this classification is essential for developing targeted detection and mitigation strategies.
Table 1: Classification of Common Surface Contaminants
| Contaminant Category | Specific Examples | Primary Sources | Physical Form |
|---|---|---|---|
| Carbonaceous Residues | Adventitious carbon, Heavy hydrocarbons, Graphite-like carbon | Airborne hydrocarbons, Incomplete combustion, Plasma cleaning residues [10] | Invisible thin films (3-8 nm) [10] |
| Silicone-Based Compounds | Silicone oil, Silicone polymers | Lubricants, Door seals, Laboratory tubing [10] [13] | Oily films, Residues |
| Particulates | Dust, Rust, Mill scale | Shot blasting, Environmental dust, Equipment wear [10] [14] | Micron-sized particles [10] |
| Soluble Salts | Chlorides, Sulfates | Acid rain, Marine environments, Industrial pollution, Process water [10] [11] | Crystalline deposits, Invisible films |
| Biological Matter | Microorganisms, Pyrogens | Stagnant water, Improper equipment storage [12] | Biofilms, Particulates |
| Metallic Residues | Aluminum, Iron, Zinc, Lead | Labware leaching, Environmental air, Cleaning tools [13] | Ions, Particles |
Invisible Contaminants: The Hidden Challenge
The most insidious contaminants are those not visible to the naked eye. Adventitious carbon represents a universal contaminant found on all materials exposed to ambient conditions, typically forming layers of 3-8 nanometers thickness [10]. Similarly, silicone oil contamination migrates readily from lubricants and seals, while soluble salts such as chlorides and sulfates deposit from environmental sources like acid rain and marine spray [10] [11]. These invisible contaminants are particularly problematic in semiconductor, optoelectronic, and pharmaceutical industries where molecular-level purity is critical for device performance and product safety [10].
Visible Contaminants: Indicators of Process Control Failures
Visible contaminants including dust, grime, rust, and oil films often signal broader process control issues [10] [14]. While more readily identified, their presence indicates potential cross-contamination risks that can compromise analytical results and product quality. In industrial coating applications, visible residues such as oil films prevent proper adhesion of protective coatings, leading to premature failure and accelerated corrosion [10] [14].
Impact of Contaminants on Analytical Results and Material Performance
Surface contaminants introduce significant errors in analytical measurements and impair material performance through multiple mechanisms.
Analytical Interference Mechanisms
The presence of surface contaminants can interfere with analytical techniques through various physical and chemical mechanisms. In Atomic Force Microscopy (AFM), hydrocarbon and water vapor contamination layers create capillary forces that cause attractive interactions between the probe and sample, resulting in false feedback, reduced resolution, limited scan rates, and image artifacts [10]. For spectroscopic techniques like X-ray Photoelectron Spectroscopy (XPS), surface contamination alters the elemental composition readings within the typical analysis depth of 10 nanometers, potentially leading to misinterpretation of surface chemistry [10]. In ICP and ICP-MS analysis, trace contaminants from water, acids, or labware can elevate background signals, producing falsely elevated results for common elements like sodium, calcium, aluminum, and zinc at parts-per-billion or parts-per-trillion levels [13].
Table 2: Impact of Common Laboratory Contaminants on Analytical Results
| Contaminant Source | Affected Elements | Typical Concentration Range | Primary Analytical Techniques Affected |
|---|---|---|---|
| Borosilicate Glassware | Boron, Silicon, Sodium | Variable, potentially significant at low ppm [13] | ICP-MS, ICP-OES, Trace metal analysis |
| Impure Acids (e.g., HCl) | Various metals (Fe, Ni, etc.) | Up to 100 ppb in acid [13] | All elemental analysis techniques |
| Laboratory Air (Ordinary) | Iron, Lead, Aluminum | ng/m³ levels [13] | Surface analysis, Trace element analysis |
| Silicone Tubing | Silicon, Aluminum, Iron, Magnesium | Significant in presence of nitric acid [13] | HPLC, Flow-based analysis systems |
| Powdered Gloves | Zinc | High concentrations [13] | Trace element analysis, Surface analysis |
Material Performance Degradation
Beyond analytical interference, surface contaminants critically impact material performance and longevity. The most significant consequence involves corrosion initiation, where soluble salts such as chlorides and sulfates react with metal surfaces to form corrosion cells, accelerating material degradation [10] [11]. In protective coating applications, contaminants at the coating-substrate interface cause adhesive failure through osmotic blistering, where moisture drawn through the coating forms blisters beneath it, leading to delamination and under-film corrosion [10] [14] [11]. For pharmaceutical manufacturing, cross-contamination between potent compounds (e.g., steroids, hormones) or with pesticide residues presents serious health risks, as evidenced by FDA recalls and import alerts [12].
Detection and Analytical Methods for Surface Contamination
A systematic approach to contamination detection employs complementary analytical techniques to characterize both the composition and distribution of surface residues.
Advanced Analytical Techniques
X-ray Photoelectron Spectroscopy (XPS/ESCA): This surface-sensitive technique provides quantitative elemental composition within the top 10 nanometers of a surface, enabling identification of chemical states and detection of as little as 0.1 monatomic layer of contamination [10]. XPS is particularly valuable for characterizing adventitious carbon, silicone contamination, and evaluating surface cleanliness after cleaning procedures [10].
Chromatographic-Mass Spectrometric Methods: Liquid chromatography coupled with tandem mass spectrometry (LC-MS/MS) enables detection and quantification of organic contaminants including pesticides, pharmaceuticals, and process residues at nanogram per liter levels [15] [16]. These methods are essential for monitoring environmental contaminants of concern in water and wastewater, with applications extending to pharmaceutical manufacturing cleanliness verification [15] [16].
Atomic Force Microscopy (AFM): AFM imaging combined with force-distance (F/D) curve measurements directly characterizes contamination layer thickness and properties through interactive forces between the probe and sample surface [10]. This technique is particularly sensitive to hydrocarbon and water vapor layers that affect nanoscale measurements.
Inductively Coupled Plasma Mass Spectrometry (ICP-MS): For trace metal contamination, ICP-MS provides exceptional sensitivity down to parts-per-trillion levels, making it indispensable for quantifying metallic impurities from labware, reagents, and environmental sources [13].
Standardized Surface Preparation and Cleanliness Assessment
Industry standards provide standardized methodologies for surface preparation and cleanliness assessment. The Association for Materials Protection and Performance (AMPP, formerly SSPC/NACE) standards define specific cleanliness levels for steel surfaces before coating application [14]:
- SSPC-SP-1 Solvent Cleaning: Removes soluble contaminants using steam, emulsifying agents, or cleaning compounds [14].
- SSPC-SP-5 White Metal Blast Cleaning: Produces a surface uniformly free of all visible contaminants with a white or gray appearance [14].
- SSPC-SP-10 Near-White Metal Blast Cleaning: Allows only 5% of each unit area to exhibit random staining [14].
- SSPC-SP-6 Commercial Blast Cleaning: Permits up to 33% of each unit area to contain residual stains [14].
These standards establish reproducible methods for quantifying surface cleanliness, with applicability extending beyond industrial coatings to analytical sample preparation.
Experimental Protocols for Contamination Assessment and Control
Protocol 1: Surface Cleanliness Validation for Analytical Equipment
This protocol aligns with FDA guidance on cleaning validation for pharmaceutical equipment [12] and can be adapted for analytical instrumentation.
Objective: To verify the effectiveness of cleaning procedures for analytical equipment and prevent cross-contamination between samples.
Materials and Reagents:
- High-purity water (ASTM Type I or better) [13]
- High-purity acids (trace metal grade) [13]
- Appropriate solvents (HPLC grade or better)
- Sampling materials (swabs, rinsate collection containers)
- Analytical instrumentation appropriate for target residues
Procedure:
- Establish Acceptance Criteria: Define scientifically justifiable residue limits based on analytical method sensitivity, typically including:
- Analytical detection levels (e.g., 10 ppm)
- Biological activity levels (e.g., 1/1000 of normal therapeutic dose)
- No visible residue [12]
Develop Sampling Plan:
- Identify worst-case locations in equipment (hard-to-clean areas, transfer lines, valves)
- Employ swab sampling for direct surface contact or rinse sampling for overall residue recovery
- Document sampling locations with reference to equipment diagrams [12]
Execute Cleaning and Sampling:
- Perform cleaning procedure according to established SOP
- Collect samples immediately after cleaning, documenting time between processing and cleaning
- Include procedural blanks to account for background contamination [12]
Analyze Samples:
- Utilize analytical methods with appropriate sensitivity (HPLC, LC-MS, ICP-MS)
- Target not only primary reactants but also potential by-products and degradants
- Include method validation data demonstrating specificity, accuracy, and precision [12]
Document and Report:
- Compare results against predetermined acceptance criteria
- Investigate any deviations and implement corrective actions
- Establish revalidation schedule based on equipment use and historical data [12]
Protocol 2: Minimizing Contamination in Trace Element Analysis
Adapted from laboratory practices for ICP and ICP-MS analysis [13], this protocol addresses common contamination sources in ultra-trace measurements.
Objective: To minimize introduction of contaminants during sample preparation for trace element analysis.
Materials and Reagents:
- ASTM Type I water (resistivity >18 MΩ·cm) [13]
- High-purity acids (ICP-MS grade) [13]
- Fluoropolymer (FEP) or quartz labware [13]
- Powder-free gloves [13]
- Cleanroom environment (preferred) or class 100 laminar flow hood [13]
Procedure:
- Labware Preparation:
- Segregate labware for high-level (>1 ppm) and low-level (<1 ppm) use [13]
- Avoid borosilicate glass for boron and silicon analysis [13]
- Implement automated pipette washing systems to reduce residual contamination compared to manual cleaning [13]
- Pre-clean all labware with high-purity acid (e.g., 10% nitric acid) followed by multiple rinses with high-purity water
Sample Handling:
Reagent Quality Verification:
- Check certificates of analysis for all acids and reagents
- Perform reagent blank analyses to establish background levels
- Avoid hydrochloric acid when possible due to typically higher impurity levels [13]
Environmental Monitoring:
- Regularly analyze procedural blanks to monitor laboratory background
- Implement air particulate monitoring in critical sample preparation areas
- Maintain positive pressure in clean areas to minimize particulate ingress [13]
The Scientist's Toolkit: Essential Research Reagent Solutions
Table 3: Essential Materials for Surface Contamination Control
| Material/Reagent | Specification/Grade | Primary Function | Contamination Risks Mitigated |
|---|---|---|---|
| High-Purity Water | ASTM Type I [13] | Diluent, rinse solution | Ionic contamination, Trace elements |
| Nitric Acid | Trace metal grade, ICP-MS grade [13] | Sample digestion, Labware cleaning | Various metal impurities |
| Ammonium Hydroxide | High purity [13] | pH adjustment, Cleaning agent | Metallic impurities |
| Fluoropolymer (FEP) Labware | Metal-free certified [13] | Sample storage, preparation | Boron, silicon, sodium leaching |
| Powder-Free Gloves | Low extractables [13] | Personal protective equipment | Zinc, other particulate contamination |
| High-Purity Solvents | HPLC grade or better | Extraction, Cleaning | Organic residues, Additives |
| Certified Reference Materials | Current expiration dates [13] | Quality control, Calibration | Incorrect analytical results |
| XPS Test Kits | Silicone/fluorocarbon specific [10] | Facility contamination evaluation | Silicone contamination, Surface effects |
The identification and control of surface contaminants represents a critical component in ensuring analytical accuracy and material performance, particularly within the framework of IUPAC guidelines for surface analysis. A systematic approach encompassing proper material selection, standardized cleaning protocols, and validated analytical methods is essential for researchers and drug development professionals. Implementation of the protocols and methodologies outlined in this application note provides a foundation for reducing analytical errors, improving product quality, and maintaining regulatory compliance. As analytical techniques continue to advance with increasingly sensitive detection capabilities, vigilance in contamination control becomes ever more critical to generating reliable, defensible scientific data.
Surface analysis is a critical component of materials science, playing a pivotal role in characterizing the outermost atomic layers of solids to understand composition, structure, and chemical state. This technical note provides a detailed overview of four principal surface analysis techniques—X-ray Photoelectron Spectroscopy (XPS), Auger Electron Spectroscopy (AES), Ion Scattering Spectroscopy (ISS), and Secondary Ion Mass Spectrometry (SIMS). Framed within the context of developing a comprehensive IUPAC guide for sample preparation, this document serves researchers, scientists, and drug development professionals who require precise surface characterization for their work. These techniques offer complementary information for investigating surface phenomena, with applications spanning from battery cathode development to pharmaceutical surface characterization, making them indispensable tools in modern analytical science [17] [18].
The exceptional utility of these methods lies in their ability to probe the top 1-10 nanometers of a material, where many critical interactions occur. Each technique operates on different physical principles, offers varying levels of sensitivity, and provides unique information about the sample surface. Proper selection and application of these techniques require a thorough understanding of their fundamental principles, capabilities, and limitations, particularly regarding sample preparation requirements that ensure accurate and reproducible results while maintaining surface integrity.
Fundamental Principles and Technical Specifications
Physical Principles and Information Obtained
Each surface analysis technique exploits distinct physical phenomena to extract information about surface composition and chemistry:
X-ray Photoelectron Spectroscopy (XPS): This technique operates on the photoelectric effect, where incident X-rays eject core-level electrons from surface atoms. The measured kinetic energy of these photoelectrons provides information about elemental identity, chemical state, and bonding environment. XPS is particularly valuable for determining chemical states and oxidation states of elements present on the surface [19].
Auger Electron Spectroscopy (AES): AES relies on the Auger process, where an incident electron beam creates a core-hole vacancy, followed by a relaxation process that emits a characteristic Auger electron. The kinetic energy of these Auger electrons serves as a fingerprint for elemental identification in the top 3-10 nm of the material. AES is particularly efficient for light element detection and offers exceptional spatial resolution [20] [21].
Ion Scattering Spectroscopy (ISS): ISS is based on the principles of elastic scattering between incident ions and surface atomic nuclei. By measuring the energy and angle of scattered ions, ISS provides information about the elemental composition and structure of the very outermost atomic layer, making it the most surface-sensitive technique available [18].
Secondary Ion Mass Spectrometry (SIMS): SIMS uses a focused primary ion beam to sputter material from the surface, with a fraction of the ejected particles becoming ionized. These secondary ions are then analyzed by a mass spectrometer, providing extremely sensitive elemental, isotopic, and molecular information from the uppermost atomic layers [22].
Technical Specifications and Comparison
The following table summarizes the key technical specifications and capabilities of the four surface analysis techniques, providing a clear comparison for technique selection:
Table 1: Comparison of Key Surface Analysis Techniques
| Parameter | XPS | AES | ISS | SIMS |
|---|---|---|---|---|
| Primary Excitation | X-rays | Electron beam (3-25 keV) | Ion beam (noble gases) | Ion beam (O₂, Cs⁺) |
| Signal Detected | Photoelectrons | Auger electrons | Scattered ions | Secondary ions |
| Detection Limits | 0.1-1 at% | 0.1-1 at% | Varies with element | ppb-ppm range |
| Depth Resolution | 2-10 nm | 2-20 nm | Single atomic layer | Sub-nm to tens of nm |
| Lateral Resolution | 10-100 µm | ≥10 nm | Varies with instrument | Down to 40 nm |
| Elements Detected | Li and heavier | Li and heavier | Primarily heavier elements | H to U and above |
| Chemical Information | Excellent (chemical states) | Limited | Limited for bonding | Molecular information possible |
| Depth Profiling | With ion sputtering | With ion sputtering | By angle variation | Native capability |
| Quantitative Analysis | Good with standards | Semi-quantitative | Quantitative with calibration | Requires standards |
Experimental Protocols and Methodologies
Sample Preparation Guidelines
Proper sample preparation is critical for obtaining reliable surface analysis data. The following protocols outline essential considerations for each technique:
Universal Preparation Considerations
All ultra-high vacuum (UHV) surface analysis techniques share common sample preparation requirements:
- Clean Handling: Use powder-free gloves and clean tools to prevent surface contamination.
- Size Compatibility: Samples must fit the instrument sample holder, typically less than several millimeters.
- UHV Compatibility: Materials must withstand ultra-high vacuum conditions (<10⁻⁹ torr) without significant outgassing [20].
- Surface Stability: Samples should not degrade or transform under beam exposure during analysis.
Technique-Specific Preparation Methods
XPS Sample Preparation:
- Conducting and insulating samples can typically be analyzed without modification.
- Powders should be pressed into indium foil or mounted on double-sided adhesive tapes.
- Flat surfaces are preferred for quantitative analysis to minimize topography effects.
- Sputter cleaning with Ar⁺ ions may be used to remove adventitious carbon contamination.
AES Sample Preparation:
- Samples must be electrically conductive to prevent charging under electron beam.
- For insulating samples, use specialized mounting techniques such as:
- Surface cleaning with low-energy ion sputtering is often necessary to remove contaminants.
ISS Sample Preparation:
- Surfaces must be atomically clean, often requiring in situ sputter-anneal cycles.
- Flat, well-ordered surfaces yield the best results for structural analysis.
- Special precautions are needed to maintain surface cleanliness during transfer.
SIMS Sample Preparation:
- Minimal special preparation is needed beyond standard UHV compatibility.
- Conductive and insulating materials can be analyzed.
- For insulating samples, electron flood guns may be used for charge compensation.
- Standards with known composition are essential for quantitative analysis.
Instrumental Workflows and Procedures
The following diagram illustrates the generalized workflow for surface analysis experiments, from sample preparation to data interpretation:
Diagram 1: Generalized Surface Analysis Workflow
XPS Analysis Protocol
- Sample Loading: Introduce the sample into the UHV chamber using a load-lock system to maintain main chamber vacuum integrity.
- Survey Scan: Acquire a wide energy range survey spectrum (e.g., 0-1100 eV) to identify all elements present.
- High-Resolution Scans: Collect narrow energy range scans for regions of interest to determine chemical states.
- Quantitative Analysis: Calculate atomic concentrations using peak areas and elemental sensitivity factors.
- Depth Profiling (if required): Employ monatomic or cluster ion sputtering while intermittently analyzing the newly exposed surface.
AES Analysis Protocol
- SEM Imaging: Use the focused electron beam to obtain secondary electron images and identify regions of interest.
- Point Analysis: Position the electron beam on specific features and acquire Auger spectra.
- Elemental Mapping: Raster the beam across the sample surface while detecting specific Auger electrons to create elemental distribution maps.
- Depth Profiling: Combine with ion sputtering to determine composition as a function of depth.
SIMS Analysis Protocol
- Primary Ion Selection: Choose O₂⁺ primary ions for enhanced positive secondary ions or Cs⁺ for enhanced negative secondary ions [22].
- Analysis Mode Selection:
- Static SIMS: Use low primary ion dose (<10¹³ ions/cm²) to preserve molecular information from the top monolayer.
- Dynamic SIMS: Use higher primary ion dose for bulk composition and depth profiling of trace elements.
- Mass Spectrometry: Analyze the mass-to-charge ratio of ejected secondary ions.
- Depth Profiling: Monitor secondary ion intensities as a function of sputtering time to obtain depth distributions.
Essential Materials and Research Reagents
Successful surface analysis requires specific materials and reagents for sample preparation, mounting, and analysis. The following table details these essential items:
Table 2: Essential Research Reagents and Materials for Surface Analysis
| Material/Reagent | Function/Purpose | Technique Applicability |
|---|---|---|
| Indium Foil | Conductive, malleable substrate for mounting small or powder samples | AES, XPS |
| Conductive Carbon Tape | Sample mounting with electrical continuity to holder | All techniques |
| Double-Sided Adhesive Tape | Mounting insulating samples without conductive coatings | XPS, SIMS |
| High-Purity Argon Gas | Source for ion sputter guns for surface cleaning and depth profiling | All techniques |
| Silicon Wafer Substrates | Clean, flat reference substrates for instrument calibration | All techniques |
| Certified Reference Materials | Quantification standards with known composition | All techniques |
| Colloidal Graphite Paint | Creating electrical pathways for charge dissipation on insulators | Primarily AES |
| Ultra-High Purity Solvents | (e.g., methanol, acetone) for ultrasonic cleaning without residue | Sample preparation |
| Copper TEM Grids | Masking insulating samples to minimize charging | AES |
| Gold/Palladium Targets | Thin film deposition for reference samples | Instrument calibration |
Advanced Applications and Case Studies
Battery Cathode Characterization
The combination of XPS and TOF-SIMS has proven invaluable for studying engineered particle (Ep) battery cathodes. In lithium metal battery systems, these techniques reveal how Ep coatings stabilize electrode-electrolyte interfaces, reduce side reactions, and mitigate transition metal dissolution from high-voltage cathode materials like lithium cobalt oxide (LCO). XPS provides chemical state information about the interface, while TOF-SIMS offers high-resolution detection of organic and inorganic species distribution, enabling researchers to optimize interfacial stability and enhance battery performance and longevity [17].
Defect and Contamination Analysis
AES excels at identifying sub-micrometer particles and defects in electronic devices. Its high spatial resolution (≥10 nm) enables precise elemental analysis of small surface features that can cause device failures. AES can determine oxide layer thickness on electropolished medical devices, analyze bond pads on semiconductor die, and identify grain boundary contamination in metal fractures. The ability to perform small-area depth profiling makes AES particularly valuable for failure analysis in semiconductor and metallurgical applications [21] [23].
Ultra-Sensitive Trace Element Detection
SIMS provides unparalleled sensitivity for trace element and isotopic analysis, with detection limits reaching parts-per-billion levels for many elements. This extreme sensitivity makes SIMS ideal for dopant and contaminant analysis in semiconductors, high-precision isotope ratio measurements, and distribution analysis of trace elements in materials. The technique's high lateral resolution (down to 40 nm) enables detailed imaging of elemental distributions, while its depth profiling capabilities allow characterization of thin film structures with nanometer-scale resolution [22].
Outermost Surface Layer Analysis
ISS uniquely probes the very outermost atomic layer of a material, providing information unavailable with other techniques. This extreme surface sensitivity makes ISS ideal for studying surface segregation, catalyst characterization, thin film growth, and adsorption phenomena. While less sensitive for light elements, ISS provides excellent elemental specificity for heavier elements and can achieve high depth resolution through angle-resolved measurements, making it valuable for understanding surface reactions and interface formation [18].
Technique Selection Guidelines
Choosing the appropriate surface analysis technique requires careful consideration of the specific analytical needs:
For chemical state information and quantitative analysis of the top 2-10 nm: Select XPS, particularly for insulating materials or when chemical bonding information is crucial [19].
For high spatial resolution elemental analysis of the top 3-10 nm on conductive samples: Choose AES, especially for defect analysis, small particles, or features smaller than 1 micrometer [20] [21].
For extreme surface sensitivity analyzing only the outermost atomic layer: Employ ISS for studying surface segregation, adsorption, or catalyst surfaces [18].
For ultimate detection sensitivity (ppb levels) and isotopic information: Utilize SIMS, particularly for trace element analysis, depth profiling, or when molecular information is needed in static mode [22].
For comprehensive characterization of complex materials: Consider using multiple complementary techniques, such as the combined XPS and TOF-SIMS approach successfully applied to battery materials [17].
The following decision diagram provides a systematic approach for selecting the most appropriate surface analysis technique:
Diagram 2: Surface Analysis Technique Selection Guide
XPS, AES, ISS, and SIMS represent powerful complementary techniques for surface characterization, each with unique strengths and applications. XPS excels in providing chemical state information and quantitative analysis, AES offers exceptional spatial resolution for conductive materials, ISS provides unparalleled sensitivity to the outermost atomic layer, and SIMS delivers extreme elemental sensitivity and depth resolution. Understanding the fundamental principles, technical capabilities, and sample preparation requirements for each technique is essential for obtaining meaningful surface analysis data. As surface science continues to advance, these techniques will remain indispensable for materials development, failure analysis, and fundamental surface studies across diverse scientific and industrial fields. Proper technique selection, coupled with appropriate sample preparation protocols, enables researchers to extract maximum information from material surfaces and interfaces, driving innovation in technology and science.
Practical Sample Preparation Methods for Biomedical Surface Analysis
In the field of surface chemical analysis, the pre-treatment of samples is a critical step that directly influences the reliability and accuracy of analytical results. As defined by the International Union of Pure and Applied Chemistry (IUPAC), surface analysis techniques require specimens with well-defined surfaces free from artifacts introduced during preparation [24]. Ex-situ preparation, where these processes occur separately from the analysis instrument, encompasses mechanical and chemical techniques such as cutting, polishing, and etching. This article outlines standardized protocols and application notes for these essential methods, providing a structured guide for researchers and scientists, particularly those in drug development and materials science, to achieve surfaces fit for purpose according to international quality assurance standards [25].
Experimental Protocols and Application Notes
Chemical Etching for Precision Metal Components
Chemical etching is a subtractive machining process that utilizes thermochemical reactions to selectively remove material from a metal substrate, achieving high precision without affecting the material's inherent properties [26].
Step-by-Step Protocol:
- Material Selection: Begin with a metal sheet suitable for the final component's requirements. The process accommodates a wide thickness range, typically from 0.010 mm to 2.5 mm [26].
- Pre-cleaning: Chemically clean and degrease the metal sheet to remove all debris, waxes, and rolling oils. This is critical for ensuring subsequent proper adhesion of the photoresist [26].
- Lamination: Apply an ultraviolet (UV)-light-sensitive photoresist layer to the entire surface of the pre-cleaned sheet. Ensure a uniform and blemish-free application, as any imperfections can lead to etchant penetration and part compromise [26].
- Printing: Align a photo tool stencil containing the desired component design with the laminated sheet. Expose the assembly to UV light, which crosslinks the photoresist in the exposed areas, transferring the design pattern onto the sheet [26].
- Developing: Wash the sheet in a developer solution to dissolve and remove the unexposed, soft photoresist. This step reveals the bare metal in the areas designated for etching while the hardened resist protects the features to be preserved [26].
- Etching: Spray the developed sheet with a corrosive etchant chemistry, most commonly ferric chloride. The etch time is a determined by a technician based on variables including metal type, grade, thickness, and the size of the features to be formed [26].
- Stripping: Following etching, remove the remaining hardened photoresist from the metal sheet using an appropriate chemical stripper, revealing the final etched components [26].
- Inspection and Finishing: Subject the components to visual and dimensional inspection using optical equipment. If required, subsequent finishing processes such as plating, passivation, or heat treatment can be performed [26].
Chemo-Mechanical Polishing for Semiconductor Substrates
Chemical-mechanical polishing (CMP) is a critical process for planarizing semiconductor substrates, such as tungsten wafers, combining chemical and mechanical actions to achieve ultra-smooth surfaces.
Detailed Protocol:
Table 1: Key Components of a Typical Tungsten Polishing Composition
| Component Category | Example | Function | Key Characteristic |
|---|---|---|---|
| Abrasive Grain | Silica, Alumina, Zirconia | Mechanical abrasion | Mean particle diameter ≤ 200 nm |
| Oxidizing Agent | Hydrogen peroxide, Iron(III) nitrate | Oxidizes metal surface for easier removal | Concentration 0.5-3.0% by mass |
| Organic Acid | Oxalic acid, Citric acid | Forms soluble metal complexes | Prevents redeposition of removed material |
| Dispersing Agent | Various polymers | Maintains suspension stability | Prevents particle agglomeration |
| pH Adjustor | Ammonia, Potassium hydroxide | Optimizes chemical activity | Typically adjusted to pH 2.0-5.5 |
- Composition Preparation: Formulate the polishing slurry by combining the components listed in Table 1 in deionized water. The specific formulation must be tailored to the substrate material (e.g., tungsten, tungsten alloy) [27].
- Substrate Mounting: Secure the semiconductor substrate onto a polishing holder, ensuring it is firmly and evenly held.
- Polishing Process: Feed the polishing slurry onto a polishing platen covered with a polyurethane pad. Press the substrate face-down against the rotating pad. The process parameters—including downforce pressure, platen speed, and slurry flow rate—are carefully controlled to achieve the desired material removal rate and surface planarity [27].
- Post-Polishing Cleaning: After polishing, thoroughly rinse the substrate with deionized water to remove all abrasive particles and chemical residues from the surface. This step is crucial to prevent contamination.
- Quality Control: Inspect the polished surface using techniques such as powder X-ray diffraction for crystallographic analysis and other metrology tools to measure surface roughness and ensure it meets the required specifications [27].
Dry Etching for Semiconductor Patterning
Dry etching is a vital process in semiconductor fabrication for the removal of material from a masked pattern on a substrate.
Process Overview:
This technique involves placing the patterned substrate in a vacuum chamber and exposing it to a bombardment of ions (often plasma-based) [28]. The ions interact with the surface, physically sputtering and/or chemically reacting with the unmasked material, thereby selectively etching it away. The highly anisotropic nature of dry etching allows for the creation of features with vertical sidewalls, which is essential for advanced micro- and nano-electronics.
The Scientist's Toolkit: Key Research Reagent Solutions
The efficacy of ex-situ preparation methods is highly dependent on the reagents and materials used. The table below details essential solutions and their functions.
Table 2: Essential Reagents for Ex-Situ Surface Preparation
| Reagent/Material | Primary Function | Application Notes |
|---|---|---|
| Ferric Chloride (FeCl₃) | Corrosive etchant | A common etchant for a wide range of metals; concentration and temperature control are critical for etch rate and finish [26]. |
| Hydrogen Peroxide (H₂O₂) | Oxidizing agent | Used in polishing slurries to oxidize metal surfaces, making them more amenable to mechanical removal [27]. |
| Photoresist | UV-sensitive polymer mask | Used in etching and lithography to protect selected areas of the substrate from the etchant; available in positive and negative tones [26]. |
| Silica & Alumina Nanoparticles | Abrasive grains | Provide the mechanical action in polishing slurries; particle size and distribution are key to controlling removal rate and surface scratch quality [27]. |
| Oxalic & Citric Acids | Organic complexing agents | Chelate with metal ions in polishing slurries, preventing redeposition of removed material and enhancing removal rates [27]. |
| Ionized Gas (e.g., Ar⁺, CF₄) | Etchant species in plasma | The reactive medium in dry etching processes; gas selection determines the chemical (reactive) or physical (sputtering) nature of the etch [28]. |
Workflow and Pathway Visualization
The following diagram illustrates the logical sequence and decision pathways involved in selecting and applying the primary ex-situ preparation methods for surface analysis.
Pathway for Ex-Situ Surface Preparation Selection
This workflow guides the user from the initial sample state to the most appropriate preparation technique, based on the desired outcome and material properties.
The meticulous application of mechanical and chemical ex-situ preparation methods—including polishing, cutting, and etching—is a foundational requirement for generating high-quality, reliable data in surface analysis. Adherence to standardized protocols, such as those detailed in this document, ensures that sample surfaces are fit for their intended analytical purpose. Furthermore, compliance with established guidelines for single-laboratory method validation, as outlined by IUPAC and other international bodies, is indispensable for demonstrating the reliability of these preparation techniques within a comprehensive quality assurance framework [25]. By integrating these robust, well-defined procedures into their research and development workflows, scientists and drug development professionals can significantly enhance the integrity and reproducibility of their surface analysis results.
Within the field of surface science, the accurate characterization of material interfaces is fundamentally dependent on the initial condition of the sample. In-situ preparation under ultra-high vacuum (UHV) conditions comprises a suite of techniques designed to create atomically clean and well-defined surfaces immediately prior to analysis, thereby preventing contamination from ambient exposure. These methods are crucial for obtaining reliable and reproducible data on surface composition, structure, and electronic properties. The integrity of surface analysis, a cornerstone of modern research from semiconductors to biomaterials, is predicated on meticulous sample preparation [29]. Adherence to standardized protocols, such as those outlined in metrological guidelines for purity assignment, ensures the traceability and validity of experimental results, connecting fundamental research directly to application-driven standards [30]. This document provides detailed application notes and protocols for three core in-situ UHV techniques: cleavage, fracture, and heating.
The Scientist's Toolkit: Essential Materials and Reagents
The following table catalogues the essential reagents, materials, and equipment required for the in-situ preparation techniques described in this guide.
Table 1: Key Research Reagent Solutions and Essential Materials for In-Situ UHV Preparation
| Item Name | Function/Application | Key Considerations |
|---|---|---|
| UHV System | Provides the necessary environment (pressures typically <10⁻⁹ mbar) to prevent surface contamination by gases. | Base pressure, chamber volume, and number of ports for analysis and preparation techniques are critical. |
| Sample Mounts & Holders | Secure and position the sample within the UHV system. | Must be compatible with high temperatures and fabricated from high-purity, low-vapor-pressure materials (e.g., Ta, Mo, W). |
| Cleavage Blades & Anvils | Used to apply a localized force for cleaving brittle crystals along their natural crystal planes. | Typically made of hardened steel or tungsten carbide. Geometry is specific to the sample and cleavage mechanism. |
| In-Situ Fracture Stage | A specialized fixture for applying stress to notched samples to induce brittle fracture. | Must be robust enough to generate high stress while maintaining UHV integrity. |
| Direct Heating Filaments | Resistive heating elements placed directly behind or in contact with the sample. | Fast heating rates; risk of sample contamination if filament outgasses. |
| Electron Bombardment Heater | Heats the sample by directing a beam of high-energy electrons onto its rear surface. | Can achieve very high temperatures (>2000°C); requires careful power control to avoid melting. |
| High-Purity Wires (Ta, Mo, W) | Used for spot-welding samples to holders for secure mechanical and thermal contact. | High melting point and good electrical conductivity are essential. |
| Sputter Ion Gun | Source of inert gas ions (e.g., Ar⁺) for removing surface layers via sputtering, often paired with annealing. | Ion energy and current density must be optimized to prevent ion implantation and surface damage. |
Protocols for In-Situ Cleavage
Application Notes
In-situ cleavage is a mechanical separation technique used to expose fresh, pristine surfaces of single-crystal or layered materials inside the UHV chamber. This method is highly effective for materials with defined cleavage planes, such as graphite, transition metal dichalcogenides, and many semiconductors (e.g., GaAs, Si) [29]. The primary advantage is the creation of large, atomically flat and clean surfaces that are free from solvent or thermal processing history. This makes it ideal for studying intrinsic surface properties, electronic band structures, and the physics of two-dimensional materials [31].
Step-by-Step Experimental Protocol
Ex-Situ Preparation:
- Sample Shaping: For a "pin and anvil" setup, shape the single-crystal sample into a rectangular rod (typical dimensions: 1x1x10 mm).
- Notching: Using a fine wire saw or diamond blade, carefully cut a shallow notch (approximately 10-20% of the cross-section) at the desired cleavage position on the rod.
- Solvent Cleaning: Ultricate the sample in a series of high-purity solvents (e.g., acetone, followed by isopropanol) to remove organic contaminants from handling and shaping.
- Mounting: Secure the notched sample onto a UHV-compatible cleavage stage using a high-temperature ceramic adhesive or a mechanical clamp.
In-Situ Cleavage in UHV:
- Transfer and Pump-Down: Introduce the loaded stage into the UHV system and pump down to the base pressure (typically <1x10⁻⁹ mbar) to ensure a contaminant-free environment.
- Alignment: Precisely align a hardened steel or tungsten carbide cleavage blade with the notch on the sample. The blade should be positioned to apply a tensile stress at the notch root.
- Cleavage Execution: Actuate the blade to apply a controlled, sharp impulse or slow pressure to the notch. Successful cleavage is often audibly indicated by a "click" and visually confirmed by a change in the sample's appearance.
- Post-Cleavage Verification: Transfer the freshly cleaved surface to an analysis position (e.g., for SEM, XPS, or STM) to confirm surface quality, flatness, and the absence of contaminants.
Table 2: Key Parameters for Cleavage of Common Materials
| Material | Cleavage Plane | Notch Depth (Typical) | Difficulty | Expected Surface Quality |
|---|---|---|---|---|
| Highly Oriented Pyrolytic Graphite (HOPG) | (0001) | Optional | Easy | Atomically flat terraces over µm areas. |
| Mica (Muscovite) | (001) | Optional | Easy | Large, flat surfaces, can be charged. |
| GaAs | (110) | 10-15% | Moderate | Flat, with characteristic atomic reconstruction. |
| MoS₂ | (0001) | 15-20% | Moderate | Semi-conducting, layered surface. |
| Si | (111) | 20-25% | Difficult | Requires precise notch control; can shatter. |
Workflow Visualization
Protocols for In-Situ Fracture
Application Notes
In-situ fracture is specifically designed for the analysis of grain boundaries, interfaces, and the bulk composition of metals, alloys, and intermetallic compounds. Unlike cleavage, which follows a single crystal plane, fracture propagates through the path of least resistance, which is often a region of weakness like a grain boundary or a precipitate interface. This technique is therefore vital for studies of hydrogen embrittlement in pipeline steels [32], segregation phenomena, and mechanical failure analysis. The key measured property is often the fracture toughness in different environments, which can be severely degraded by hydrogen [32].
Step-by-Step Experimental Protocol
Sample Design and Notching:
- Geometry: Machine a compact tension (CT) or Charpy-style sample with a well-defined notch. Standardized dimensions are critical for comparative fracture toughness measurements.
- Notch Preparation: The notch root should be as sharp as possible, often achieved by fatiguing a pre-notched sample or using a razor blade to introduce a fine scratch. This ensures a controlled crack initiation point.
- Surface Finish: Polish the sample surfaces to a mirror finish to allow for subsequent microscopic analysis of the fracture path.
In-Situ Fracture in UHV:
- Mounting: Secure the notched sample into a dedicated UHV fracture stage. This stage must be capable of applying a high tensile or bending load.
- Cooling (Optional): For studies on hydrogen embrittlement, the sample may need to be cooled to cryogenic temperatures to retain dissolved hydrogen introduced by pre-charging, simulating conditions relevant to gas transmission pipelines [32].
- Fracture Execution: Actuate the fracture mechanism (e.g., a screw-driven plunger or a piezoelectric hammer) to apply a rapid, high-force impact to the sample, causing brittle fracture.
- Surface Analysis: Immediately transfer the fracture surface to an analytical instrument (e.g., SEM or AES) to examine the fracture morphology (ductile dimpling vs. brittle cleavage) and chemistry of grain boundaries before any contamination occurs.
Table 3: Fracture Parameters for Different Material Classes
| Material Class | Sample Geometry | Fracture Type | Key Analysis | Environmental Considerations |
|---|---|---|---|---|
| High-Strength Steels | Compact Tension (CT) | Brittle (Intergranular) | Grain boundary segregation, hydrogen content. | Hydrogen pre-charging drastically reduces fracture toughness [32]. |
| Ductile Metals (Al, Cu) | Charpy / 3-point bend | Ductile (Microvoid coalescence) | Inclusion chemistry, dimple size. | Less sensitive to UHV environment; fracture for bulk analysis. |
| Intermetallics (Ni₃Al) | Notched rod | Mixed (Brittle & Ductile) | Bonding strength at grain boundaries. | UHV prevents oxide formation on fresh surfaces. |
Workflow Visualization
Protocols for In-Situ Heating (Annealing)
Application Notes
In-situ heating, or annealing, is a versatile UHV technique used for a multitude of purposes: degassing a sample after introduction from air, ordering a surface to create specific atomic reconstructions, sintering deposited nanoparticles, and inducing chemical reactions or desorption. The process involves raising the sample temperature to precisely controlled values for defined durations. The thermal energy enables atoms to diffuse across the surface, healing defects and allowing the system to reach a lower-energy, more ordered state. This is a critical step for preparing well-defined surfaces for catalytic studies or thin film growth.
Step-by-Step Experimental Protocol
Sample Mounting for Thermal Contact:
- Ensure excellent thermal and mechanical contact between the sample and the heater. This is often achieved by spot-welding thin foil samples or mounting crystals with high-temperature conductive paste or clamps.
- Attach a thermocouple (Type K, C, or R) directly to the front face of the sample using a UHV-compatible ceramic adhesive or by spot-welding to a thin foil. Avoid relying on heater temperature, as it can be significantly different from the actual sample temperature.
Degassing and Annealing Cycle:
- Initial Degas: After pump-down, slowly heat the sample to a moderate temperature (e.g., 150-300°C for metals) and hold for several hours. This step desorbs water vapor and other volatile contaminants from the surface and the sample holder itself.
- Monitor Pressure: The UHV chamber pressure will rise during this process due to outgassing. Continue until the pressure stabilizes at or near the base pressure.
- High-Temperature Anneal: Ramp the temperature to the final annealing value. This is material-specific (e.g., 500-700°C for Au(111) reconstruction, >900°C for Si(100) cleaning).
- Controlled Cool-Down: After the annealing time elapses, lower the temperature slowly. Rapid cooling can introduce thermal stress and defects.
Surface Quality Assessment:
- Use Low-Energy Electron Diffraction (LEED) to verify the presence of a sharp, well-ordered surface reconstruction.
- Use XPS or AES to confirm the removal of surface contaminants such as carbon or oxygen.
Table 4: Annealing Protocols for Common Surfaces
| Surface | Degas Temperature / Time | Annealing Temperature / Time | Purpose | Characteristic Verification |
|---|---|---|---|---|
| Au(111) | 200°C / 2 hours | 550°C / 10-15 minutes | Form herringbone surface reconstruction. | LEED: (1x1) pattern; STM: large terraces with reconstruction. |
| Si(100) | 300°C / 3 hours | 900-1200°C / 1-5 minutes | Remove native oxide, create (2x1) dimer row reconstruction. | LEED: sharp (2x1) pattern; AES: no O KLL peak. |
| Cu(110) | 150°C / 2 hours | 500°C / 10 minutes | Create a clean, ordered surface for catalysis studies. | LEED: (1x1) pattern; XPS: minimal O 1s and C 1s signals. |
| Stainless Steel | 300-500°C / 5-10 hours | N/A | Bulk degassing of the vacuum chamber itself. | System base pressure improvement. |
Workflow Visualization
Within the framework of IUPAC-guided research on sample preparation for surface analysis, the selection and execution of a surface cleaning protocol are foundational to achieving reliable and reproducible data. Contaminants, including adsorbed atmospheric gases, hydrocarbons, and oxides, can significantly alter surface composition and electronic properties, leading to erroneous analytical results. This document outlines detailed application notes and protocols for two critical cleaning techniques: noble gas ion sputtering and solvent cleaning. The former is a physical method ideal for achieving atomically clean surfaces in ultra-high vacuum (UHV) environments, while the latter is a chemical approach crucial for the initial removal of soluble contaminants. Adherence to the standardized nomenclature and practices detailed herein ensures the integrity of surface-sensitive analyses across scientific and industrial disciplines.
Solvent Cleaning Protocols
Solvent cleaning serves as a critical first step in most surface preparation workflows, aimed at removing soluble contaminants like oils, greases, and dust without altering the substrate's physical microstructure [14] [33]. Its effectiveness is governed by several international standards, which provide a common language for specifying and verifying cleanliness.
Key Standards and Visual Descriptions
The most widely recognized standards are the joint standards from NACE International and SSPC (now merged into AMPP), as well as ISO 8501 [14] [33]. The following table summarizes the primary solvent and mechanical preparation standards.
Table 1: Key Solvent and Mechanical Surface Preparation Standards
| Standard Designation | Description | Comparable ISO 8501 Grade |
|---|---|---|
| SSPC-SP 1 | Solvent Cleaning: Removal of all visible oil, grease, dirt, and soluble contaminants [14] [33]. | (Preparatory step) |
| SSPC-SP 2 | Hand Tool Cleaning: Removal of loose mill scale, rust, and coating using non-powered tools [14] [33]. | St 2 |
| SSPC-SP 3 | Power Tool Cleaning: Removal of loose mill scale, rust, and coating using powered hand tools [14]. | St 3 |
| ISO 8501 St 2 | Thorough hand tool scraping and brushing to bare metal [33]. | SSPC-SP 2 |
| ISO 8501 St 3 | Very thorough hand tool scraping and brushing to bare metal [33]. | SSPC-SP 3 |
For more aggressive cleaning to bare metal, which may be required for analysis, blast cleaning standards are used. It is critical to note that the numbering between different standards does not necessarily correlate, and higher numbers do not always indicate a cleaner surface [14].
Table 2: Key Blast Cleaning Standards for Surface Analysis
| Standard Designation | Description | Acceptable Staining | Comparable ISO 8501 Grade |
|---|---|---|---|
| NACE No. 1/SSPC-SP 5 | White Metal Blast Cleaning: Uniformly free of all visible foreign matter [14] [33]. | 0% | Sa 3 |
| NACE No. 2/SSPC-SP 10 | Near-White Metal Blast Cleaning: Free of all except for light shadows on ≤5% of each unit area [14] [33]. | ≤5% | Sa 2½ |
| NACE No. 3/SSPC-SP 6 | Commercial Blast Cleaning: Free of all except for stains on ≤33% of each unit area [14] [33]. | ≤33% | Sa 2 |
| NACE No. 4/SSPC-SP 7 | Brush-Off Blast Cleaning: Removal of loose material, tight adherents may remain [14]. | (Tight adherents remain) | Sa 1 |
Detailed Experimental Protocol: SSPC-SP 1 Solvent Cleaning
This protocol is designed to achieve a surface condition compliant with SSPC-SP 1, serving as a essential preparatory step for subsequent analysis or further surface treatment [33].
2.2.1 Research Reagent Solutions
Table 3: Essential Materials for Solvent Cleaning
| Item | Function / Specification | Examples / Notes |
|---|---|---|
| Solvents | To dissolve and remove organic contaminants without leaving residue [33]. | Acetone, Methyl Ethyl Ketone (MEK), Isopropyl Alcohol. |
| Lint-Free Cloths/Wipes | Physical application and wiping of solvents. | - |
| Brushes | Agitation and cleaning of intricate geometries. | Non-shedding bristles. |
| Dull Putty Knife | To test for and remove loosely adherent contaminants [14] [33]. | - |
2.2.2 Step-by-Step Procedure
- Initial Inspection & Gross Removal: Visually inspect the surface for bulk contamination. Use a scraper or cloth to remove large deposits of oil, grease, or dirt.
- Solvent Application: Apply a suitable residue-free solvent (e.g., acetone or MEK) to a lint-free cloth or brush. Do not pour solvent directly onto the surface, as this can spread contamination.
- Wiping: Wipe the surface thoroughly with the solvent-dampened cloth, using a circular motion. Frequently fold the cloth to present a clean surface. Repeat until no visible residue remains on the cloth after wiping.
- Inspection and Verification: The final surface must be free of all visible oil, grease, dirt, and dust [14] [33]. A simple verification test involves drawing a line with chalk from a clean area, through the cleaned area, and onto another clean area. A decrease in the line's intensity in the cleaned zone indicates residual oil or grease requiring further cleaning [33].
- Drying: Allow the surface to air dry completely before any subsequent processing or analysis.
2.2.3 Workflow Visualization
The following diagram illustrates the logical sequence for selecting and applying solvent and mechanical cleaning standards within a research context.
Noble Gas Ion Sputtering Protocols
Noble gas ion sputtering is a cornerstone technique for preparing atomically clean surfaces in UHV systems, essential for techniques like XPS, AES, and SIMS. It utilizes inert gas ions, typically argon, to physically eject atoms from the surface, thereby removing contaminants and overlayers.
Fundamentals and Quantitative Parameters
The process involves bombarding a sample with energetic noble gas ions, leading to material removal via momentum transfer. The key controllable parameters are the ion energy, ion flux, and incidence angle, which collectively determine the sputtering yield and the extent of surface modification [34]. Recent advances focus on using gas cluster ion beams (GCIB), comprising hundreds or thousands of atoms, to minimize subsurface damage while maintaining effective sputtering rates [34].
Table 4: Quantitative Parameters from Noble Gas Sputtering Studies
| Parameter | Experimental Value / Condition | Context / Substrate |
|---|---|---|
| Implantation Energy (4He) | 20 keV [35] | For depth profiling simulation of solar wind. |
| Implantation Energy (20Ne/22Ne) | 60 keV [35] | For depth profiling simulation of solar wind. |
| Implantation Energy (36Ar/40Ar) | 110 keV [35] | For depth profiling simulation of solar wind. |
| Cluster Ion Energy per Atom (E/N) | ~100 eV/atom (High-energy mode) [34] | Provides sufficient sputtering efficiency on KGd(WO4)2:Nd crystal. |
| Cluster Ion Energy per Atom (E/N) | Several eV/atom (Low-energy mode) [34] | Provides minimal surface damage on KGd(WO4)2:Nd crystal. |
| Sputtering Depth Resolution | Within top 100 nm [35] | For solar wind noble gas analysis. |
| Analysis Detection Limit (4He in Ilmenite) | 7 × 10¹⁶ cm⁻³ [35] | Achieved via TOF-SNMS depth profiling. |
Detailed Experimental Protocol: Argon Ion Sputtering for Surface Cleaning
This protocol outlines the steps for cleaning a sample surface using a broad-beam argon ion source in a UHV chamber.
3.2.1 Research Reagent Solutions
Table 5: Essential Materials for Noble Gas Sputtering
| Item | Function / Specification | Examples / Notes |
|---|---|---|
| High-Purity Argon Gas | Source gas for generating inert ions. | 99.999% purity or higher to avoid reactive contamination. |
| Ion Gun | Generates and focuses a beam of Ar⁺ ions. | Cold cathode or hot filament source. |
| Sample Holder / Stage | Holds sample, provides electrical bias, and allows for positioning. | Often includes heating/cooling capabilities. |
| Faraday Cup | Measures ion current density at the sample position. | Crucial for quantifying dose and reproducibility. |
3.2.2 Step-by-Step Procedure
- Sample Loading & Pump Down: Introduce the sample into the UHV preparation chamber. Pump the chamber to a base pressure typically ≤ 1 × 10⁻⁸ mbar to minimize re-contamination during sputtering.
- Gas Introduction & Pressure Stabilization: Backfill the chamber with high-purity argon gas to an operating pressure, typically in the range of 1 × 10⁻⁵ to 1 × 10⁻⁴ mbar.
- Ion Gun Parameter Setup:
- Energy: Set the ion acceleration voltage. For atomic ions, a common range for cleaning is 0.5 - 5 keV. Lower energies (e.g., 0.5-1 keV) reduce atomic mixing and subsurface damage.
- Current: Adjust the emission current to achieve a measured ion current density at the sample of 1 - 20 µA/cm². Use a Faraday cup for accurate measurement.
- Angle: Set the angle of incidence. Off-normal incidence (e.g., 45-60°) often increases sputtering yield.
- Sputter Etching: Expose the sample surface to the ion beam for a calculated time. The sputter time (t) can be estimated based on the desired depth (d), the sputter rate (S, in nm/s) for the specific material and conditions, and the ion current density (J): t ≈ d / S. Sputter rates must be calibrated for each material.
- Surface Analysis: After sputtering, rotate the sample to transfer it in vacuo to the analysis chamber for characterization (e.g., by XPS or AES) to verify the removal of contaminants and assess surface stoichiometry.
3.2.3 Workflow Visualization
The following diagram outlines the experimental workflow for surface cleaning and analysis using noble gas ion sputtering.
The meticulous preparation of surfaces is a prerequisite for valid surface analysis. Solvent cleaning and noble gas ion sputtering are complementary techniques addressing different stages of the cleaning workflow. Solvent cleaning, governed by standardized protocols like SSPC-SP 1, is indispensable for the initial removal of gross organic and particulate contamination. Noble gas ion sputtering, a highly controlled UHV process, is the definitive method for producing atomically clean surfaces immediately prior to analysis. The protocols and data presented here, framed within the context of IUPAC's standardizing principles, provide a foundational guide for researchers in drug development, materials science, and analytical chemistry to ensure their sample preparation is robust, reproducible, and yields scientifically defensible results.
In the field of biomedical engineering and pharmaceutical sciences, the preparation of polymer surfaces and drug formulations represents a critical frontier. The performance of a biomedical device or a pharmaceutical product is profoundly influenced by the physico-chemical properties of its surface and the precise composition of its dosage form. For polymer-based implants, surface characteristics dictate biocompatibility, protein adsorption, and cellular response [36]. Similarly, for drug formulations, accurate dosage and homogeneity are paramount for ensuring safety and efficacy, making robust analytical protocols a regulatory necessity [37] [38]. This application note, framed within the context of developing a comprehensive IUPAC guide on sample preparation for surface analysis, provides detailed protocols and data analysis methods to standardize these critical preparatory processes for researchers and drug development professionals.
Polymer Surface Modification Techniques and Protocols
Surface modification of polymers is essential for tailoring their interactions with biological environments. The goal is to alter surface properties like chemistry, energy, and topography without compromising the bulk material's integrity [36].
Key Modification Methods
Table 1: Common Polymer Surface Modification Techniques for Biomedical Applications
| Method | Key Principle | Key Parameters | Induced Surface Changes | Primary Biomedical Effect |
|---|---|---|---|---|
| Plasma Treatment [36] | Exposure to ionized gas (e.g., O2, N2, Ar) | Gas type, pressure, power, exposure time | Introduction of polar functional groups (e.g., -COOH, -NH2); increased surface energy and nanoscale roughness | Enhanced hydrophilicity, improved cell adhesion and proliferation [36] |
| Laser Treatment [36] | Irradiation with focused laser beam (e.g., excimer UV) | Wavelength, fluence, pulse number, repetition rate | Formation of Laser-Induced Periodic Surface Structures (LIPSS); precise topographical patterning | Guidance of cell growth; controlled modulation of bioadhesion [36] |
| Chemical Grafting [39] | Covalent attachment of polymer brushes ("grafting-to", "grafting-from") | Initiator surface immobilization, monomer type, reaction time | Dense layer of tethered polymer chains with specific end-group functionalities | Tunable friction, adhesion, wettability, and biofunctionalization (e.g., with peptides) [39] |
| Ion Implantation [36] | Bombardment with high-energy ions (e.g., N+, Ca+) | Ion species, energy, dose | Formation of a hard, modified sub-surface layer; possible nanoparticle formation | Improved wear resistance; induction of antibacterial or cytotoxic properties [36] |
Experimental Protocol: Plasma Treatment for Improved Cell Adhesion
This protocol outlines the steps for modifying a polymer surface (e.g., polystyrene) using oxygen plasma to enhance its suitability for cell culture applications.
Materials & Equipment
- Polymer substrates (e.g., sheets, films)
- Oxygen gas supply (high purity)
- Plasma treatment system (e.g., low-pressure RF plasma)
- Analytical balance
- Solvents for cleaning (e.g., ethanol, isopropanol)
- Ultrasonic bath
Step-by-Step Procedure
- Substrate Preparation: Cut polymer samples into desired dimensions (e.g., 1 cm x 1 cm). Clean substrates sequentially in an ultrasonic bath with ethanol and deionized water for 15 minutes each to remove surface contaminants. Dry the samples under a stream of inert nitrogen gas.
- System Setup: Place the cleaned and dried samples in the plasma chamber. Ensure they are securely positioned on the sample holder. Evacuate the chamber to a base pressure of ≤ 10⁻² mbar.
- Process Parameters: Introduce oxygen gas into the chamber, maintaining a constant flow rate (e.g., 20 sccm) to stabilize the working pressure (e.g., 0.2 mbar). Set the radio frequency (RF) power (e.g., 50 W) and initiate the plasma discharge. Treat the samples for a predetermined time (e.g., 30 seconds to 5 minutes). Note: Optimal time and power must be determined empirically for each polymer.
- Post-Treatment Handling: After treatment, vent the chamber with air or nitrogen and immediately retrieve the samples. For best results, use the plasma-treated samples immediately or store them in a controlled environment to prevent hydrophobic recovery.
Validation and Characterization
- Water Contact Angle (WCA): Measure the static WCA to confirm increased hydrophilicity. A successful treatment often reduces WCA from >80° to <40° [36].
- X-ray Photoelectron Spectroscopy (XPS): Use XPS to quantify the atomic concentration of oxygen-containing functional groups on the surface.
- Atomic Force Microscopy (AFM): Perform AFM imaging in tapping mode to assess nanoscale changes in surface topography and roughness. Phase imaging can reveal differences in surface mechanical properties [40].
The diagram below illustrates the protocol workflow and the resulting surface changes that facilitate improved biointerfacial interactions.
Drug Formulation Analysis: Methods and Validation
Accurate quantification of the Active Pharmaceutical Ingredient (API) in nonclinical dose formulations is critical for establishing safety and efficacy in regulatory studies [37] [38].
Analytical Method Validation
According to Good Laboratory Practice (GLP) regulations, analytical methods for dose formulation analysis must be validated. The following table summarizes the key validation parameters and typical acceptance criteria for a high-performance liquid chromatography with ultraviolet detection (HPLC-UV) method.
Table 2: Key Validation Parameters for Nonclinical Dose Formulation Analysis (HPLC-UV) [38]
| Validation Parameter | Definition | Recommended Acceptance Criteria |
|---|---|---|
| Accuracy | Closeness of measured value to true value | Percentage recovery within 95-105% |
| Precision | Repeatability of measurements (expressed as %RSD) | Relative Standard Deviation (%RSD) ≤ 5% |
| Specificity | Ability to assess analyte unequivocally in the presence of excipients | No interference from vehicle components at the retention time of the analyte |
| Linearity & Range | Ability to obtain results proportional to analyte concentration | Correlation coefficient (r²) ≥ 0.995 over the specified range |
| Stability | Chemical stability of analyte in solution under specific conditions | Percentage recovery within 90-110% of nominal concentration |
| Carryover | Transfer of analyte from a high-concentration sample to a subsequent one | Response in blank after high standard is ≤ 20% of the lower limit of quantification (LLOQ) |
| System Suitability | Verification of chromatographic system performance before analysis | Based on parameters like tailing factor (<2.0), theoretical plates (>2000), and RSD of replicate injections (<2.0%) |
Experimental Protocol: Formulation Analysis for Tablets
This protocol describes the "grind, extract, and filter" process for analyzing the potency and content uniformity of an immediate-release tablet formulation [37] [41].
Materials & Equipment
- Tablets (at least 10 units for composite assay)
- Qualified reference standard of the API
- HPLC system with UV detector
- Analytical balance (5-place)
- Volumetric flasks (Class A)
- Mortar and pestle
- Sonicator or mechanical shaker
- Syringe filters (0.45 µm, nylon or PTFE)
- HPLC vials and caps
Step-by-Step Procedure
- Sample Preparation (Grind): For a composite assay, crush not less than 10 tablets in a porcelain mortar and pestle into a fine, homogeneous powder. Accurately weigh a portion of the powder, equivalent to the target API weight per tablet, and transfer it quantitatively into an appropriate volumetric flask (e.g., 100 mL) [41].
- Solubilization (Extract): Add the diluent (e.g., a mixture of acidified water and organic solvent determined during method development) to the flask until it is about 70% full. Sonicate the flask in a water bath or agitate using a wrist-action shaker for a validated time (e.g., 20-30 minutes) to ensure complete API extraction. During sonication, ensure all particles are solubilized and monitor for potential heat-induced degradation [41].
- Dilution and Filtration: Allow the solution to cool to room temperature. Dilute to the final volume with the diluent and mix thoroughly. Filter a portion of the solution through a 0.45 µm syringe filter. Discard the first 0.5-1.0 mL of the filtrate to saturate the filter membrane. Collect the subsequent clear filtrate directly into an HPLC vial [41].
- HPLC Analysis: Inject the sample into the HPLC system using the validated method. The analytical batch should include freshly prepared calibration standards and quality control (QC) samples to ensure the run's validity [37] [38].
Data Analysis and Acceptance Criteria
- The concentration of the API in the sample is calculated by comparing the peak response to the calibration curve.
- For the composite assay, the result should be within 95.0-105.0% of the label claim [38].
- For content uniformity testing, the acceptance value (AV) calculated according to pharmacopeial standards must meet specified limits.
The workflow for drug formulation analysis, from sample preparation to data reporting, is summarized in the following diagram.
The Scientist's Toolkit: Essential Research Reagents and Materials
Table 3: Key Reagents and Materials for Polymer and Formulation Preparation
| Item | Function/Application |
|---|---|
| Polymer Substrates (e.g., Polystyrene, Poly(L-lactic acid), Polyethylene) | Base materials for medical devices, implants, and tissue culture platforms requiring surface modification [36]. |
| High-Purity Process Gases (e.g., O₂, N₂, Ar) | Used in plasma treatment and ion implantation systems to create reactive species for surface functionalization [36]. |
| Qualified Reference Standard | A highly characterized sample of the API with established purity, used as a calibration standard for accurate quantitation in formulation analysis [38]. |
| HPLC-Grade Solvents | High-purity solvents (e.g., acetonitrile, methanol) used for preparing mobile phases and sample diluents to minimize background interference and baseline noise. |
| Syringe Filters (0.45 µm and 0.2 µm, Nylon or PTFE) | Used for clarifying sample solutions of drug products prior to HPLC injection to remove particulate matter and protect the chromatography system [41]. |
| Class A Volumetric Glassware | High-accuracy flasks and pipettes used for precise preparation of standards and sample solutions, ensuring data integrity [41]. |
In surface chemical analysis, the fundamental goal is to obtain analytical results that accurately represent the material's true surface properties. The integrity of a sample is paramount, as any unintended alteration during collection, preparation, or storage can render subsequent data meaningless. This document outlines best practices and protocols to avoid surface alterations, ensuring sample integrity from the point of collection to final analysis, framed within the context of developing a comprehensive IUPAC guide for sample preparation.
Sample integrity is defined not just by the absence of chemical degradation, but by the constancy of the analyte concentration and the preservation of the original surface state [42]. Compromises can occur through chemical, physical, or biological means, including contamination from tools or the environment, adsorption, precipitation, or changes induced by improper temperature or humidity [43] [42]. Adherence to the protocols described herein is critical for generating reliable, reproducible data in fields ranging from drug development to materials science.
Fundamental Concepts and Definitions
A clear and consistent vocabulary is essential for communicating practices that ensure sample integrity. The following terms are central to this document.
- Surface Chemical Analysis: Analytical techniques in which beams of electrons, ions, or photons are incident on a material surface and scattered or emitted electrons, ions, or photons detected from within about 10 nm of the surface are spectroscopically analysed [44].
- Sample Integrity: The preservation of a sample's original chemical, physical, and biological state, ensuring that the analytical results reflect the true condition of the sample at the time of collection. This encompasses the constancy of analyte concentration and the absence of contamination or alteration [42].
- Surface Alteration: Any unintended change to the surface composition or morphology that occurs after the sample is taken from its native environment. This includes contamination, oxidation, adsorption, dehydration, or morphological damage introduced during handling or preparation.
- Analyte Stability: The ability of an analyte to maintain its chemical integrity and concentration in a specific matrix under defined storage conditions for a specified time period [42].
Critical Control Parameters for Sample Integrity
Maintaining sample integrity requires rigorous control of environmental and handling conditions. The following parameters are most critical and should be monitored and documented throughout the sample lifecycle.
Temperature Management
The stability of biological and chemical samples is acutely sensitive to thermal variations. Degradation pathways, including enzymatic activity, protein denaturation, and chemical breakdown kinetics, are directly accelerated by elevated temperatures or repeated thermal cycling [43].
Best Practices:
- Continuous Monitoring: Utilize validated, continuous temperature monitoring systems (CTMS) that frequently record data (e.g., every five minutes) to provide an auditable history [43].
- Deviation Alarming: Configure alarms to trigger at levels that allow staff time to intervene before sample integrity is compromised. Establish clear escalation protocols for after-hours responses [43].
- Mitigation Strategies: Equip freezers and refrigerators housing critical materials with backup power sources (e.g., generators, battery backups) to prevent catastrophic loss during power failures [43].
Environmental and Air Quality Control
Air quality directly impacts sample integrity, particularly in microbiological and trace chemical analysis. Airborne particulates, volatile organic compounds (VOCs), and cross-contamination are significant risks [43].
Best Practices:
- HEPA Filtration: Use High-Efficiency Particulate Air (HEPA) filters in biological safety cabinets (BSCs) and cleanroom ventilation systems to remove 99.97% of particles 0.3 micrometers in diameter [43].
- Pressure Differentials: Implement pressure zoning. Use positive pressure rooms to protect sensitive samples from external contaminants and negative pressure rooms to contain hazardous materials [43].
- Workflow Segregation: Establish dedicated, physically segregated areas for incompatible activities, such as reagent preparation and sample accessioning, to prevent microbial or chemical carryover [43].
Contamination Control During Handling
The pre-analytical phase is particularly vulnerable to errors, with studies suggesting that up to 75% of laboratory errors occur during sample preparation, often due to improper handling or contamination [45].
Best Practices:
- Tool Selection and Cleaning: Choose tools that minimize cross-contamination. Disposable plastic probes can virtually eliminate this risk for sensitive assays. For reusable tools, validate cleaning procedures by running a blank solution to ensure no residual analytes are present [45].
- Reagent Purity: Verify the purity of all reagents and use only those that meet rigorous standards. Regular testing of reagents can help identify potential problems before they affect samples [45].
- Surface Decontamination: Use disinfecting solutions (e.g., 70% ethanol, 5-10% bleach) to clean lab surfaces. For specific analytes like DNA, use specialized decontamination solutions (e.g., DNA Away) to create a DNA-free environment [45].
Table 1: Stability Acceptance Criteria for Quantitative Bioanalysis (adapted from [42])
| Stability Assessment Type | Acceptance Criterion (Deviation from Reference Value) | Key Requirements |
|---|---|---|
| Bench-top, Freeze/Thaw, Long-term (Chromatography) | ±15% | Storage duration must cover maximum study sample storage period. |
| Bench-top, Freeze/Thaw, Long-term (Ligand-Binding Assays) | ±20% | Storage duration must cover maximum study sample storage period. |
| Stock Solution Stability | ±10% | Assess at lowest and highest concentrations used in practice. |
Table 2: Recommended Environmental Controls for Sample Integrity [43]
| Environmental Factor | Impact on Sample Integrity | Recommended Control Measure |
|---|---|---|
| High Relative Humidity | Promotes microbial growth, affects hygroscopic materials, causes condensation. | Dehumidification systems, vapor barriers, desiccant materials. |
| Low Relative Humidity | Causes desiccation, concentration of analytes, electrostatic discharge. | Humidification systems, sealed containers. |
| Light Exposure (UV/Visible) | Initiates photodegradation, breaking down sensitive compounds (e.g., vitamins, hormones). | Amber/opaque glassware, UV-blocking window films, minimized exposure time. |
| Oxygen (in headspace) | Causes oxidative degradation of sensitive compounds (e.g., lipids). | Inert gas purging (nitrogen/argon), sealed, light-proof vials. |
Experimental Protocols for Integrity Verification
The following protocols provide detailed methodologies for key experiments to verify that the implemented controls are effective in preserving sample integrity.
Protocol: Verification of Analyte Stability in Matrix
This protocol assesses the stability of an analyte in a biological matrix (e.g., plasma, serum) under specific storage conditions (e.g., bench-top, frozen) [42].
1. Scope and Application This procedure is used to confirm that the concentration of an analyte in a stored matrix does not change significantly over a defined period, mimicking the handling and storage of study samples. It applies to both small and large molecules.
2. Experimental Procedure
- Step 1: Sample Preparation. Prepare a minimum of three replicates each of quality control (QC) samples at a low concentration (QCL) and a high concentration (QCH) in the appropriate biological matrix.
- Step 2: Storage and Reference. Subject the QC samples to the storage condition under investigation (e.g., leave at room temperature for 24 hours for bench-top stability). The reference samples (freshly prepared QCs at the same concentrations) should be analyzed simultaneously.
- Step 3: Analysis. Analyze the stored samples and the reference samples against a freshly prepared calibration curve.
- Step 4: Data Analysis. Calculate the mean concentration for the stored QCs and the reference QCs. The percent change should be calculated as:
(Mean Concentration of Stored QC / Mean Concentration of Reference QC) * 100.
3. Acceptance Criteria The analyte is considered stable if the mean concentration of the stored samples is within ±15% of the mean concentration of the reference samples for chromatographic assays, or within ±20% for ligand-binding assays [42].
Protocol: Assessment of Tool-Induced Contamination
This protocol validates the effectiveness of tool cleaning procedures or confirms the suitability of disposable tools to prevent cross-contamination [45].
1. Scope and Application This method is used to verify that reusable homogenizer probes, blades, or other tools do not harbor residual analytes that could contaminate subsequent samples.
2. Experimental Procedure
- Step 1: Contamination. Deliberately process a sample with a high concentration of the target analyte using the tool in question.
- Step 2: Cleaning. Perform the standard laboratory cleaning procedure on the tool.
- Step 3: Blank Analysis. After cleaning, use the tool to process a blank matrix (a matrix sample known to be free of the analyte).
- Step 4: Analysis. Analyze the resulting blank sample using the standard analytical method.
3. Acceptance Criteria The blank sample processed after cleaning should show no detectable levels of the target analyte. The signal must be below the lower limit of quantification (LLOQ) of the analytical method.
A Systematic Workflow for Sample Integrity
The following diagram illustrates a logical workflow for maintaining sample integrity from collection to analysis, integrating the controls and verification protocols outlined in this document.
The Scientist's Toolkit: Essential Materials and Reagents
The following table details key reagents and materials essential for experiments and procedures aimed at preserving sample integrity.
Table 3: Essential Research Reagent Solutions for Sample Integrity
| Item | Function/Application | Key Considerations |
|---|---|---|
| Disposable Homogenizer Probes (e.g., Omni Tips) | Single-use probes for sample homogenization. | Virtually eliminate cross-contamination between samples; ideal for high-throughput or sensitive assays [45]. |
| Stainless Steel Homogenizer Probes | Durable probes for homogenizing tough or fibrous samples. | Require rigorous, validated cleaning protocols between uses to prevent carryover contamination [45]. |
| High-Purity Solvents & Reagents | Used in sample preparation, dilution, and analysis. | Purity must be verified for the specific application; trace impurities can interfere with analysis or cause analyte degradation [45]. |
| Decontamination Solutions (e.g., DNA Away) | Specialized solutions to remove specific contaminating analytes from surfaces. | Critical for creating an analyte-free environment (e.g., DNA-free for PCR work) on lab benches, pipettors, etc. [45]. |
| Stabilizer Cocktails | Additives to biological samples to inhibit enzymatic degradation (e.g., proteases, nucleases). | Composition is analyte-specific; must be validated to ensure it does not interfere with the analytical method. |
| Amber or Opaque Storage Vials | Containers for storing light-sensitive samples and reagents. | Prevent photodegradation of analytes like vitamins, hormones, and fluorescent dyes [43]. |
| Validated Continuous Temperature Monitoring System (CTMS) | Electronic system with sensors for tracking storage unit temperatures. | Provides an auditable history of storage conditions; essential for proving sample integrity during storage [43]. |
| HEPA-Filtered Laminar Flow Hood / Biosafety Cabinet | Provides a clean, particulate-free workspace for sample manipulation. | Protects samples from airborne contamination and, in some configurations, protects the user from the sample [43]. |
Troubleshooting Sample Preparation: Avoiding Contamination and Artefacts
Common Pitfalls in Sample Preparation and How to Mitigate Them
Sample preparation is a foundational step in analytical science, profoundly influencing the accuracy, reproducibility, and reliability of experimental results. In surface analysis, where techniques probe only the outermost layers of a material, the integrity of the sample surface is paramount. Errors introduced during preparation can obscure true surface chemistry, lead to incorrect conclusions, and invalidate otherwise sound research. It is estimated that a significant proportion of laboratory errors occur during the pre-analytical phase [45] [46], and sample preparation alone can account for 66–80% of total analysis time [47]. This application note details common pitfalls encountered during sample preparation for surface analysis and provides detailed protocols to mitigate them, ensuring data of the highest quality.
Common Pitfalls and Quantitative Data
Understanding the magnitude of contamination from various sources is crucial for risk assessment. The following tables summarize quantitative data on contamination from common laboratory sources.
Table 1: Contamination Levels from Pipette Cleaning Methods (Analysis of 5% Nitric Acid after pipette contact) [13]
| Element | Manual Cleaning (ppb) | Automated Pipette Washer (ppb) |
|---|---|---|
| Sodium (Na) | ~20.00 | < 0.01 |
| Calcium (Ca) | ~20.00 | < 0.01 |
| Aluminum (Al) | 0.35 | 0.02 |
| Iron (Fe) | 0.10 | 0.01 |
Table 2: Contamination Introduced by Laboratory Tubing (in 1% Nitric Acid) [13]
| Element | Silicone Tubing (ppb) | Neoprene Tubing (ppb) |
|---|---|---|
| Silicon (Si) | 21.50 | 0.43 |
| Aluminum (Al) | 0.95 | 0.12 |
| Iron (Fe) | 0.45 | 0.10 |
| Magnesium (Mg) | 0.75 | 0.10 |
| Zinc (Zn) | 0.10 | 2.80 |
Table 3: Environmental Contamination in Nitric Acid During Distillation [13]
| Element | Regular Laboratory (ppt) | Clean Room (ppt) |
|---|---|---|
| Aluminum (Al) | 190.00 | 4.00 |
| Calcium (Ca) | 770.00 | 50.00 |
| Iron (Fe) | 180.00 | 15.00 |
| Sodium (Na) | 980.00 | 90.00 |
| Magnesium (Mg) | 190.00 | 8.00 |
Experimental Protocols for Mitigation
Protocol 1: Cleaning and Preparation of Labware for Trace Metal Analysis
This protocol is designed to minimize residual contamination on reusable labware, such as glassware, pipettes, and homogenizer probes [13] [45].
Key Reagent Solutions:
- High-Purity Water: ASTM Type I water (18.2 MΩ·cm resistivity) [13].
- High-Purity Acids: Trace metal-grade nitric acid (e.g., for ICP-MS) [13].
- Laboratory Detergent: Mild, non-phosphate, low-residue detergent suitable for critical cleaning.
Procedure:
- Initial Rinse: Immediately after use, rinse the labware with a compatible solvent to remove gross sample contamination.
- Detergent Wash: Soak in a warm (e.g., 40-50°C) solution of high-purity detergent. Use a soft brush to scrub if necessary.
- Tap Water Rinse: Rinse thoroughly with tap water to remove all detergent.
- Acid Bath (Critical Step): Soak the labware in a 10% (v/v) solution of high-purity nitric acid for a minimum of 4 hours, preferably overnight.
- Final Rinses: Rinse the labware three times with high-purity water (ASTM Type I). The final rinse should have a neutral pH.
- Drying and Storage: Allow to air dry in a Class 100 laminar flow hood or a dedicated clean bench. Store in sealed containers or clean plastic bags to prevent accumulation of dust [48].
- Validation: Periodically validate the cleaning process by filling cleaned vessels with high-purity 1% nitric acid and analyzing the acid by ICP-MS for target elements. Results should be near or below instrument detection limits.
Protocol 2: Sample Handling and Mounting for XPS Analysis
This protocol ensures surface-sensitive analyses like XPS are performed on representative, uncontaminated surfaces [48] [49].
Key Reagent Solutions:
- High-Purity Solvents: Sequentially distilled or HPLC-grade acetone, isopropanol, and methanol [48] [49].
- Indium Foil: High-purity (e.g., 99.999%) for mounting powder samples [48].
- Polyethylene Gloves: Powder-free to prevent contamination with silicones and particulates [48].
Procedure:
- Glove Selection: Use only clean, powder-free polyethylene gloves. Latex or vinyl gloves often contain silicones and plasticizers that can contaminate the surface [48].
- Tool Cleaning: Clean all tools (tweezers, scalpels) via sonication in high-purity isopropanol for 10-15 minutes before use [48].
- "As-Received" Analysis:
- Solvent Cleaning (for removal of soluble contaminants):
- Using a wash bottle with high-purity solvent (e.g., acetone, followed by isopropanol), gently flush the sample surface.
- Immediately dry the surface with a stream of clean, dry nitrogen gas.
- Powder Sample Preparation:
- Press a small amount of powder into a pellet of high-purity indium foil. This provides a conductive, clean binding substrate [48].
- Alternatively, disperse the powder in a high-purity solvent and drop-cast onto a clean substrate like a silicon wafer.
- Storage and Transfer: Store and transfer prepared samples in clean glass petri dishes or wrapped in new, clean aluminum foil. Never use standard plastic bags, which can leach contaminants [48].
Protocol 3: Evaluation of Sample Preparation Variability using SILAC
This protocol uses Stable Isotope Labeling by Amino Acids in Cell Culture (SILAC) to quantitatively evaluate the variability introduced by multi-step sample preparation workflows, such as in comparative proteomics [50].
Key Reagent Solutions:
- SILAC Media: Lysine and arginine-depleted cell culture media supplemented with "light" (Lys0, Arg0) or "heavy" (13C6 Lys, 13C6 Arg) isotopic forms of these amino acids [50].
- Lysis Buffer: RIPA or similar buffer supplemented with protease and phosphatase inhibitors.
- Immunoprecipitation Beads: Agarose or magnetic beads conjugated with a specific antibody (e.g., anti-phosphotyrosine) [50].
Procedure:
- Cell Culture and Labeling: Grow two populations of cells in "light" and "heavy" SILAC media for at least six cell divisions to ensure full incorporation of the isotopic labels [50].
- Treatment and Lysis: Subject both cell populations to the same experimental condition (e.g., drug treatment). Lyse the cells using an appropriate lysis buffer.
- Parallel Sample Preparation: Mix equal protein amounts from the "light" and "heavy" lysates. This mixture now serves as an internal standard.
- Perform Preparation Steps: Subject the mixed lysate to the sample preparation steps under investigation (e.g., immunoprecipitation, SDS-PAGE fractionation, in-gel digestion) [50].
- LC-MS/MS Analysis: Analyze the prepared peptides by Liquid Chromatography with Tandem Mass Spectrometry (LC-MS/MS). The mass spectrometer will distinguish between "light" and "heavy" peptide pairs.
- Data Analysis: Calculate the ratio of "heavy" to "light" peptide signals for each identified protein. In an ideal, error-free preparation, this ratio should be constant (e.g., 1:1) for all proteins. The standard deviation of these ratios across multiple proteins quantifies the technical variability introduced by the preparation workflow [50].
Workflow and Relationship Diagrams
The following diagram illustrates a strategic workflow for surface analysis, emphasizing steps to prevent contamination and ensure the analysis of a representative surface.
The Scientist's Toolkit: Essential Research Reagent Solutions
Table 4: Essential Materials and Reagents for Contamination-Control
| Item | Function & Rationale |
|---|---|
| ASTM Type I Water | Highest purity water for preparing standards, dilutions, and final rinsing of labware. Minimizes introduction of inorganic and organic contaminants [13]. |
| High-Purity Acids (ICP-MS Grade) | Acids with certified low levels of elemental impurities for sample digestion, preservation, and labware cleaning baths [13]. |
| Fluoropolymer (FEP) Labware | Containers and bottles for storing standards and samples. Leaches fewer contaminants than glass (e.g., boron, sodium) or standard plastics [13]. |
| Polyethylene Gloves | Powder-free gloves prevent contamination from silicones, talc, and other elements found in latex or vinyl gloves [48]. |
| High-Purity Indium Foil | A clean, malleable substrate for pressing powdered samples for XPS analysis, providing a conductive surface [48]. |
| Single-Use Homogenizer Probes | Disposable probes (e.g., Omni Tips) eliminate the risk of cross-contamination and the variability associated with cleaning reusable probes [45]. |
| Stable Isotope-Labeled Standards (SILAC) | Internal standards for mass spectrometry that allow for precise quantification and evaluation of sample preparation variability [50]. |
| DNA/RNA Decontamination Solutions | Specialized solutions (e.g., DNA Away) to remove nucleic acid contaminants from surfaces and equipment in molecular biology workflows [45]. |
Meticulous sample preparation is not merely a preliminary step but a critical determinant of success in surface analysis and other sensitive analytical techniques. The pitfalls of contamination, variability, and improper handling are significant, but as demonstrated, they can be effectively mitigated through rigorous protocols, the use of high-purity reagents, and a deep understanding of potential error sources. By adopting the practices outlined in this application note—from validated cleaning procedures and controlled handling environments to the use of internal standards for variability assessment—researchers can ensure the generation of robust, reproducible, and reliable data that truly reflects the sample's properties and not the artifacts of its preparation.
Strategies for Minimizing and Correcting for Surface Contamination
Surface contamination introduces significant analytical error in scientific research, drug development, and industrial quality control. Effective management requires a systematic approach integrating preventive strategies, rigorous cleaning protocols, and statistical correction methods. This guide synthesizes current evidence and established procedures to form a comprehensive framework for contamination control, with particular emphasis on applications in surface analysis and sample preparation aligned with IUPAC guidelines. The persistence of contaminants—including molecular residues, particulates, and biological agents—on critical surfaces directly compromises analytical accuracy, measurement reproducibility, and experimental validity across diverse fields from healthcare to materials science [51] [52].
Contamination control operates on two complementary fronts: proactive minimization through engineered barriers and procedural controls, and reactive correction through analytical techniques and data processing algorithms. The fundamental principle rests on understanding that contaminants can be located on surfaces or permeated into materials, with surface contaminants generally easier to detect and remove [53]. The extent of contamination depends on multiple factors including contact time, contaminant concentration, temperature, molecular size, and physical state of the contaminating substance [53]. This document provides researchers with actionable protocols and analytical frameworks to address these challenges systematically.
Principles of Surface Contamination
Contamination Mechanisms and Classifications
Surface contamination occurs through multiple mechanisms with varying implications for detection and decontamination. The primary classification distinguishes between particulate adhesion, molecular adsorption, and biological colonization, each requiring distinct mitigation approaches. According to IUPAC definitions, the "surface" represents the outer portion of a sample of undefined depth, while the "physical surface" specifically refers to the outermost atomic layer contacting the vacuum in analytical instruments [1].
Contaminants exhibit different adherence properties based on their physical characteristics. Loose contaminants like dusts and vapors cling to equipment through electrostatic attraction, while adhering contaminants such as glues, resins, and organic films bond through stronger physical or chemical interactions [53]. Volatile liquids represent a third category where evaporation rate significantly impacts contamination spread. The risk assessment for contamination must consider the intended use of the surface or item, with medical and analytical applications requiring more stringent controls than general industrial surfaces [51].
Impact on Analytical Measurements
Surface contamination introduces analytical interference through multiple mechanisms. In sequencing workflows, residual nucleic acids cause false positives, sequencing artifacts, and skewed microbial community profiles, with studies detecting cross-contamination in approximately 80% of samples processed within a single facility [52]. For surface analysis techniques like X-ray photoelectron spectroscopy (XPS), trace contamination significantly impacts quantitative accuracy near the detection limit, where statistical uncertainties become pronounced [54].
The business impact includes compromised research validity, product quality issues, and regulatory non-compliance. In healthcare settings, contaminated environmental surfaces contribute to healthcare-associated infections through hand contact transfer [51]. In pharmaceutical development, surface contaminants can alter drug formulation properties or generate misleading stability data. Understanding these consequences underscores the importance of robust contamination control strategies.
Minimization Strategies
Environmental and Engineering Controls
Environmental controls establish the first line of defense against surface contamination through facility design and air management. Proper ventilation with appropriate air changes per hour, HEPA filtration, and positive pressure differentials in critical areas prevent ingress of particulate matter. Containment strategies should match the contamination risk, with higher-risk materials requiring more stringent controls like glove boxes or isolation chambers for highly sensitive applications [52].
Laboratory design should incorporate segregation principles separating pre-and post-amplification areas in molecular biology workflows, with unidirectional workflow from "clean" to "dirty" areas [52]. Surface materials should be selected for cleanability, with non-porous, chemically resistant materials like stainless steel or polypropylene preferred over porous or reactive surfaces. The spatial organization should minimize clutter that impedes proper cleaning and create designated zones for different contamination risk activities.
Procedural and Administrative Controls
Standard Operating Procedures (SOPs) establish the behavioral framework for contamination minimization. These should explicitly define protocols for gowning, glove changes, hand hygiene, and surface decontamination between procedures. The foundational principle involves establishing work practices that minimize contact with hazardous substances, such as avoiding walking through areas of obvious contamination or directly touching potentially hazardous substances [53].
Personnel training must emphasize contamination awareness with regular competency assessments. Training should cover proper use of personal protective equipment (PPE), with all fasteners secured, gloves and boots tucked under sleeves and legs, and junctures taped to prevent contaminants from entering [53]. Quality indicators such as surface monitoring data and contamination incident reports should be regularly reviewed to identify procedural gaps. Implementation of checklists and job aids improves adherence to complex decontamination protocols [55].
Material and Equipment Selection
Equipment design significantly influences contamination risk. Surface characteristics including porosity, roughness, and chemical composition determine cleanability, with polished surfaces generally permitting more effective decontamination. Equipment selection should prioritize designs with minimal seams, joints, or hard-to-clean areas that can harbor contaminants.
The barrier protection approach using impervious-backed paper, aluminum foil, or plastic covers provides effective contamination control for frequently touched surfaces or equipment difficult to clean [51]. Disposable components should be utilized when decontamination proves challenging or unreliable. For reusable equipment, manufacturers must provide comprehensive instructions regarding compatibility with chemical germicides, water resistance, and appropriate decontamination methods when servicing is required [51].
Cleaning and Decontamination Protocols
Chemical Decontamination Methods
Chemical decontamination employs mechanistic approaches including dissolution, chemical detoxification, and disinfection. Selection criteria must consider the contaminant properties, surface compatibility, and required safety levels. The Spaulding classification provides a rational framework for matching decontamination levels to infection risk, with critical, semi-critical, and non-critical categories determining appropriate protocols [51].
Table 1: Chemical Decontamination Methods and Applications
| Method | Mechanism | Common Agents | Typical Applications |
|---|---|---|---|
| Dissolution | Physical removal through solubilization | Water, organic solvents | Soluble salts, non-polar compounds |
| Surfactants | Reduce adhesion forces between contaminants and surfaces | Household detergents | Particulate matter, organic films |
| Chemical Detoxification | Inactivation through chemical reaction | Halogen stripping, neutralization, oxidation/reduction | Toxic chemicals, hazardous substances |
| Disinfection/Sterilization | Microbial inactivation | Chemical disinfectants, steam, dry heat | Microbial contamination, biological safety |
The efficacy of chemical decontamination depends on multiple factors including contact time, concentration, temperature, and the amount of organic soil present [51]. Chemical germicides regulated by the EPA as "hospital disinfectants" have demonstrated potency against representative microorganisms, while those with tuberculocidal claims possess broader spectrum capability against more resistant pathogens [51].
Physical Decontamination Methods
Physical removal methods effectively address gross contamination through mechanical action. The appropriate technique depends on contaminant characteristics, with different approaches for loose contaminants, adhering contaminants, and volatile liquids [53]. Physical methods include scrubbing/scraping, rinsing with pressurized fluids, evaporation/vaporization, and steam jets.
For delicate instruments or complex geometries, ultrasonic cleaning provides enhanced contaminant removal through cavitation effects. Research on endodontic files demonstrates ultrasonic cleaning significantly reduces surface contamination scores, particularly when combined with pre-cleaning methods [56]. The limitations of physical methods include potential for contaminant spread and possible surface damage when using aggressive techniques like high-pressure sprays or abrasive scrubbing.
Procedural Framework for Surface Cleaning
Systematic cleaning procedures ensure consistent results and minimize cross-contamination. The CDC recommends a risk-based approach guided by probability of contamination, patient vulnerability, and potential for exposure [55]. The fundamental sequence proceeds from cleaner to dirtier areas, high to low surfaces, and in a methodical systematic manner to avoid missing areas [55].
The cleaning process involves: (1) thorough wetting of a fresh cleaning cloth in environmental cleaning solution; (2) folding the cloth to an appropriate size; (3) wiping surfaces using proper strategy with mechanical action; (4) regular rotation to unused cloth surfaces; (5) proper disposal or reprocessing of used cloths [55]. Special attention must focus on high-touch surfaces including bedrails, IV poles, sink handles, bedside tables, counters, privacy curtains, patient monitoring equipment, and door knobs [55].
Cleaning Methodology Decision Flow
Correction Methods and Analytical Considerations
Statistical Correction for Analytical Measurements
At trace contamination levels, statistical uncertainty becomes significant in surface analysis techniques like XPS. The concept of relative background subtraction variance (RBSV) quantifies uncertainty introduced by background determination methods relative to the background area itself [54]. For elements near the detection limit, the correlation between background and peak areas significantly impacts measurement uncertainty, contrary to the "uncorrelated-area approximation" used for prominent peaks [54].
The detection limit conventionally defined as the amount where background-subtracted signal equals three times its standard deviation requires careful consideration of acquisition parameters, background-determination method, and spectral properties [54]. Optimization strategies should minimize total measurement time needed to achieve target detection limits, particularly for radiation-sensitive samples or high-throughput laboratories. Statistical approaches must account for the fact that different analysts may report varying peak intensities when presented with the same spectra, especially near detection limits [54].
Validation and Quality Control Measures
Rigorous method validation establishes performance characteristics of contamination control protocols. This includes determination of detection limits, quantification limits, precision, accuracy, and robustness under varying conditions. Quality control samples should include method blanks, negative controls, and reference materials with known contamination levels to monitor procedural performance.
For molecular biology applications, comprehensive decontamination requires simultaneous targeting of nucleic acids, nucleases, and enzymes. Studies demonstrate that specialized cleaning agents inducing oxidative fragmentation of surface-bound nucleic acids while inactivating associated enzymes can remove detectable DNA and enzymatic activity within one minute of surface contact [52]. Process verification should include regular environmental monitoring through surface sampling with subsequent analytical testing to detect contamination trends before they impact critical operations.
Experimental Protocols
Protocol: Surface Cleanliness Evaluation via SEM
This protocol evaluates cleaning efficacy for metal instruments using scanning electron microscopy (SEM), adapted from endodontic file cleaning research [56].
Materials and Equipment
Table 2: Research Reagent Solutions for Surface Cleanliness Evaluation
| Item | Specification | Function |
|---|---|---|
| SEM Instrument | High vacuum mode, 15.00-20.00 kV, Everhart-Thornley detector | High-resolution surface imaging |
| Sample Holder | Custom design with orientation markings | Consistent positioning for sequential imaging |
| Ultrasonic Cleaner | 40 kHz frequency, 480 W power, temperature control | Cavitation-based contaminant removal |
| Cleaning Solutions | Distilled water, 70% alcohol, 0.2% chlorhexidine | Contaminant dissolution and disinfection |
| Mechanical Cleaners | Soft nylon-bristle brushes, chlorhexidine-impregnated sponge, alcohol-impregnated gauze | Physical contaminant disruption |
Procedure
- Baseline Imaging: Using sterile handling techniques, mount specimens on custom holders ensuring consistent orientation. Acquire SEM images at standardized magnifications (e.g., 250x, 500x, 1000x) from representative areas, documenting instrument parameters.
- Contamination Scoring: Two independent evaluators assess images using a 0-3 scale: 0=clean surface; 1=organic film presence; 2=organic film with debris covering ≤50% of surface; 3=heavy contamination with debris covering >50% of surface. Calculate inter-rater reliability using Cohen's kappa.
- Experimental Groups: Randomly assign specimens to experimental groups with appropriate sample size (typically n=10 per group based on power analysis considerations).
- Cleaning Interventions: Apply designated cleaning protocols:
- Group 1: Autoclave sterilization only (134°C for 45 minutes)
- Group 2: Ultrasonic cleaning (40 kHz, 90°C, 10 minutes)
- Group 3: Manual brushing (30 seconds) followed by ultrasonic cleaning
- Group 4: Sponge cleaning (10 insertions) with 0.2% chlorhexidine followed by ultrasonic cleaning
- Group 5: Gauze cleaning with 70% alcohol followed by ultrasonic cleaning
- Post-treatment Imaging: Repeat SEM imaging using identical parameters and positions.
- Data Analysis: Compare pre- and post-cleaning scores using non-parametric statistics (Wilcoxon Signed-Rank test for within-group comparisons; Fisher-Freeman-Halton test for intergroup comparisons).
Interpretation
Effective cleaning protocols show statistically significant reductions in median contamination scores. Research demonstrates autoclave sterilization alone provides insufficient cleaning, while mechanical methods combined with ultrasonic cleaning reduce scores significantly, with sponge and gauze methods showing highest efficacy (67% reduction) [56].
Protocol: Trace Contamination Analysis via XPS
This protocol measures trace surface contamination using X-ray photoelectron spectroscopy (XPS) with statistical uncertainty analysis near detection limits [54].
Materials and Equipment
- XPS instrument with calibrated relative sensitivity factors (RSFs)
- Standardized sample holders ensuring consistent positioning
- Charge neutralization system for non-conductive samples
- Reference materials for quantification verification
- Data analysis software capable of peak fitting and background subtraction
Procedure
- Sample Preparation: Clean reference surfaces using validated protocols. Apply contamination standards or experimental contaminants using controlled deposition methods.
- Instrument Calibration: Verify energy scale using standard reference materials. Confirm analyzer transmission function and relative sensitivity factors.
- Data Acquisition:
- Select acquisition parameters to optimize signal-to-noise for target elements
- Acquire wide scans to identify all elements present
- Collect high-resolution regional scans for quantitative analysis
- Set dwell times and number of sweeps to achieve desired counting statistics
- Data Processing:
- Subtract appropriate background (Shirley, Tougaard, or linear)
- Integrate peak areas using consistent energy windows
- Calculate atomic concentrations using standard quantification procedures
- Apply relative sensitivity factor corrections
- Uncertainty Analysis:
- Calculate statistical uncertainties incorporating background subtraction correlation
- Determine detection limits using the RBSV framework
- Report uncertainties with coverage factors for desired confidence levels
Interpretation
For trace contamination analysis, proper uncertainty estimation must include the correlation between background and peak areas, which significantly impacts detection limits [54]. The relative background subtraction variance (RBSV) provides a metric to optimize acquisition strategies, balancing measurement time against required detection limits.
Trace Contamination Analysis Workflow
Effective management of surface contamination requires a systematic framework integrating proactive minimization strategies, validated cleaning protocols, and appropriate correction methods. The principles outlined in this document provide researchers with evidence-based approaches to maintain surface integrity across diverse applications from healthcare to analytical laboratories. Implementation should be guided by risk assessment considering the vulnerability of processes to contamination effects and the consequences of analytical errors.
The continuing challenge of emerging contaminants, particularly nanoplastics and PFAS, necessitates ongoing method development and validation [57] [58]. Future directions include advanced detection technologies like liquid chromatography-mass spectrometry (LC-MS) and inductively coupled plasma mass spectrometry (ICP-MS) that enable precise monitoring at trace levels [57]. By adopting the comprehensive strategies outlined here—from fundamental principles to specialized protocols—researchers can significantly reduce contamination-related errors and enhance the reliability of surface analysis data.
In surface analysis, the quality of data is profoundly dependent on the initial preparation of the sample. The International Union of Pure and Applied Chemistry (IUPAC) emphasizes the importance of defining the "experimental surface"—the portion of the sample that interacts with the analysis technique—which is directly determined by preparation methods [1]. Inadequate preparation can introduce artifacts and contamination, leading to misinterpretation of a material's true properties. This application note provides detailed, optimized protocols for preparing three critical material classes—polymers, alloys, and biomaterials—within the context of developing a comprehensive IUPAC guide for surface analysis. The principles outlined here are designed to help researchers achieve reliable, reproducible, and analytically significant results by preserving the native state of the material while creating a surface suitable for high-resolution characterization.
Polymer Sample Preparation Protocols
The preparation of polymer samples requires careful consideration of their inherent softness, susceptibility to deformation, and environmental sensitivity. The primary challenge is to create a surface representative of the material's true structure without introducing preparation-induced artifacts [59].
Key Preparation Techniques
- Thin Film Preparation (Spin Coating & Solution Casting): For fundamental surface property studies, creating a uniform thin film is often the first step. Spin coating involves depositing a polymer solution onto a substrate followed by high-speed rotation to achieve a uniform thickness. Key parameters include solution concentration, spinning speed, and drying environment. Solution casting involves evaporating a polymer solution in a controlled manner to form a film. Both methods require optimization of solvent choice and drying conditions to prevent defects like orange-peel morphology or solvent entrapment [59].
- Sectioning and Microtomy: To analyze internal structures or cross-sections, ultramicrotomy is employed. This technique uses glass or diamond knives to produce thin, ultra-smooth sections. For many polymers, cryo-microtomy—sectioning at temperatures below the polymer's glass transition (Tg) using liquid nitrogen—is essential to prevent smearing and plastic deformation [59].
- Surface Treatment and Cleaning: Prior to analysis, surfaces must be free of contaminants. Protocols include gentle solvent washing (with a solvent that does not dissolve the bulk polymer), plasma treatment (e.g., oxygen or argon plasma for cleaning or functionalization), and ultrasonication in compatible solvents. The choice of method depends on the polymer's chemical resistance and the analysis objectives [59].
- Sample Mounting and Fixation: Stable mounting is critical for high-resolution techniques like Atomic Force Microscopy (AFM). Methods include using double-sided carbon tape, epoxy adhesives, or specialized mechanical clamps. The key is to ensure rigid fixation without causing stress or contamination at the region of interest [59].
Optimized Workflow for Atomic Force Microscopy (AFM)
AFM is particularly sensitive to surface topography and mechanical properties, making sample preparation paramount. The following workflow, visualized in Figure 1, is optimized for a wide range of polymeric materials.
Figure 1. Optimized Polymer Preparation Workflow for AFM Analysis. This diagram outlines the decision-making process and key steps for preparing polymer samples to obtain reliable AFM data [59].
Research Reagent Solutions for Polymer Preparation
Table 1: Essential reagents and materials for polymer sample preparation.
| Reagent/Material | Function | Application Example |
|---|---|---|
| Double-Sided Carbon Tape | Conductively mounts sample to substrate for SEM/AFM. | General mounting of non-volatile polymers. |
| Low-VOC Epoxy Resin | Embeds samples for microtomy, providing mechanical support. | Embedding soft or fibrous polymers for cross-sectioning. |
| Diamond Knife | Sections embedded or bulk polymer to create a smooth surface. | Ultramicrotomy for TEM and high-resolution AFM. |
| High-Purity Solvents (e.g., Toluene, THF, Chloroform) | Dissolves polymer for thin film creation or cleans surfaces. | Spin coating; removing organic contaminants. |
| Conductive Silver Paste | Creates a grounded, conductive path for SEM/EDX. | Mounting polymers for electron microscopy. |
Alloy Sample Preparation Protocols
Metallographic preparation of multi-phase alloys aims to reveal the true microstructure without introducing relief, smearing, or selective etching. This is especially critical for advanced materials like Multi-Principal Element Alloys (MPEAs), which often contain phases of vastly different hardness [60].
Quantitative Metallography for Multi-Phase Alloys
The goal is to produce a scratch-free, flat surface suitable for techniques like Electron Backscatter Diffraction (EBSD). A recent study on a dual-phase WMoFeNi MPEA compared several methods, with quantitative results summarized in Table 2 [60].
- Vibratory Polishing with Alumina Suspension: This method provided a smoother surface compared to silica polishing. Although it preferentially scraped the softer FCC phase, it did not create significant relief, making it a good final step before ion polishing [60].
- Vibratory Polishing with Silica Suspension: This method was found to preferentially etch the harder μ phase, leading to a rough surface topography that was unsuitable for high-quality EBSD analysis [60].
- Broad Ion Beam (BIB) Polishing: Following mechanical polishing, ion polishing acts as a "surface perfector". It removes the thin, deformed layer left by mechanical processes, eliminating scratches and surface stress. The study concluded that sequential alumina vibratory polishing followed by BIB polishing yielded the best EBSD results [60].
Table 2: Comparison of preparation methods for a WMoFeNi Multi-Principal Element Alloy [60].
| Preparation Method | Surface Finish | Phase Selectivity | EBSD Band Contrast | Recommended Use |
|---|---|---|---|---|
| Silica Vibratory Polishing | Rough | Preferentially etches hard μ phase | Poor | Not recommended for EBSD |
| Alumina Vibratory Polishing | Smooth | Preferentially scrapes soft FCC phase | Good | Primary mechanical polishing |
| Alumina Polish + Ion Polish | Very Smooth | Minimal | Excellent | Optimal final preparation |
Optimized Workflow for EBSD Analysis
The following standardized protocol, illustrated in Figure 2, is recommended for preparing complex, multi-phase alloys for EBSD and other high-resolution surface analysis techniques [60] [61].
Figure 2. Optimized Alloy Preparation Workflow for EBSD Analysis. This sequence ensures the removal of deformed layers and produces a pristine, deformation-free surface for high-quality diffraction patterns [60] [61].
Biomaterial Sample Preparation Protocols
Biomaterial surface preparation is unique due to the need to preserve biological functionality and molecular structure while meeting the analytical requirements of techniques like X-ray Photoelectron Spectroscopy (XPS) and Time-of-Flight Secondary Ion Mass Spectrometry (ToF-SIMS). The key is to maintain the state of the upper monolayer, which dictates wetting, biocompatibility, and adhesion [62].
Key Considerations and Contamination Control
- Surface Contamination: Contaminants from manufacturing (e.g., mold release agents, solvents) or handling (e.g., salts, lipids) can mask the true surface chemistry and lead to incorrect conclusions about biocompatibility. Strict protocols for cleaning and handling with powder-free gloves are essential [62].
- Molecular Orientation and Functionalization: Many biomaterials are modified with self-assembled monolayers (e.g., thiols on gold, silanes on glass) or plasma treatments to control bio-interactions. Preparation and analysis must ensure these layers are intact and correctly oriented [62].
- Hydration State: The analysis of hydrated biomaterials or hydrogels is particularly challenging. While some techniques require a vacuum, specialized sample holders and cryogenic preparation can be used to preserve the native hydrated state for analysis.
Workflow for Surface Chemistry Analysis
The generalized workflow for preparing biomaterials for surface chemical analysis focuses on preserving the native surface state while removing non-native contaminants, as shown in Figure 3.
Figure 3. Biomaterial Surface Preparation and Analysis Workflow. This protocol prioritizes the preservation of intentional surface modifications while removing adventitious contaminants [62].
Research Reagent Solutions for Biomaterials
Table 3: Essential reagents and materials for biomaterial surface preparation.
| Reagent/Material | Function | Application Example |
|---|---|---|
| High-Purity Water (HPLC Grade) | Removes water-soluble salts and residues without leaving spots. | Initial rinsing of implants and medical devices. |
| Anhydrous Ethanol | Removes organic contaminants and dehydrates samples rapidly. | Rinsing and cleaning prior to surface analysis. |
| Inert Sample Mounting Tape (e.g., Cu) | Secures sample to holder without contaminating the analysis area. | Mounting for XPS and ToF-SIMS analysis. |
| Gold or Silicon Substrates | Provide an ultra-clean, flat surface for coating and analyzing thin films. | Supporting polymer films or protein layers for analysis. |
| Plasma Cleaner (Argon/Oxygen) | Generates a clean, sterile surface and can introduce functional groups. | Activating polymer surfaces prior to biomolecule immobilization. |
Optimizing sample preparation is not a one-size-fits-all process; it requires a deep understanding of the material's properties and the specific requirements of the analytical technique. For polymers, the focus is on minimizing deformation and contamination. For multi-phase alloys, the priority is achieving a flat, deformation-free surface that represents all phases equally. For biomaterials, preserving the native surface chemistry and functionality is paramount. The protocols and guidelines provided here, developed in accordance with international standards and current research, form a foundation for obtaining reliable and meaningful surface analysis data, a core objective of the ongoing IUPAC guide research.
Time and Cost-Efficient Preparation Methods for High-Throughput Settings
Quantitative Benchmarking of High-Throughput Preparation
High-Throughput Screening (HTS) is defined as an automated method to quickly assay large libraries of chemical species for the affinity of small organic molecules toward a target of interest, with current systems capable of testing more than 100,000 different compounds per day [63]. The efficiency of these methods is fundamentally dependent on optimized sample preparation protocols that maximize throughput while minimizing resource consumption.
Table 1: Performance Metrics for High-Throughput Preparation Methods
| Method / Principle | Estimated Compounds Processed Per Day | Relative Cost Index | Primary Efficiency Driver |
|---|---|---|---|
| Traditional Liquid-Handling Automation | > 100,000 [63] | High | Automation, parallel processing |
| Miniaturized & Microfluidic Systems | Very High (theoretical) | Low | Reduced reagent/solvent volumes [64] |
| In-Situ Preparation | Protocol Dependent | Very Low | Elimination of separate prep steps [64] |
| Solid-Phase Extraction (SPE) | Medium | Medium | Automation, high purity yields |
| Green Solvent-Based Methods | High | Low | Use of safer, cheaper solvents [64] |
Foundational Principles for Efficient Preparation
The ten principles of Green Sample Preparation (GSP) provide a strategic framework for developing time and cost-efficient methodologies, emphasizing that "green sample preparation is sample preparation" and should be integrated as a core guiding principle [64]. These principles are directly applicable to high-throughput environments.
Table 2: Green Sample Preparation Principles and High-Throughput Applications
| Principle | Implementation in HTS Context | Impact on Time/Cost |
|---|---|---|
| Use of Safe Solvents/Reagents | Preference for water-based or bio-based solvents over hazardous organics [64] | Reduces waste disposal costs and safety overhead |
| Miniaturization | Scaling down assay volumes to nanoliter scale in microtiter plates [64] | Drastic reduction in reagent consumption and cost per test |
| Automation | Employing robotic liquid handlers and automated workstations [63] | Increases throughput, improves reproducibility, reduces labor time |
| Procedure Simplification | Integrating sample prep with analysis (e.g., in-situ derivatization) [64] | Shortens overall workflow, minimizes handling errors |
| Low Energy Demand | Utilizing ambient temperature reactions where possible [64] | Lowers operational energy costs |
| High Sample Throughput | Designing parallel processing workflows [63] | Maximizes data output per unit time |
Detailed Experimental Protocols
Protocol 3.1: Automated Miniaturized Solid-Phase Extraction for Biofluids
This protocol is designed for the rapid cleanup and concentration of analytes from biological matrices prior to surface analysis.
- Objective: To efficiently extract and concentrate target analytes from plasma/serum for high-throughput analysis.
- Materials:
- Research Reagent Solutions:
- 96-Well SPE Plates: (e.g., C18 or mixed-mode chemistry) for parallel processing of multiple samples.
- Conditioning Solvent: Methanol (HPLC grade).
- Equilibration Buffer: 10-50mM ammonium formate/acetate buffer, pH ~4-7.
- Wash Solution: 5-10% methanol in water or buffer.
- Elution Solvent: 70-100% methanol or acetonitrile, possibly with a volatile acid/base.
- Equipment: Automated 96-channel liquid handling robot, positive pressure manifold, microplate centrifuge, analytical instrument (e.g., LC-MS).
- Research Reagent Solutions:
- Procedure:
- Conditioning: Automatically dispense 200 µL of methanol to each well of the SPE plate. Apply gentle positive pressure or vacuum to pass solvent through.
- Equilibration: Dispense 200 µL of equilibration buffer to each well. Pass through until the sorbent is just wet.
- Sample Loading: Transfer 50-100 µL of pre-clarified (centrifuged) biofluid sample to each well. Use slow, controlled flow for maximum binding.
- Washing: Dispense 2 x 200 µL of wash solution to remove weakly bound matrix interferents.
- Elution: Apply 2 x 50 µL of elution solvent into a clean collection plate. The reduced volume enhances concentration.
- Analysis: Seal the collection plate and proceed directly to analysis or dilute as needed.
Protocol 3.2: Direct In-Situ Derivatization in a Microplate
This protocol simplifies workflow by combining sample preparation and reaction steps in a single vessel.
- Objective: To perform chemical derivatization of surface-bound analytes directly in the assay microplate.
- Materials:
- Research Reagent Solutions:
- Derivatization Reagent: (e.g., a fluorescent or chromophoric tagging agent), prepared fresh in suitable solvent.
- Reaction Buffer: A buffer optimized for the specific derivatization chemistry (e.g., borate, phosphate).
- Quenching Solution: A reagent to stop the reaction (e.g., acid, base, or a competing compound).
- Equipment: Microplate shaker/incubator, multichannel pipette or liquid handler, microplate reader.
- Research Reagent Solutions:
- Procedure:
- Sample Introduction: After the target is immobilized on the plate surface, add the analyte solution to the wells.
- Reagent Addition: Simultaneously add the derivatization reagent and reaction buffer using a liquid handler.
- Incubation: Seal the plate and incubate with shaking at a controlled temperature for a predetermined time (e.g., 30 minutes at 37°C).
- Quenching: Add a fixed volume of quenching solution to all wells to halt the reaction uniformly.
- Direct Reading: Read the plate immediately on the appropriate detector without any transfer steps.
Workflow Visualization and Decision Pathways
HTS Method Selection
Green Sample Prep Workflow
Essential Research Reagent Solutions
Table 3: Key Reagent Solutions for High-Throughput Sample Preparation
| Reagent / Material | Primary Function | Application Note |
|---|---|---|
| Multi-Well SPE Plates | Solid-phase extraction of multiple samples in parallel. | Enables simultaneous processing of 96 or 384 samples, drastically reducing prep time. Choose sorbent chemistry (C18, HLB, Ion-Exchange) based on analyte [64]. |
| Derivatization Tags | Chemically modify analytes to enhance detection. | Fluorescent or chromophoric tags (e.g., FITC, DNPH) are used in-situ (Protocol 3.2) for sensitive detection without transfer steps. |
| Green Solvents | Replacement for hazardous traditional solvents. | Bio-based or safer solvents (e.g., ethanol, ethyl acetate) reduce environmental impact and waste disposal costs [64]. |
| Immobilization Matrices | Anchor targets or catalysts on a solid surface. | Functionalized surfaces (e.g., with NHS, streptavidin) in microplates allow for easy washing and reuse, saving reagent costs. |
| Automated Liquid Handling Tips | Precise, robotic transfer of liquid volumes. | Critical for accuracy and reproducibility in miniaturized protocols. Disposable or washable tips prevent cross-contamination. |
Validating Surface Preparation: Accuracy, Reference Materials, and Technique Comparison
Using Certified Reference Materials (CRMs) for Method Validation
Within the context of sample preparation for surface analysis, as guided by IUPAC principles, the validation of analytical methods is a critical step to ensure data reliability, accuracy, and traceability. Certified Reference Materials (CRMs) play an indispensable role in this process. A CRM is a reference material characterized by a metrologically valid procedure for one or more specified properties, accompanied by a certificate that provides the value of the specified property, its associated uncertainty, and a statement of metrological traceability [65].
The use of CRMs provides an objective means to validate the entire analytical procedure, from sample preparation to final measurement, ensuring that methods produce results that are fit for their intended purpose. This document outlines detailed application notes and protocols for incorporating CRMs into method validation protocols, with a specific focus on challenges relevant to surface analysis, such as interfacial phenomena and nanomaterial characterization [65].
The Role of CRMs in the Method Validation Framework
Method validation establishes documented evidence that a specific analytical procedure is suitable for its intended use. CRMs are crucial for assessing key method performance characteristics, primarily accuracy and precision. Accuracy is defined as the closeness of agreement between a measured value and the true value of the CRM, while precision refers to the closeness of agreement between independent measurements obtained under stipulated conditions [66].
The process of using a CRM for validation is fundamentally a comparison exercise. It tests whether the analytical method, when applied to the CRM, yields a result that is statistically indistinguishable from the certified value, considering the associated uncertainties. This provides a direct link to metrological traceability, as the CRM's certificate ensures its values are traceable to national or international standards.
Data Quality and CRMs
The relationship between CRMs and data quality can be systematically understood through standard data quality dimensions. The following table summarizes how CRMs directly address these critical dimensions in the context of method validation.
Table 1: How CRMs Address Key Data Quality Dimensions in Analytical Chemistry
| Quality Dimension | Role of CRM in Validation |
|---|---|
| Accuracy [66] | Serves as a ground-truth standard to quantify measurement bias by comparing the mean measured value to the certified value. |
| Completeness [66] | Ensures the analytical method can reliably detect and quantify the analyte, confirming that data sets are not skewed by non-detects for the target property. |
| Consistency [66] | Verifies that the method produces coherent results over time and across different instrument calibrations, supporting the stability of the measurement process. |
| Validity [66] | Confirms that the measurement results fall within the expected range defined by the CRM's certified value and uncertainty, ensuring data conforms to predefined rules. |
Experimental Protocol: Using CRMs for Method Validation
This protocol provides a step-by-step guide for validating an analytical method using a CRM. The workflow is designed to be comprehensive, covering selection, measurement, data analysis, and final assessment.
Figure 1: A workflow diagram for method validation using Certified Reference Materials (CRMs). The process involves selection, preparation, analysis, and statistical assessment.
Materials and Equipment
The following table details the essential reagents and materials required for a typical method validation experiment using CRMs.
Table 2: Essential Research Reagent Solutions and Materials for CRM-based Method Validation
| Item | Function/Description |
|---|---|
| Certified Reference Material (CRM) | The core material with certified property values, used to establish accuracy and traceability. Must be appropriate for the sample matrix and analyte of interest. |
| High-Purity Solvents | (e.g., HPLC-grade water, acids, organic solvents). Used for sample dissolution, dilution, and preparation to prevent contamination. |
| Primary Standards | Ultra-pure materials used for instrument calibration, often separate from the CRM used for validation. |
| Sample Preparation Equipment | Includes analytical balance (for precise weighing), ultrasonic bath, homogenizer, and digestion system (e.g., microwave). |
| Analytical Instrumentation | The system being validated (e.g., HPLC-MS, ICP-OES, GC). Must be properly calibrated before validation. |
| Statistical Software | For performing t-tests, calculating standard deviation, and evaluating control charts. |
Step-by-Step Procedure
- CRM Selection and Handling: Select a CRM that closely matches the sample matrix and analyte concentration of the test materials. Upon receipt, inspect the certificate of analysis and store the CRM according to the supplier's instructions (e.g., in a desiccator, at specified temperature) to maintain stability [65].
- Sample Preparation: Accurately weigh a minimum of six independent portions of the CRM. The sample mass must be sufficient to ensure homogeneity and representativeness. Prepare the CRM samples using the exact same procedure (e.g., dissolution, extraction, digestion) that will be applied to routine test samples.
- Instrumental Analysis: Analyze the prepared CRM samples in a random sequence alongside appropriate calibration standards and method blanks. The number of replicates (a minimum of six is recommended) should provide a robust statistical basis for evaluating precision.
- Data Collection and Processing: Record the measured value for the target property from each CRM replicate. The raw data should be compiled in a structured table for subsequent statistical analysis, as shown in the example below.
Table 3: Example Data Sheet for CRM Measurement Replicates
| Replicate # | Certified Value (mg/kg) | Measured Value (mg/kg) | Deviation from Certified Value |
|---|---|---|---|
| 1 | 100.0 ± 2.5 | 98.5 | -1.5 |
| 2 | 100.0 ± 2.5 | 101.2 | +1.2 |
| 3 | 100.0 ± 2.5 | 99.1 | -0.9 |
| 4 | 100.0 ± 2.5 | 102.5 | +2.5 |
| 5 | 100.0 ± 2.5 | 100.8 | +0.8 |
| 6 | 100.0 ± 2.5 | 97.9 | -2.1 |
Data Analysis and Statistical Evaluation
- Calculate Mean and Standard Deviation: Compute the mean (x̄) and standard deviation (s) of the measured values from the CRM replicates. The standard deviation represents the method's precision under repeatability conditions.
- Assess Accuracy (t-test): Perform a statistical t-test to compare the mean measured value (x̄) to the certified value (μ). The calculated t-value is compared to a critical t-value from statistical tables for (n-1) degrees of freedom at a 95% confidence level.
- t-value Calculation: ( t = \frac{| \bar{x} - \mu |}{s / \sqrt{n}} )
- Acceptance Criterion: If the calculated t-value is less than the critical t-value, there is no significant evidence of bias, and the method's accuracy is confirmed.
- Evaluate Measurement Uncertainty: Combine the standard uncertainty of the CRM (uCRM) and the standard uncertainty from the method precision (umethod = s/√n) to estimate the overall uncertainty of the measurement.
Case Study: Validation of a Surface Analytical Technique
Consider a scenario from surface analysis, inspired by research on interfacial phenomena in nanocomposites [65]. A researcher is developing a method to quantify the concentration of a bioactive compound, such as succinic acid (SA), on the surface of a modified nanosilica carrier.
Challenge: Validating the extraction and quantification of SA from a complex, nanostructured powder matrix. CRM Selection: A CRM of silica powder with a certified surface concentration of a similar organic acid would be ideal. Alternatively, a CRM of succinic acid in a suitable solvent could be used to validate the quantification step of the analysis. Validation Approach: The researcher would follow the protocol in Section 3. The preparation step would involve extracting the SA from the nanosilica under defined conditions. Successful validation (i.e., no significant bias found in the t-test) would provide confidence that the sample preparation and analytical method accurately release and quantify the surface-bound compound.
The integration of Certified Reference Materials into method validation protocols is a non-negotiable practice for ensuring data quality in analytical science, particularly in complex fields like surface analysis of nanomaterials [65]. The structured protocol outlined herein—encompassing careful CRM selection, rigorous sample preparation, replicated analysis, and robust statistical evaluation—provides a defensible framework for demonstrating method accuracy and precision. By adhering to this practice, researchers and drug development professionals can generate reliable, traceable, and high-quality data that meets the rigorous standards expected in IUPAC-guided research and regulatory submissions.
In the realm of analytical chemistry, particularly in surface analysis guided by IUPAC principles, the concepts of accuracy and precision are foundational for validating experimental data. Accuracy is defined as the "The closeness of agreement between a test result and the true value," a qualitative concept combining random error components and a common systematic error or bias component [67]. For researchers and drug development professionals, quantifying this accuracy is not merely an academic exercise but a critical practice for ensuring data reliability, method validation, and regulatory compliance. This document outlines standardized protocols for calculating deviation and Relative Percent Difference (RPD), providing a framework for assessing analytical accuracy within the context of surface analysis and sample preparation [1] [67].
The boundary between two phases, or the "surface", is, in practical analytical terms, that portion of the sample with which significant interaction occurs with the particles or radiation used for excitation [1]. Preparing and analyzing this region demands rigorous quality control. The Relative Percent Difference serves as a fundamental metric for this purpose, enabling the evaluation of analytical precision and sample homogeneity through laboratory duplicates [68].
Theoretical Background
Key Concepts in Analytical Accuracy
- Accuracy: The closeness of agreement between a measured value and the true value. It is a measure of the total error, encompassing both random and systematic components [67].
- Precision: The closeness of agreement between independent measurements obtained under the same conditions. It is a measure of random error and is often quantified by the standard deviation [67].
- Bias: The systematic difference between the measured value and the true value. It is a component of accuracy [67].
- True Value: An ideal value characterized by a quantity perfectly defined in the conditions that exist when that quantity is considered. In practice, this is often approximated using Certified Reference Materials (CRMs) [67].
The Role of Certified Reference Materials
The assessment of accuracy hinges on the availability of reliable reference points. Certified Reference Materials (CRMs) are physical standards certified for one or more properties, with their certified values established through collaborative analyses using multiple independent methods [67]. These materials, available from bodies like the National Institute of Standards and Technology (NIST) and the British Bureau of Analysed Samples, provide the accepted "true value" against which instrumental measurements are compared. It is crucial to recognize that these certified values themselves contain uncertainties, typically expressed as a standard deviation or a 95% prediction interval [67].
Calculation Methods
The accuracy of a measurement, or the bias of an analytical method, can be quantified through several straightforward calculations that compare a measured value to the certified or accepted value of a CRM.
Weight Percent Deviation
The most direct way to express bias is to compute a straightforward weight percent deviation [67]:
Formula 1: Deviation
Deviation = %Measured – %Certified
Example Calculation:
Consider a CRM with a certified nickel concentration of 30.22%. An instrumental measurement yields a value of 30.65%.
Deviation (Weight Percent) = 30.65% – 30.22% = 0.43%
Relative Percent Difference (RPD)
A more universally applicable way to express this bias is to compute the Relative Percent Difference (RPD), which references the difference to the mean concentration level of the analyte [67]. This is also commonly used to assess the precision between duplicate samples [68].
Formula 2: Relative Percent Difference (RPD)
Relative % Difference = ( |Measured Value - Certified Value| / Certified Value ) × 100
Example Calculation (using the same nickel data):
Relative % Difference = ( |30.65% – 30.22%| / 30.22% ) × 100 = 1.42%
For laboratory duplicates, the same RPD formula is used, where the two measured values from the duplicate analyses are compared to each other to evaluate analytical precision and sample homogeneity [68].
Percent Recovery
Analytical chemists often use the term "percent recovery," which provides a similar insight into accuracy [67].
Formula 3: Percent Recovery
% Recovery = (Measured Value / Certified Value) × 100
Example Calculation:
% Recovery = (30.65% / 30.22%) × 100 = 101.42%
Experimental Protocols
Workflow for Assessing Analytical Accuracy
The following diagram outlines the core workflow for quantifying analytical accuracy using CRMs and the RPD metric.
Protocol: Accuracy Verification Using a Single CRM
This protocol details the steps for verifying the accuracy of an analytical method by analyzing a single Certified Reference Material.
1. Material Selection:
- Select a CRM that closely matches the sample matrix and analyte concentration of the unknown samples to be measured. Verify the certificate of analysis for the certified values and their associated uncertainties [67].
2. Instrument Calibration:
- Calibrate the analytical instrument (e.g., spectrometer, chromatograph) according to the manufacturer's recommended procedures and standard laboratory operating protocols. Ensure calibration standards are traceable to national or international standards.
3. Sample Preparation:
- Prepare the CRM for analysis as per the certificate's instructions and your established laboratory methods. This may involve drying, homogenization, dilution, or other preparatory steps. For surface analysis, particular attention must be paid to the "experimental surface"—the portion of the sample with which the analytical technique significantly interacts [1].
- Process a laboratory duplicate (a second aliquot from the same CRM) to simultaneously assess precision via RPD [68].
4. Measurement:
- Analyze the CRM and its duplicate following the standard analytical method. It is considered good practice to analyze the CRM multiple times (e.g., n=3 or n=5) to establish a measure of precision for the measurement itself.
5. Data Calculation:
- For each analyte of interest, calculate the RPD between the measured value(s) and the certified value using Formula 2.
- Alternatively, or additionally, calculate the percent recovery using Formula 3.
- For the duplicate analysis, calculate the RPD between the two measured results [68].
6. Acceptance Criteria:
- Compare the calculated RPD or percent recovery to established acceptance criteria. General guidelines for acceptable bias are provided in Table 1. Regulatory methods or internal quality control documents may define more specific limits.
- If the RPD for the duplicate exceeds the pre-defined limit (e.g., >2x the Reference Detection Limit for concentrations near the method detection limit), the analysis should be investigated and repeated [68].
Protocol: Assessing Method Accuracy via Correlation Curves
For a comprehensive assessment of a method's accuracy across a concentration range, correlation curves are highly recommended [67].
1. Material Selection:
- Select a suite of CRMs (typically 5-10) that cover the expected concentration range of the analyte in your samples.
2. Measurement and Calculation:
- Analyze each CRM in the suite using the analytical method under investigation.
- For each CRM, calculate the measured concentration.
3. Data Analysis and Evaluation:
- Plot the certified values on the x-axis against the measured values on the y-axis.
- Perform a linear regression analysis on the data.
- Criterion 1: Calculate the correlation coefficient (R²). A value of >0.9 indicates good agreement, and >0.98 indicates excellent accuracy [67].
- Criterion 2: The slope of the regression line should approximate 1.0 and the y-intercept should approximate 0. Deviations indicate a proportional or constant bias, respectively [67].
Data Presentation and Acceptance Criteria
Guidelines for Acceptable Accuracy
The question of acceptable bias is determined by the Data Quality Objectives of the analysis. The following table provides empirical guidelines for acceptable deviations from certified values [67].
Table 1: Guidelines for Acceptable Accuracy (Bias)
| Analyte Concentration Level | Acceptable Recovery | Acceptable RPD |
|---|---|---|
| Major (>1%) | 95-105% | ±5% |
| Minor (0.1% - 1%) | 90-110% | ±10% |
| Trace (<0.1%) | 85-115% | ±15% |
Presenting Quantitative Data in Tables
Effective table design is critical for communicating analytical data clearly. The following principles should be applied [69] [70]:
- Aid Comparisons: Numbers are easier to compare vertically than horizontally. Right-flush align numeric columns and their headers to facilitate place-value comparison.
- Reduce Visual Clutter: Avoid heavy grid lines. Remove unit repetition within cells by including units in the column header.
- Increase Readability: Ensure headers stand out from the body. Use a consistent, appropriate level of precision for all values in a column. Use a tabular font (e.g., Lato, Roboto) where each number has the same width.
Table 2: Example Data Table for CRM Accuracy Assessment
| Analytic | Certified Value (%) | Measured Value (%) | Weight % Deviation | RPD (%) | Acceptable Limit Met? |
|---|---|---|---|---|---|
| Nickel (Ni) | 30.22 | 30.65 | +0.43 | 1.42 | Yes |
| Chromium (Cr) | 18.12 | 17.93 | -0.19 | 1.05 | Yes |
The Scientist's Toolkit
Table 3: Essential Research Reagent Solutions and Materials
| Item | Function in Accuracy Assessment |
|---|---|
| Certified Reference Materials (CRMs) | Provides an accepted "true value" with a known uncertainty against which instrument measurements and methods are compared for accuracy verification [67]. |
| Laboratory Duplicates | A second aliquot of a sample processed through the entire analytical method; used to calculate RPD and evaluate analytical precision and sample homogeneity [68]. |
| Calibration Standards | Solutions or materials of known purity and concentration used to calibrate analytical instruments, establishing the relationship between instrument response and analyte amount. |
| Quality Control (QC) Sample | A stable, homogeneous material similar to the test samples, analyzed periodically to monitor the ongoing performance and precision of the analytical method over time. |
Establishing Acceptance Criteria for Bias in Quantitative Surface Analysis
Quantitative surface analysis provides critical data for material characterization, thin-film diagnostics, and functional coating assessment. A fundamental challenge lies in ensuring that reported concentrations accurately reflect the true composition of the sample surface. Measurement bias—the systematic deviation between measured and accepted reference values—directly impacts data quality and subsequent scientific or regulatory decisions [67]. Within the broader context of developing IUPAC guidelines for sample preparation, establishing statistically sound and practically achievable acceptance criteria for this bias is paramount for method validation and inter-laboratory comparability [71].
This document provides a structured framework for establishing, calculating, and validating acceptance criteria for bias in quantitative surface analysis techniques such as X-ray Photoelectron Spectroscopy (XPS), Secondary Ion Mass Spectrometry (SIMS), and Auger Electron Spectroscopy (AES). The protocols are designed to be technique-agnostic where possible, ensuring wide applicability across surface science disciplines.
Defining Bias in Analytical Chemistry
In metrological terms, bias is attributed to systematic effects on measurement results. The IUPAC defines run bias as the contribution to measurement bias attributed to systematic effects on measurement results made in a single analytical run [71]. Total measurement bias in analytical chemistry may be considered to include run bias, laboratory bias, and measurement procedure bias.
Accuracy, which encompasses both random error (precision) and systematic error (bias), is qualitatively defined as "The closeness of agreement between a test result and the true value" [67]. For quantitative analysis, the objective is to discover the exact amount of an analyte present, making the assessment and control of bias a central concern.
Quantifying Bias
The first step in establishing control criteria is the consistent quantification of bias. The following calculations are recommended, using Certified Reference Materials (CRMs) as the source of accepted true values.
Calculation Methods
- Absolute Deviation: The simplest expression of bias, calculated as the difference between the measured and certified values.
Deviation = %Measured – %Certified[67] - Relative Percent Difference (RPD): References the deviation to the concentration level, providing a normalized metric for comparison across different analytes and concentration ranges.
Relative % Difference = [(%Measured – %Certified) / %Certified] × 100[67] - Percent Recovery: An alternative expression commonly used in analytical chemistry.
% Recovery = (%Measured / %Certified) × 100[67]
Practical Example Calculation
Consider a CRM certified for a nickel concentration of 30.22%. An instrumental measurement yields a value of 30.65%.
- Absolute Deviation = 30.65% – 30.22% = 0.43%
- Relative % Difference = [(30.65% – 30.22%) / 30.22%] × 100 = 1.42%
- Percent Recovery = (30.65% / 30.22%) × 100 = 101.42% [67]
Establishing Acceptance Criteria
Acceptable bias limits are not universal; they must be defined based on the Data Quality Objectives (DQOs) of the analysis, which include the technical requirements of the application and relevant regulatory standards [67].
Empirical Guidelines for Acceptable Bias
Based on practical experience in spectrochemical analysis, the following guidelines for acceptable deviation from certified values provide a useful starting point [67]:
Table 1: Guidelines for Acceptable Analytical Bias
| Analyte Concentration Range | Acceptable Relative Percent Difference |
|---|---|
| Major components (> 100 ppm) | 3 – 5% |
| Minor components (1 – 100 ppm) | 5 – 10% |
| Trace levels (< 1 ppm) | 10 – 15% |
Statistical Process Control (SPC)
A more robust, long-term approach involves using SPC charts [67].
- Procedure: Analyze one or more Quality Control (QC) standards (e.g., a CRM) with each analytical run.
- Data Recording: Plot the calculated bias (either absolute or relative) for the QC standard over time.
- Control Limits: Establish warning and control limits (e.g., at ±2σ and ±3σ, respectively) from the historical data.
- Acceptance Criterion: Bias for a given run is considered acceptable if the QC result falls within the established control limits.
Experimental Protocol for Bias Assessment
This protocol outlines the specific steps for determining the bias of a quantitative surface analysis method.
Materials and Reagents
Table 2: Essential Research Reagent Solutions for Bias Assessment
| Item | Function |
|---|---|
| Certified Reference Materials (CRMs) | Provides the accepted reference value with a stated uncertainty against which instrument response is calibrated and bias is assessed [67]. |
| Internal Standard Materials | A material of known, high purity used to verify instrumental linearity or correct for minor drift. |
| Calibration Standards | A series of standards with certified concentrations used to construct the analytical calibration curve. |
| Sample Preparation Solvents | High-purity solvents for cleaning substrates and CRM surfaces to avoid contamination that could contribute to bias. |
| Conducting Substrates / Mounting Materials | For analysis of insulating samples, a consistent mounting method (e.g., on indium foil, with a charge neutralizer) is critical to minimize artifacts that can cause bias. |
Step-by-Step Procedure
- CRM Selection: Select a CRM that is matrix-matched to the unknown samples and has certified values for the analytes of interest at relevant concentrations. Verify the certificate's validity and uncertainty statements [67].
- Sample Preparation: Prepare the CRM according to the certificate's instructions and your established sample preparation protocol. This may include cleaning, polishing, or mounting. Consistency with the preparation of unknown samples is critical.
- Instrument Calibration: Ensure the surface analysis instrument (XPS, SIMS, etc.) is properly calibrated for energy scale, intensity, and transmission function according to the manufacturer's specifications.
- Data Acquisition: Analyze the CRM under the same experimental conditions (e.g., beam energy, current, analysis area, acquisition time) used for unknown samples. Replicate measurements (n ≥ 3) are required to account for precision.
- Data Processing: Apply the same data processing algorithms (e.g., background subtraction, peak integration, sensitivity factors) to the CRM data as would be applied to an unknown.
- Bias Calculation: For each replicate and each analyte, calculate the concentration, then compute the absolute deviation and RPD relative to the certified value.
- Statistical Evaluation: Calculate the mean bias and its standard deviation from the replicate measurements.
Workflow Diagram
The following workflow visualizes the logical process for establishing and validating bias acceptance criteria.
Advanced Verification: Correlation Curves
For a comprehensive assessment of a method's accuracy across a wide concentration range, correlation curves are highly recommended [67].
- Procedure: Analyze a suite of CRMs covering the concentration range of interest. Plot the certified values on the x-axis against the measured values on the y-axis.
- Accuracy Criteria:
- The correlation coefficient (R²) should be greater than 0.98, indicating excellent agreement.
- The linear regression through the data should have a slope approximating 1.0 and a y-intercept approximating 0 [67].
- Interpretation: Deviation from this ideal 45° line indicates a consistent, proportional bias in the method that may require correction in the calibration model.
Establishing and adhering to clearly defined acceptance criteria for bias is a cornerstone of reliable quantitative surface analysis. By integrating the use of CRMs, standardized calculations, and empirical or statistical control limits into routine practice, laboratories can ensure the accuracy and defensibility of their data. This practice, framed within robust IUPAC-aligned sample preparation guidelines, is essential for generating high-quality, comparable data in research, industrial, and regulatory contexts, particularly in critical fields like drug development where surface properties can significantly influence product performance and safety [72].
Correlation Curves and Statistical Process Control for Ongoing Accuracy Assessment
In the context of sample preparation for surface analysis, as defined by IUPAC, the "experimental surface" is the portion of the sample with which analytical instruments significantly interact [1]. Consistent preparation of this surface region is critical for generating reliable and reproducible data in drug development and research. This document details the application of correlation curve analysis and Statistical Process Control (SPC) as integrated methodologies for the ongoing assessment and assurance of accuracy in sample preparation workflows. These techniques enable the proactive detection of drift and variation, safeguarding the integrity of surface analysis results.
Theoretical Foundation
Correlation Curves in Metrology
Correlation analysis involves using empirical correlations to relate different sets of experimental data to find quantitative estimates of underlying factors [73]. In metrology, this can be applied to displacement measurement. One advanced technique uses speckle correlation, where a laser illuminates an optically rough surface and a camera captures the resulting speckle pattern. The core of the method involves comparing a newly captured speckle pattern against a pre-calibrated database of patterns using a Zero-normalized cross-correlation (ZNCC) criterion to find the best match, which reveals the absolute position or displacement [74].
The correlation coefficient, ( C_{ZNCC} ), between a reference image ( f ) and a displaced image ( g ) is calculated as:
[ C{ZNCC} = \sum{i=-M}^{M} \sum{j=-M}^{M} \left{ \frac{[f(xi,yi) - fm] \times [g(x'i,y'j) - g_m]}{\Delta f \Delta g} \right} ]
where ( fm ) and ( gm ) are the mean intensities, and ( \Delta f ) and ( \Delta g ) are the standard deviations of the images [74]. Plotting this coefficient against known displacements produces a correlation curve. The peak of this curve indicates the position of best match. Research shows that fitting a cubic spline to this correlation curve allows for high-resolution position estimation even with a reduced number of calibration patterns, achieving sub-micrometer accuracy and making it feasible for precise surface alignment tasks [74].
Fundamentals of Statistical Process Control (SPC)
Statistical Process Control (SPC) is a methodological use of statistical techniques to monitor and control a process [75] [76]. Pioneered by Walter Shewhart in the 1920s, its core objective is to distinguish between two types of process variation [77] [76]:
- Common Cause Variation: Inherent, random variation intrinsic to a stable process. It is always present and predictable within statistically calculated limits.
- Special Cause Variation: Unpredictable variation stemming from assignable, non-random sources. It indicates a process shift that requires investigation.
The primary tool of SPC is the control chart, a graphical display of process data over time with three key statistical boundaries [77] [75]:
- Center Line (CL): Typically the process mean.
- Upper Control Limit (UCL) and Lower Control Limit (LCL): Statistically calculated limits (often at ±3 standard deviations from the mean) that define the expected range of common cause variation.
Table: Types of Control Charts and Their Applications in Surface Preparation
| Data Type | Chart Type | Primary Use Case in Surface Preparation |
|---|---|---|
| Variables | X-bar & R | Monitoring the mean and range of subgrouped measurements (e.g., average surface roughness from a batch of samples). |
| (Continuous Data) | Individual & Moving Range (I-MR) | Tracking individual, slow-to-produce measurements (e.g., single, critical coating thickness measurements). |
| Attributes | p-chart | Monitoring the proportion of non-conforming samples in a batch (e.g., percent of samples with visible contamination). |
| (Discrete/Count Data) | u-chart | Tracking the average number of defects per unit (e.g., average number of scratches per prepared substrate). |
Integrated Protocol for Accuracy Assessment
The following protocol integrates correlation curves for calibration and SPC for ongoing monitoring of a sample preparation process.
Protocol 1: System Calibration Using Speckle Correlation and Curve Fitting
This protocol establishes an accurate displacement scale for sample positioning stages, a common element in automated preparation systems.
1. Objective: To create a high-resolution displacement measurement scale using speckle correlation and cubic spline curve fitting for accurate sample positioning. 2. Materials and Reagents:
- Laser Source: HeNe laser (632.8 nm wavelength, 3 mW power) [74].
- Imaging Sensor: CCD camera for speckle pattern capture.
- Optically Rough Sample: The sample surface to be calibrated.
- Precision Motorized Stage: Capable of sub-micrometer incremental movement.
- Data Processing Unit: Computer with software for calculating ZNCC and performing cubic spline interpolation.
Table: Essential Research Reagent Solutions for Speckle Correlation
| Item | Function / Explanation |
|---|---|
| HeNe Laser | Provides coherent, monochromatic light source necessary for generating a stable, high-contrast speckle pattern. |
| CCD Camera | Acts as the sensor to directly capture the speckle patterns for subsequent digital correlation analysis. |
| Motorized Stage | Provides the precise physical displacement to be measured, serving as the reference for calibrating the optical scale. |
| Cubic Spline Algorithm | The mathematical function used for interpolating the correlation curve between data points, enabling sub-pixel/resolution accuracy. |
3. Experimental Workflow:
Calibration Workflow Using Speckle Correlation
4. Procedure: 1. Setup: Illuminate the sample surface with the expanded laser beam. Position the CCD camera approximately 35 mm from the surface to capture the speckle pattern [74]. 2. Database Creation: * Move the motorized stage in fixed, coarse increments (e.g., 10 µm) over the desired measurement range. * At each step, capture the speckle pattern and store it in a database with its corresponding known position. 3. Position Determination for an Unknown: * Capture a new speckle pattern at an unknown sample position. * Compute the ZNCC value (Eq. 1) between this new pattern and all patterns in the database. * Plot the correlation coefficients against the known database positions to form a discrete correlation curve. * Fit a cubic spline function to this discrete curve to interpolate between the coarse 10 µm data points. * The position corresponding to the maximum value of the fitted spline curve is the accurately determined sample position. This method has been shown to achieve resolutions of 36 nm with a 10 µm database interval [74].
Protocol 2: Implementing SPC for Ongoing Monitoring of Surface Preparation
This protocol uses control charts to monitor the stability and accuracy of a sample preparation process over time.
1. Objective: To implement an SPC system for detecting special cause variation in a surface preparation process, enabling proactive correction before non-conforming samples are produced. 2. Materials and Reagents:
- Measurement Tool: The analytical instrument or technique used to assess the prepared surface (e.g., profilometer for roughness, XPS for elemental composition).
- Data Collection System: A means to record measurement data (e.g., LIMS, spreadsheet).
- SPC Software: Software capable of plotting control charts and applying Western Electric or Nelson rules (e.g., Node-RED with SPC nodes, commercial SPC packages) [78].
3. Experimental Workflow:
SPC Implementation and Monitoring Workflow
4. Procedure: 1. Define the Metric: Select a critical quality attribute of the prepared surface for monitoring (e.g., thickness, roughness, contamination level). 2. Establish Control Charts: * Collect a baseline of at least 20-25 data points from the process when it is believed to be stable [79]. * Calculate the centerline (mean) and control limits (typically ±3 standard deviations) from this initial data. * Select the appropriate control chart type based on the data (see Table 1). 3. Ongoing Monitoring and Reaction: * Plot new data on the control chart as it becomes available. * Apply Western Electric Rules to detect out-of-control conditions [77] [79]: * Rule 1: A single point outside the 3σ control limits. * Rule 2: Two out of three consecutive points beyond the 2σ warning limits on the same side. * Rule 3: Four out of five consecutive points beyond the 1σ limits on the same side. * Rule 4: Eight consecutive points on one side of the centerline. * For Common Cause Variation: If only Rule 1 is triggered occasionally, the process is stable; focus on system-level improvements. * For Special Cause Variation: If any rule is triggered, immediately investigate the process to identify the assignable cause (e.g., reagent lot change, instrument calibration drift, operator error) and implement corrective actions [76].
The integration of correlation curves for high-precision system calibration and Statistical Process Control for ongoing monitoring creates a robust framework for ensuring accuracy in surface sample preparation. This data-driven approach moves quality assurance from a reactive, post-preparation inspection to a proactive, preventative methodology. By adopting these protocols, researchers and drug development professionals can significantly enhance the reliability of their surface analysis data, directly supporting the rigorous demands of IUPAC-guided research and regulatory compliance.
Within surface science, the term "surface" requires precise definition as its interpretation directly influences selection of both preparation methods and analytical techniques. According to IUPAC recommendations, three distinct definitions are essential for analytical purposes [1]:
- Surface: The 'outer portion' of a sample of undefined depth, used in general discussions of the outside regions.
- Physical Surface: That atomic layer of a sample which, when placed in a vacuum, is the layer 'in contact with' the vacuum; the outermost atomic layer.
- Experimental Surface: That portion of the sample with which there is significant interaction with the particles or radiation used for excitation.
This conceptual framework establishes that preparation methods must be tailored to yield the specific surface type required by subsequent analytical techniques, ensuring methodological compatibility and analytical validity.
Experimental Protocols: Surface Preparation and Analysis Workflows
Protocol 1: Quantitative Comparison of Surface Properties Between Groups
Purpose: To compare quantitative surface property data (e.g., roughness, contact angle, coating thickness) between different preparation methods or sample groups [80].
Materials:
- Prepared samples with different surface treatments
- Appropriate surface characterization instrument (e.g., profilometer, goniometer, thickness gauge)
- Statistical analysis software (e.g., R, Python with pandas/scipy)
Procedure:
- Prepare samples using different surface treatment methods (A, B, C...), ensuring adequate sample size per group.
- Measure the quantitative surface property of interest using standardized conditions.
- Record all measurements in a structured table with columns: Sample ID, Treatment Group, Measurement Value.
- Calculate summary statistics (mean, median, standard deviation, IQR) for each treatment group.
- Compute differences between group means/medians as appropriate [80].
- Generate appropriate comparative visualizations (see Section 3).
Data Analysis:
- For two groups: Calculate difference between means with corresponding measures of variance.
- For multiple groups: Calculate differences between each group and a reference group.
- Use statistical tests (t-tests, ANOVA) to determine significance of observed differences.
Protocol 2: Propensity Score Matching for Surface Treatment Evaluation
Purpose: To reduce selection bias when comparing surface analytical results from non-randomized treatment studies by balancing treatment and control groups on observed confounders [81].
Materials:
- Observational dataset with treatment assignment and pre-treatment covariates
- R statistical software with MatchIt or PanelMatch packages
- Pre-specified outcome variables measured after surface treatment
Procedure:
- Data Preparation: Clean data, handle missing values, select covariates related to both treatment assignment and outcome [81].
- Propensity Score Estimation: Estimate propensity scores using logistic regression or machine learning methods (random forests, gradient boosting) [81].
- Pre-Matching Diagnostics: Examine propensity score distributions and compute standardized mean differences to assess initial imbalance [81].
- Matching: Apply nearest-neighbor, optimal, or full matching with appropriate calipers [81].
- Post-Matching Diagnostics: Recompute balance metrics and assess matched sample quality [81].
- Treatment Effect Estimation: Estimate causal effect of surface treatment on analytical outcomes using the matched sample [81].
Special Considerations:
- For time-series cross-sectional surface data, use PanelMatch for longitudinal matching [82].
- Always report diagnostics: standardized mean differences before/after matching, proportion of data matched [81].
- Conduct sensitivity analyses using multiple matching methods to test robustness of findings [81].
Data Visualization for Comparative Surface Analysis
Effective visualization is essential for interpreting comparative surface analysis data. The table below summarizes appropriate chart types based on data characteristics and analytical goals [83] [84]:
Table 1: Comparison Chart Selection Guide for Surface Analysis Data
| Chart Type | Primary Use Case | Data Characteristics | Advantages |
|---|---|---|---|
| Bar Chart | Comparing categorical surface data across groups [83] | Few categories, simple comparisons | Simple interpretation, clear rankings |
| Double Bar Graph | Comparing two related surface metrics across the same categories [84] | Paired measurements across categories | Direct two-way comparison |
| Boxplot | Comparing distribution of surface properties between groups [80] | Multiple groups, showing spread & outliers | Reveals distribution shape, outliers |
| 2-D Dot Chart | Comparing individual surface measurements between groups [80] | Small to moderate datasets | Shows individual data points |
| Line Chart | Tracking surface property changes over time or conditions [83] | Time series, sequential data | Shows trends and patterns |
| Slope Chart | Displaying changes in surface properties between two states [84] | Pre-post treatment measurements | Emphasizes direction of change |
Workflow Diagram: Matching Preparation to Analytical Techniques
The following diagram illustrates the decision pathway for matching surface preparation methods to appropriate analytical techniques based on research goals and surface definitions:
Diagram 1: Surface analysis method selection workflow.
Workflow Diagram: Quantitative Comparison Analysis Protocol
This diagram outlines the experimental workflow for comparative analysis of surface properties between different sample groups or preparation methods:
Diagram 2: Quantitative comparison analysis protocol.
Data Presentation: Structured Comparison Tables
When comparing quantitative surface properties across different preparation methods, data should be summarized systematically. The table below demonstrates an effective format for presenting comparative statistics [80]:
Table 2: Comparison of Surface Roughness Across Different Preparation Methods
| Preparation Method | Sample Size (n) | Mean Roughness (nm) | Median Roughness (nm) | Standard Deviation | IQR |
|---|---|---|---|---|---|
| Mechanical Polishing | 15 | 2.22 | 1.70 | 1.270 | 1.50 |
| Chemical Etching | 11 | 0.91 | 0.60 | 1.131 | 0.85 |
| Laser Ablation | 12 | 5.45 | 4.95 | 2.340 | 3.20 |
| Difference (Mech-Chem) | - | 1.31 | 1.10 | - | - |
This structured presentation enables direct comparison of central tendency, variability, and distribution characteristics across different surface preparation techniques [80].
Research Reagent Solutions for Surface Analysis
Table 3: Essential Materials for Surface Preparation and Analysis
| Reagent/Material | Function/Application | Technical Notes |
|---|---|---|
| Ultra-high Vacuum Systems | Essential for physical surface analysis (XPS, LEED) | Creates environment for outermost atomic layer analysis [1] |
| Electropolishing Solutions | Preparation of contamination-free surfaces | Composition varies by substrate material |
| Sputtering Targets | Surface cleaning and thin film deposition | Material selection critical for analytical compatibility |
| Standard Reference Materials | Instrument calibration and method validation | Required for quantitative analysis accuracy |
| Propensity Score Software | Balancing treatment/control groups in observational studies | MatchIt, PanelMatch for R [81] [82] |
| Contrast Verification Tools | Ensuring accessibility of data visualizations | Check WCAG 2 AA compliance (4.5:1 minimum ratio) [85] [86] |
Application to Surface Science Research
The integration of appropriate preparation methods with compatible analytical techniques enables robust surface characterization across multiple domains:
In catalyst surface analysis, researchers can apply propensity score matching to compare the performance of differently prepared catalytic surfaces while controlling for confounding variables like surface area or precursor concentration [81]. The systematic comparison approach enables objective evaluation of preparation method efficacy on catalytic activity.
For thin film characterization, the comparative framework facilitates optimization of deposition parameters by quantitatively comparing film properties (thickness, uniformity, adhesion) across different preparation conditions. Boxplots effectively visualize the distribution of film thickness measurements, highlighting both central tendency and variability [80].
In biomaterial surface modification, the protocol enables rigorous comparison of surface properties (wettability, protein adsorption, cellular response) between treatment groups, supporting the development of surfaces with tailored biological responses.
Conclusion
Effective sample preparation is the cornerstone of reliable surface analysis, directly impacting data quality and subsequent scientific conclusions in biomedical research. By integrating foundational IUPAC definitions, robust methodological protocols, proactive troubleshooting, and rigorous validation, researchers can confidently characterize material surfaces for applications ranging from implantable devices to targeted drug delivery systems. Future directions will likely involve the increased integration of automation and smart materials to enhance reproducibility, as well as the development of standardized preparation protocols tailored to complex biological samples, further solidifying the role of precise surface analysis in advancing clinical and pharmaceutical innovations.
References
- 1. surface (S06154) [https://goldbook.iupac.org/terms/view/S06154]
- 2. IUPAC Classification → Area [https://lifestyle.sustainability-directory.com/area/iupac-classification/]
- 3. regular surface (14082) [https://goldbook.iupac.org/terms/view/14082]
- 4. concentration in experimental surface (C01229) [https://goldbook.iupac.org/terms/view/C01229]
- 5. Summary of the IUPAC Recommendations [https://www.azonano.com/article.aspx?ArticleID=5258]
- 6. Overview of Liquid Sample Preparation Techniques for ... [https://pmc.ncbi.nlm.nih.gov/articles/PMC11477957/]
- 7. Sample preparation - Sheffield Surface Analysis Centre [https://surface-analysis.sites.sheffield.ac.uk/sample-preparation]
- 8. Sample Preparation [https://ywcmatsci.yale.edu/sample-preparation]
- 9. Sample Preparation and Presentation Best Practices for ... [https://sensing.konicaminolta.us/us/blog/sample-preparation-and-presentation-best-practices-for-accurate-color-measurement/]
- 10. Surface Contamination [https://xpsanalysis.com/surface-contamination-2/]
- 11. Surface Contaminants [https://www.corrosionpedia.com/definition/1712/surface-contaminants-environmental-conditions]
- 12. Validation of Cleaning Processes (7/93) [https://www.fda.gov/inspections-compliance-enforcement-and-criminal-investigations/inspection-guides/validation-cleaning-processes-793]
- 13. A Common Sense Laboratory Guide to Reducing Errors ... [https://www.spectroscopyonline.com/view/common-sense-laboratory-guide-reducing-errors-and-contamination-icp-and-icp-ms-analysis]
- 14. Surface Prep Standards - A Quick Summary [https://blogs.ampp.org/protectperform/surface-prep-standards-a-quick-summary]
- 15. Identification of contaminants of concern in the upper ... [https://pubmed.ncbi.nlm.nih.gov/30970472/]
- 16. Analytical methods for determining environmental ... [https://www.sciencedirect.com/science/article/pii/S2215016124000360]
- 17. How XPS and TOF-SIMS Advanced Chemical Imaging ... [https://www.phi.com/news-and-articles/how-xps-and-tof-sims-advanced-chemical-imaging-uncovers-stabilizing-effects-of-engineered-particle-bettery-cathodes.html]
- 18. ISS - Ion Scattering Spectroscopy [https://mat-cs.com/iss-ion-scattering-spectroscopy/]
- 19. X-ray photoelectron spectroscopy (X06716) [https://goldbook.iupac.org/terms/view/X06716]
- 20. Auger Electron Spectroscopy [https://serc.carleton.edu/msu_nanotech/methods/aes.html]
- 21. Auger Electron Spectroscopy (AES) [https://www.eag.com/techniques/spectroscopy/auger-electron-spectroscopy/]
- 22. Introduction to Secondary Ion Mass Spectrometry (SIMS) ... [https://www.cameca.com/products/sims/technique]
- 23. Auger Electron Spectroscopy (AES) [https://www.mri.psu.edu/materials-characterization-lab/characterization-techniques/browse-30-techniques/auger-electron]
- 24. Glossary of Methods and Terms used in Surface Chemical ... [https://iupac.org/recommendation/glossary-of-methods-and-terms-used-in-surface-chemical-analysis/]
- 25. Harmonised guidelines for single-laboratory validation of ... [https://www.oiv.int/node/3599]
- 26. Chemical Etching Process Step-by-Step [https://www.precisionmicro.com/chemical-etching-a-step-by-step-guide/]
- 27. Polishing composition, polishing method, and method for ... [https://patents.google.com/patent/US20170096584A1/en]
- 28. dry etching (09489) [https://goldbook.iupac.org/terms/view/09489]
- 29. Specimen Handling, Preparation, and Treatments in ... [https://link.springer.com/content/pdf/10.1007/b115644.pdf]
- 30. 2023-03-06-iupac-guidelines [https://www.bipm.org/en/-/2023-03-06-iupac-guidelines]
- 31. Production and processing of graphene and 2d crystals [https://www.sciencedirect.com/science/article/pii/S1369702113700142]
- 32. A review of influence of hydrogen on fracture toughness ... [https://www.sciencedirect.com/science/article/pii/S0360319925000230]
- 33. A Guide to ISO and SSPC/NACE Surface Preparation ... [https://blog.belzona.com/a-guide-to-iso-and-sspc-nace-surface-preparation-standards/]
- 34. Quantifying the surface modification induced by the argon ... [https://www.sciencedirect.com/science/article/abs/pii/S0025540822003531]
- 35. Depth profiling of noble gases in ilmenite and olivine substrates [https://pubs.rsc.org/en/content/articlehtml/2025/ja/d4ja00430b]
- 36. Surface Modification of Polymer Substrates for Biomedical ... [https://pmc.ncbi.nlm.nih.gov/articles/PMC5666921/]
- 37. Pre-Clinical Formulation Analysis: Accurate Dosage & ... [https://alderleyanalytical.com/blogs/enhance-your-drug-development-with-our-pre-clinical-formulation-analysis-support/]
- 38. NonClinical Dose Formulation Analysis Method Validation ... [https://pmc.ncbi.nlm.nih.gov/articles/PMC2976985/]
- 39. Chemical Surface Modification Strategies for Polymers [https://surface-coating.alfa-chemistry.com/chemical-surface-modification-strategies-for-polymers.html]
- 40. AFM Polymer Surface Modification [https://www.eag.com/app-note/afm-polymer-surface-modification/]
- 41. Sample Preparation of Drug Substances and Products in ... [https://www.chromatographyonline.com/view/sample-preparation-of-drug-substances-and-products-in-regulated-testing-a-primer]
- 42. Stability: Recommendation for Best Practices and ... [https://pmc.ncbi.nlm.nih.gov/articles/PMC4012051/]
- 43. Environmental Controls for Sample Integrity [https://www.labmanager.com/environmental-controls-for-sample-integrity-34507]
- 44. Glossary of methods and terms used in surface chemical ... [https://www.degruyterbrill.com/document/doi/10.1515/ci-2021-0119/html?srsltid=AfmBOorAJn37wc6ISduKqvwZmrJqx_mlO357BghhEIISv6F9HlQ0VGse]
- 45. How to Reduce Sample Contamination [https://blog.omni-inc.com/blog/how-to-reduce-sample-contamination]
- 46. Preparation for blood tests: what can go wrong before the ... [https://pmc.ncbi.nlm.nih.gov/articles/PMC12377977/]
- 47. Sample Preparation and Diagnostic Methods for a Variety of ... [https://pmc.ncbi.nlm.nih.gov/articles/PMC8470389/]
- 48. Sample Preparation Methods - The XPS Library [https://xpslibrary.com/sample-prep-methods/?srsltid=AfmBOooQqNQCa7XmYXKADCjaQMePEkD5z2NvqkvffoBeMncvmzs_RbKP]
- 49. Sample Preparation - The XPS Research Institute [https://xpsresearch.institute/sample-preparation/]
- 50. Evaluation of the variation in sample preparation ... [https://pmc.ncbi.nlm.nih.gov/articles/PMC2693445/]
- 51. E. Environmental Services | Infection Control [https://www.cdc.gov/infection-control/hcp/environmental-control/environmental-services.html]
- 52. How Surface Contamination Affects Sequencing Accuracy [https://micronbrane.com/removing-surface-contamination/]
- 53. Hazardous Waste - Decontamination | Occupational Safety ... [http://www.osha.gov/hazardous-waste/decontamination]
- 54. statistical uncertainty near the detection limit [https://pmc.ncbi.nlm.nih.gov/articles/PMC5907527/]
- 55. Environmental Cleaning Procedures | HAIs [https://www.cdc.gov/healthcare-associated-infections/hcp/cleaning-global/procedures.html]
- 56. Effect of different cleaning methods on surface ... [https://pmc.ncbi.nlm.nih.gov/articles/PMC12379513/]
- 57. Toxicological impacts and mitigation strategies of food ... [https://www.sciencedirect.com/science/article/pii/S2666027X25000544]
- 58. Contaminants Compass: January 2025 Edition [https://www.mcguirewoods.com/client-resources/alerts/2025/1/contaminants-compass-january-2025-edition/]
- 59. How To Prepare Polymer Samples For Atomic Force Microscopy [https://eureka.patsnap.com/report-how-to-prepare-polymer-samples-for-atomic-force-microscopy-techniques]
- 60. Effects of metallographic preparation methods on surface ... [https://www.sciencedirect.com/science/article/pii/S1044580325005145]
- 61. Metallographic Analysis Methods and Processes【2025】 [https://www.toptech.tw/eng_knowledgeDetail.asp?Fid=84&pid=1389]
- 62. Biomedical Surface Analysis | Medical Devices [https://www.eag.com/app-note/biomedical-surface-analysis/]
- 63. high-throughput screening (08177) [https://goldbook.iupac.org/terms/view/08177]
- 64. The ten principles of green sample preparation [https://www.sciencedirect.com/science/article/pii/S0165993622000139]
- 65. Interfacial phenomena in composites with nanostructured ... [https://www.sciencedirect.com/science/article/abs/pii/S2215038220300315]
- 66. Data Quality Management: The Ultimate Guide ... [https://improvado.io/blog/data-quality-management]
- 67. Assessing Accuracy [https://www.spectroscopyonline.com/view/assessing-accuracy]
- 68. Laboratory Quality Control Sample - Duplicates and RPD [https://bvsolutions.freshdesk.com/en/support/solutions/articles/43000462648-laboratory-quality-control-sample-duplicates-and-rpd]
- 69. Design of tables for the presentation and ... [https://pmc.ncbi.nlm.nih.gov/articles/PMC10346464/]
- 70. Best Practices in Table Design - Science Editor [https://www.csescienceeditor.org/article/best-practices-in-table-design/]
- 71. run bias (08041) [https://goldbook.iupac.org/terms/view/08041]
- 72. M11 Template: Clinical Electronic Structured Harmonised ... [https://www.fda.gov/regulatory-information/search-fda-guidance-documents/m11-template-clinical-electronic-structured-harmonised-protocol-cesharp]
- 73. correlation analysis (C01346) [https://goldbook.iupac.org/terms/view/C01346]
- 74. Application of correlation curve fitting to improve the ... [https://www.sciencedirect.com/science/article/abs/pii/S0141635916300423]
- 75. What is Statistical Process Control? SPC Quality Tools [https://asq.org/quality-resources/statistical-process-control?srsltid=AfmBOopoeq7ter1rnvhsJ7xMyjrwKKW_CUEsZBJ_SHCrVe7e7_pBAnY9]
- 76. Statistical process control [https://en.wikipedia.org/wiki/Statistical_process_control]
- 77. Statistical Process Control (SPC) Charts: Ultimate Guide ... [https://www.6sigma.us/six-sigma-in-focus/spc-charts/]
- 78. Statistical Process Control (SPC): Benefits and ... [https://flowfuse.com/blog/2025/07/quality-control-automation-spc-charts/]
- 79. Statistical Process Control (SPC): Methodology, Tools, and ... [https://investigationsquality.com/2025/04/08/statistical-process-control-spc-methodology-tools-and-strategic-application/]
- 80. 14 Comparing quantitative data between individuals [https://bookdown.org/pkaldunn/SRM-Textbook/BetweenQuantData.html]
- 81. Propensity Score Matching in R — 2025 Edition [https://dev.to/vamshi_e_eebe5a6287a27142/propensity-score-matching-in-r-2025-edition-3c5c]
- 82. PanelMatch: Matching Methods for Causal Inference with ... [https://arxiv.org/abs/2503.02073]
- 83. 7 Best Comparison Charts for Effective Data Visualization [https://ninjatables.com/types-of-comparison-charts/?srsltid=AfmBOootVEQSewy21Dc2_eVL6g-b3CVY1oltTmeUTo3T5hOB8-cnqhbQ]
- 84. Top 10 Types of Comparison Charts [https://chartexpo.com/blog/types-of-comparison-charts]
- 85. Elements must meet minimum color contrast ratio thresholds [https://dequeuniversity.com/rules/axe/4.8/color-contrast]
- 86. Color contrast - Accessibility - MDN Web Docs - Mozilla [https://developer.mozilla.org/en-US/docs/Web/Accessibility/Guides/Understanding_WCAG/Perceivable/Color_contrast]