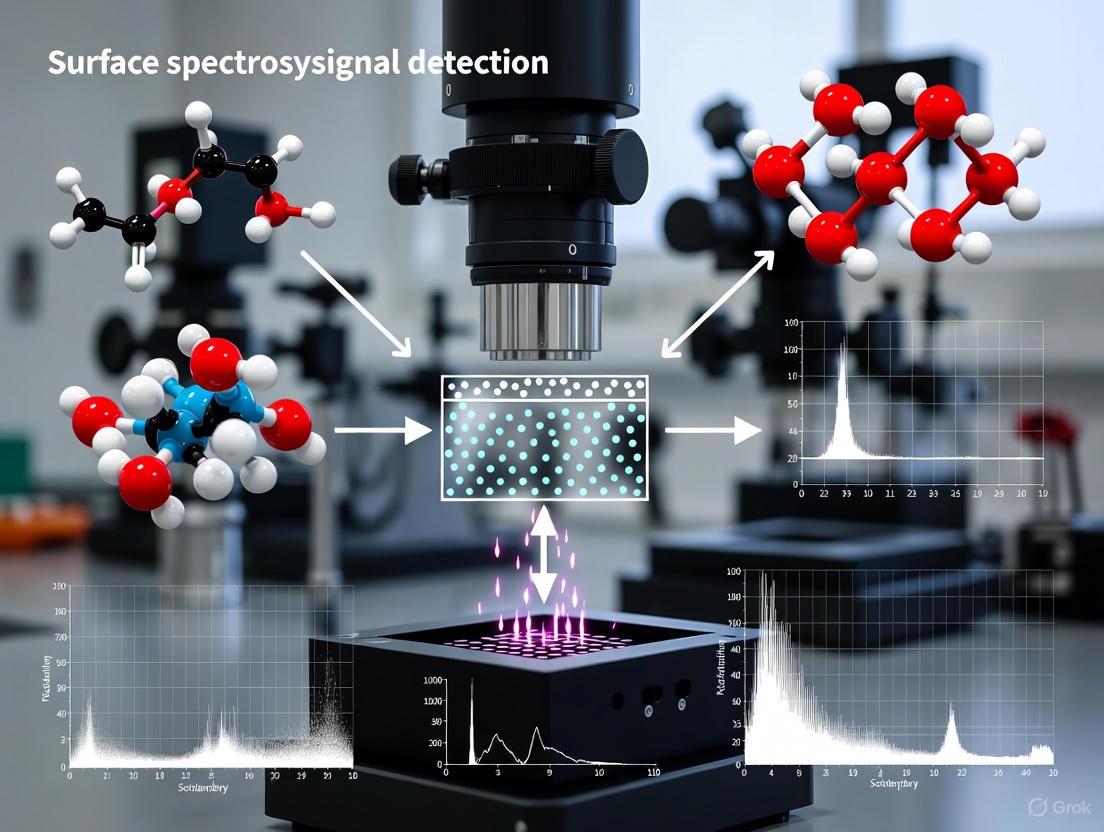
Optimizing Signal Detection in Surface Spectroscopy: Advanced Strategies for Biomedical Research
This article provides a comprehensive guide for researchers and drug development professionals on enhancing signal detection in key surface spectroscopy techniques, including Surface-Enhanced Raman Spectroscopy (SERS) and Surface Plasmon Resonance...
Optimizing Signal Detection in Surface Spectroscopy: Advanced Strategies for Biomedical Research
Abstract
This article provides a comprehensive guide for researchers and drug development professionals on enhancing signal detection in key surface spectroscopy techniques, including Surface-Enhanced Raman Spectroscopy (SERS) and Surface Plasmon Resonance (SPR). It explores the fundamental principles of signal generation and enhancement, details cutting-edge methodological and application advances in biomedicine, offers practical troubleshooting and optimization protocols for common experimental challenges, and evaluates validation frameworks and comparative performance of emerging technologies. By synthesizing foundational knowledge with advanced optimization strategies, this resource aims to empower scientists to achieve highly sensitive, reproducible, and clinically relevant data from surface spectroscopic analyses.
Core Principles and Signal Enhancement Mechanisms in Surface Spectroscopy
Troubleshooting Guides & FAQs
This section addresses common operational challenges in X-ray Photoelectron Spectroscopy (XPS), Auger Electron Spectroscopy (AES), and Time-of-Flight Secondary Ion Mass Spectrometry (TOF-SIMS), providing targeted solutions to maintain data integrity.
X-ray Photoelectron Spectroscopy (XPS)
- Q: What are common data collection and analysis errors in XPS? Persistent difficulties in XPS include improper handling of XPS backgrounds, errors in peak fitting, and incomplete reporting of instrument parameters, which can compromise data interpretation. Always follow established guidelines for data acquisition and analysis to avoid these common pitfalls [1].
- Q: Why might my conductive tape not be working, and what is 'preferential sputtering'? Conductive tape can sometimes be insulating rather than conductive, leading to sample charging. Preferential sputtering, where different elements are removed at different rates during ion etching, can alter the surface stoichiometry of your sample. Both are recognized common issues in XPS operation [2] [3].
- Q: How does prior SEM analysis affect my XPS results? Operating a Scanning Electron Microscope (SEM) on a sample before XPS analysis can deposit a layer of carbon on the area to be analyzed, contaminating the surface and skewing the XPS results [2] [3].
Auger Electron Spectroscopy (AES)
- Q: My AES data shows peak overlaps. How can I resolve this? Peak overlaps, such as Al over Cu or Sb over O, are a common difficulty. Utilizing the Auger parameter, which involves both the photoelectron and Auger peaks, can help in identifying chemical states and resolving these overlaps [4] [3].
- Q: What is the impact of a magnetic lens on Angle-Resolved XPS (AR-XPS), and could this affect AES? The magnetic lens used in some systems can have an effect on AR-XPS measurements. While directly noted for XPS, this is a important consideration for any electron spectroscopy technique, including AES, where lens effects can influence data collection [3].
Secondary Ion Mass Spectrometry (SIMS)
- Q: How can I achieve accurate mass scale calibration in TOF-SIMS? Achieving good mass accuracy is challenging but critical. A detailed calibration protocol that accounts for factors like ion kinetic energy and emission angle can improve relative mass accuracy to better than 10 ppm for masses up to 140 u, which is essential for the unique identification of species [5].
- Q: What is a key advantage of operando SIMS analysis for battery research? Operando SIMS allows for the investigation of dynamic degradation and mass transport in systems like solid-state batteries under operating conditions. This technique can chemically identify processes like sodiation and solid electrolyte interphase (SEI) composition without exposing the highly reactive surfaces to ambient air, which could alter them [6].
The table below summarizes key quantitative information from the cited research to aid in experimental planning and comparison.
Table 1: Summary of Quantitative Experimental Data from Literature
| Analysis Technique | Key Parameter | Reported Value / Finding | Experimental Context |
|---|---|---|---|
| Operando SIMS [6] | Critical Current Density (CCD) | 0.04 μA μm⁻² | Maximum tolerated current density before failure at Na metal|NASICON interface. |
| TOF-SIMS [5] | Mass Accuracy (after new protocol) | <10 ppm (up to 140 u) | A factor of 5 improvement over common calibration procedures. |
| SERS [7] | Signal Enhancement Factor | ∼21,500-fold (vs. conventional Raman) | For optimized rGO/AgNPs substrate detecting pesticides. |
| SERS [7] | Detection Limit for Ametryn | 1.0 × 10⁻⁷ mol L⁻¹ | On apple and potato peels using the optimized substrate. |
Experimental Protocols
Protocol: Operando Simultaneous Dual-Polarity SIMS for Solid-State Battery Interface Analysis
This protocol details the methodology for investigating dynamic degradation at the sodium metal|NASICON solid electrolyte interface, pioneering a diagnostic tool for next-generation batteries [6].
- 1. Sample Preparation:
- Prepare a solid-state sodium-ion half-cell using a NASICON solid electrolyte (e.g., Na₃.₄Zr₂Si₂.₄P₀.₆O₁₂) with a sodium metal electrode on the underside.
- Mount the cell in the main stage of a Hi-5 SIMS instrument.
- 2. Instrument Setup:
- Use Kliendiek micro-manipulator probes to make working electrode (WE) and counter electrode (CE) connections on the NASICON surface.
- The red square in the optical image is used for guidance to highlight the area where the beam can be applied.
- 3. Operando Electrochemical Cycling:
- Apply a constant current to generate an electric field at specific regions on the NASICON surface, creating a potential difference.
- Sodium ions (Na⁺) diffuse from the sodium metal electrode towards the probe positions.
- Cycle at different current densities (e.g., from 0.02 to 0.5 μA μm⁻²) in a 1 μm² region to form operando sodium metal|NASICON interfaces and determine the Critical Current Density (CCD).
- 4. Electrochemical Impedance Spectroscopy (EIS):
- Perform EIS on the formed interfaces.
- Fit the EIS data to equivalent circuit models to identify components, such as a resistive solid electrolyte interphase (SEI), that facilitate sodiation.
- 5. Simultaneous Dual-Polarity SIMS Analysis:
- Analyze the sodiated regions with dynamic dual-polarity SIMS, which allows the simultaneous detection of both positive and negative secondary ions.
- Chemically identify the composition of the SEI and map sodium mass transport columns.
- Key fragments to monitor include ZrO₂, SiO₂, and PO₂, indicating decomposition products like Na₂ZrO₃, Na₂SiO₃, and Na₃P.
Protocol: Integrated Suppression of Acoustic Echo and Background Noise
This protocol describes a novel frequency-domain approach to suppress both acoustic echo and background noise simultaneously within a soft decision framework, avoiding issues of conventional combined structures [8].
- 1. Signal Acquisition and DFT:
- Acquire the input signal from the microphone and the far-end speech signal.
- Convert these time-domain signals into the discrete Fourier transform (DFT) spectrum for processing, frame by frame.
- 2. Hypothesis Formulation:
- Define two hypotheses for the DFT spectrum of the microphone input signal Y(i,k), where i is the time index and k is the frequency index:
- H₀ (Near-end speech absent): Y(i,k) = D(i,k) + E(i,k)
- H₁ (Near-end speech present): Y(i,k) = D(i,k) + E(i,k) + S(i,k)
- where D is background noise, E is echo signal, and S is near-end speech.
- Define two hypotheses for the DFT spectrum of the microphone input signal Y(i,k), where i is the time index and k is the frequency index:
- 3. Estimate Combined Power of Echo and Noise (λcd):
- Echo Power (λe) Estimation:
- During single-talk periods (near-end speech absent), estimate the echo spectral magnitude |Ê(i,k)| using |Ê(i,k)| = H(i,k)|Xd(i,k)|, where Xd is the far-end signal.
- Estimate the echo path response filter H(i,k) iteratively using a magnitude least squares estimator: H(i,k) = E[Xd*(i,k)Y(i,k)] / E[Xd*(i,k)Xd(i,k)].
- Update the echo power variance λₑ(i,k) using smoothing: λ̂ₑ(i,k) = α{λₑ} λ̂ₑ(i-1,k) + (1-α{λₑ})|Ê(i,k)|².
- Freeze the update of H(i,k) during double-talk periods using a frequency-domain double-talk detector.
- Noise Power (λd) Estimation:
- Estimate the background noise power during periods of near-end speech and echo absence.
- Combine Powers: The combined power to be suppressed is λcd(i,k) = λe(i,k) + λ_d(i,k).
- Echo Power (λe) Estimation:
- 4. Calculate Suppression Gain via Soft Decision:
- Compute the a posteriori signal-to-combined power ratio (SCR): γ(i,k) = |Y(i,k)|² / λcd(i,k).
- Estimate the a priori SCR ξ(i,k) using a decision-directed approach: ξ̂(i,k) = αDD |Ŝ(i-1,k)|² / λ̂cd(i-1,k) + (1-αDD)P[γ(i,k)-1].
- Compute the likelihood ratio Λ(Y(i,k)) and the near-end speech absence probability (NSAP) p(H₀|Y(i,k)).
- Determine a single spectral suppression gain G(i,k) based on p(H₀|Y(i,k)) and the estimated parameters.
- 5. Apply Gain and Synthesize Output:
- Apply the gain to the microphone input spectrum to obtain an estimate of the clean near-end speech spectrum: Ŝ(i,k) = G(i,k) Y(i,k).
- Transform Ŝ(i,k) back to the time domain to produce the output speech signal.
Signaling Pathways & Workflows
Research Reagent Solutions
The table below lists key materials and their functions as derived from the featured experiments and techniques.
Table 2: Essential Research Reagents and Materials for Featured Experiments
| Item Name | Function / Application | Technical Context |
|---|---|---|
| NASICON Solid Electrolyte (e.g., Na₃.₄Zr₂Si₂.₄P₀.₆O₁₂) | Serves as the sodium ion-conducting electrolyte in a solid-state battery model system. | Enables operando study of sodium metal|solid electrolyte interfaces and degradation mechanisms [6]. |
| Reduced Graphene Oxide/Silver Nanoparticles (rGO/AgNPs) | Acts as an optimized substrate for Surface-Enhanced Raman Spectroscopy (SERS). | Provides a ~21,500-fold signal enhancement for detecting trace analytes like pesticide residues [7]. |
| Hi-5 Secondary Ion Mass Spectrometer | Instrument for performing operando simultaneous dual-polarity SIMS analysis. | Allows correlation of electrochemical data with chemical analysis at the nanoscale under operating conditions [6]. |
| Sodium Metal Electrode | Functions as the anode in the solid-state sodium-ion half-cell. | Provides the source of sodium ions (Na⁺) for sodiation and interface formation during operando cycling [6]. |
Surface-enhanced Raman spectroscopy (SERS) has developed into a powerful analytical technique capable of detecting trace amounts of analytes, down to the single-molecule level in some cases [9]. The extraordinary sensitivity of SERS stems from two primary signal enhancement mechanisms: the electromagnetic mechanism (EM) and the chemical mechanism (CM) [9] [10]. The EM arises from the excitation of localized surface plasmons on nanostructured metal surfaces, which generates intensely concentrated electromagnetic fields [11]. The CM, while contributing a lesser degree of enhancement, involves charge transfer between the analyte molecule and the substrate, which can alter the polarizability of the molecule [9] [10]. For researchers in spectroscopy and drug development, understanding and optimizing these mechanisms is crucial for developing highly sensitive and reliable detection assays. This guide addresses frequent experimental challenges and provides methodologies for maximizing SERS performance in your research.
Frequently Asked Questions (FAQs) and Troubleshooting
1. Why is my SERS signal weak or inconsistent, even with a known good substrate?
Weak or inconsistent signals are among the most common frustrations in SERS experiments. The causes and solutions are often related to the nanostructures and molecular positioning:
- Cause: Lack of or Inconsistent "Hotspots": The vast majority of the SERS signal originates from nanoscale gaps and crevices in the substrate, known as "hotspots," where the electromagnetic field is most intense [12]. Small changes in the number of molecules residing in these hotspots can create large intensity variations. This is particularly problematic when using colloidal nanoparticles, where it can be very challenging to aggregate nanoparticles in a reproducible manner [12].
- Solution:
- For colloidal assays, standardize the aggregation process by using the same concentration of an aggregating agent (e.g., salts like NaCl or MgSO₄) and consistent mixing times.
- Consider switching to commercially available or lithographically fabricated patterned nanostructures, which offer better reproducibility, though they can still have intensity variations on the order of 10% [12].
- To average out heterogeneity, measure multiple spots on your substrate; one study suggested that more than 100 spots are needed to properly capture this variance [12].
2. My target molecule doesn't seem to produce a SERS signal. What could be wrong?
Not all molecules enhance equally, and the SERS effect is a very short-range phenomenon.
- Cause 1: Poor Adsorption to the Surface: The SERS enhancement decays rapidly within a few nanometers from the metal surface [12]. If your molecule does not adsorb to the surface, it will not experience a significant enhancement. Furthermore, the number of molecules at the surface often follows a Langmuir isotherm, meaning low surface coverage occurs if the molecule has low affinity for the surface [12].
- Solution: Functionalize your substrate to promote adsorption. For example, using aromatic thiols or creating charge-transfer complexes can boost signals [12]. For difficult molecules like glucose, this involves surface functionalization with a capture agent, such as boronic acid [12].
- Cause 2: Inherently Low SERS Responsiveness: Some molecules, such as glucose, have a low natural SERS cross-section [12].
- Solution: Employ a SERS "tag" strategy. Attach a reporter molecule (e.g., rhodamine, aromatic thiol) that gives a strong, known SERS signal to the nanoparticle. Then, functionalize the nanoparticle with a recognition element (e.g., antibody, DNA aptamer) that binds to your target molecule [12].
3. The SERS spectrum I obtained doesn't match the standard Raman spectrum of my molecule. Why?
It is a common misconception that a SERS spectrum is simply an intensified version of a normal Raman spectrum.
- Cause 1: Changes in Selection Rules and Molecular Orientation: Adsorption to a metal surface can change the symmetry of the molecule [9]. This can cause normally Raman-inactive modes to become active, or certain vibrational modes to be enhanced more than others based on their alignment with the enhanced electric field [9] [12].
- Cause 2: Surface Chemistry or Photoreactions: The electrons in the metals that generate the plasmon resonance can also drive chemistry on the analytes [12]. A classic example is para-aminothiophenol, which was initially thought to show altered selection rules but was later found to form dimercaptoazobenzene on the surface [12].
- Solution: Use low laser powers (generally less than 1 mW in a diffraction-limited focus) to minimize photoreactions and heating [12]. The best practice is to generate a calibration curve with known concentrations of your analyte at these low laser powers [12].
4. How can I make my SERS measurements more quantitative?
The hotspot-dominated nature of SERS makes quantitative analysis challenging but achievable.
- Cause: Inhomogeneous Distribution of Enhancements: The significant spatial variation in signal intensity means that the measured signal is not a simple linear function of concentration [12].
- Solution: Use an internal standard. This is a compound that is co-adsorbed with your analyte and is assumed to experience the same enhancement factors. The analyte signal is then normalized to the internal standard's signal. This can be a co-adsorbed molecule, or, preferably, a stable isotope variant of the target molecule itself [12].
Quantitative Data and Enhancement Factors
The Enhancement Factor (EF) is the key metric for quantifying SERS substrate performance. It is calculated as [12]:
EF = (I_SERS / N_SERS) / (I_Raman / N_Raman)
where I_SERS and I_Raman are the SERS and normal Raman scattering intensities, and N_SERS and N_Raman are the number of molecules probed under SERS and normal conditions, respectively.
The table below summarizes typical enhancement factors for different substrate types, illustrating how combining EM and CM can yield superior performance.
Table 1: Enhancement Factors and Limits of Detection for Select SERS Substrates
| Substrate Material | Enhancement Mechanism | Reported Enhancement Factor (EF) | Probe Molecule | Limit of Detection (LOD) | Source |
|---|---|---|---|---|---|
| Ag Nanoparticles (AgNPs) | Primarily EM | ~10⁶ - 10⁸ (varies with aggregation) | Rhodamine 6G | Varies with aggregation | [12] [10] |
| Ti₃C₂Tₓ MXene | Primarily CM | Relatively limited | Methyl Violet | Not competitive alone | [10] |
| Au–Ti₃C₂Tₓ Composite | Combined EM & CM | 3.9 × 10⁶ | Methyl Violet | 10⁻⁷ M | [10] |
| Ti₃C₂Tₓ/AgNPs Composite | Synergistic EM & CM | 3.8 × 10⁸ | Rhodamine 6G (R6G) | 10⁻¹⁴ M (fM level) | [10] |
Table 2: Key Properties of Common Plasmonic Metals for SERS
| Metal | Plasmon Resonance Range | Key Advantages | Key Disadvantages |
|---|---|---|---|
| Silver (Ag) | Visible-NIR | Strongest EM enhancement, high EF [10] | Prone to oxidation/tarnishing |
| Gold (Au) | Visible-NIR | Biologically inert, stable | Lower EF than Ag [10] |
| Copper (Cu) | Visible | Lower cost | Susceptible to oxidation [9] |
| Aluminum (Al) | UV | Unique for UV-SERS applications [9] | Less common for visible/NIR experiments |
Experimental Protocols for Optimal Signal Enhancement
Protocol 1: Fabricating a Ti₃C₂Tₓ/AgNPs Composite Substrate for Synergistic EM-CM Enhancement
This protocol, adapted from recent research, details the creation of a highly sensitive substrate that leverages both electromagnetic and chemical enhancement [10].
Principle: Positively charged cetyltrimethylammonium bromide (CTAB)-capped Ag nanoparticles are electrostatically self-assembled onto negatively charged Ti₃C₂Tₓ MXene nanosheets. The AgNPs provide strong EM via localized surface plasmon resonance, while the MXene facilitates CM via charge transfer with adsorbed analyte molecules [10].
Materials:
- Ti₃C₂Tₓ MXene nanosheet solution (commercially available)
- Silver nitrate (AgNO₃)
- Sodium borohydride (NaBH₄)
- Cetyltrimethylammonium bromide (CTAB)
- Target analyte molecules (e.g., R6G, biomarkers)
Procedure:
- Synthesis of CTAB-capped AgNPs: Synthesize positively charged silver nanoparticles using CTAB as a capping and reducing agent with NaBH₄.
- Preparation of Ti₃C₂Tₓ Suspension: Dilute the commercial Ti₃C₂Tₓ solution to a standard concentration (e.g., 0.5 mg/mL) in deionized water.
- Electrostatic Self-Assembly: Gradually mix the positively charged AgNP solution with the negatively charged Ti₃C₂Tₓ suspension under constant stirring. The electrostatic attraction will drive the uniform decoration of AgNPs on the MXene sheets, creating the hybrid substrate.
- Substrate Characterization: Use scanning electron microscopy (SEM) and UV-Vis spectroscopy to confirm the successful and uniform assembly of AgNPs on the MXene.
- SERS Measurement: Drop-cast the analyte solution onto the prepared Ti₃C₂Tₓ/AgNPs composite substrate. After the solvent evaporates, acquire SERS spectra. The coupling factor between EM and CM in such a system has been calculated to be as high as 33.6%, demonstrating a significant synergistic interaction [10].
Protocol 2: Employing an Internal Standard for Quantitative SERS
This protocol is essential for achieving reliable quantitative results, especially when using substrates with inherent hotspot heterogeneity [12].
Principle: An internal standard (IS) molecule is introduced alongside the target analyte. This IS should adsorb to the substrate in a similar manner and its SERS signal is used to normalize the analyte signal, correcting for variations in laser power, substrate enhancement, and molecular density.
Materials:
- SERS substrate (e.g., colloidal AgNPs, patterned chip)
- Target analyte
- Internal standard molecule (e.g., a stable isotope variant of the analyte, or a co-adsorbing molecule with a distinct, non-overlapping Raman peak) [12]
Procedure:
- Prepare a Mixture: Create a solution containing a known, fixed concentration of the internal standard and varying concentrations of your target analyte.
- Deposit on Substrate: Apply the mixture to your SERS substrate uniformly.
- Acquire SERS Spectra: Collect spectra from multiple spots to account for spatial heterogeneity.
- Data Analysis: For each spectrum, identify the peak intensities of the analyte (
I_analyte) and the internal standard (I_IS). Calculate the normalized response as the ratioI_analyte / I_IS. Plot this ratio against the analyte concentration to build a robust calibration curve.
The Scientist's Toolkit: Essential Research Reagents and Materials
Table 3: Key Research Reagent Solutions for SERS Experiments
| Item Name | Function / Role in SERS | Common Examples |
|---|---|---|
| Plasmonic Nanoparticles | Provides the primary EM enhancement via LSPR. | AgNPs, AuNPs [9] [10] |
| 2D Material Substrates | Provides a platform for CM via charge transfer; can improve stability and reproducibility. | Graphene, MXenes (e.g., Ti₃C₂Tₓ) [9] [10] |
| Aggregating Agents | Induces nanoparticle aggregation to form EM hotspots in colloidal assays. | NaCl, MgSO₄, KCl [12] |
| Internal Standards | Enables normalization for quantitative SERS measurements. | Deuterated compounds, 4-mercaptobenzoic acid [12] |
| Surface Functionalizers | Promotes specific adsorption of target molecules to the surface; enables SERS-tag strategies. | Thiols, boronic acid, antibodies, DNA aptamers [12] |
Enhancement Mechanism and Troubleshooting Workflows
Diagram 1: SERS Enhancement and Troubleshooting
Diagram 2: SERS Signal Enhancement Pathways
HAXPES and NAP-XPS for Deeper and In-Situ Analysis
Troubleshooting Guides
NAP-XPS Common Experimental Issues
Table 1: Troubleshooting Guide for NAP-XPS Operation
| Symptom | Possible Cause | Solution | Reference |
|---|---|---|---|
| Poor signal-to-noise ratio at elevated pressure | Signal attenuation due to electron scattering in the gas phase. | Optimize gas pressure; use a differentially pumped analyzer; position the analyzer close to the sample. | [13] [14] |
| Uncertainty if UHV measurements represent the state in reactive atmospheres | Surface state changes when transferring sample from gas environment to UHV. | Use NAP-XPS for direct in situ characterization under relevant gas pressures (up to 100 mbar). | [14] |
| Sample charging on insulating oxide surfaces | Low electrical conductivity of the sample at lower temperatures. | Perform measurements at elevated temperatures (e.g., 300-400 °C) to enhance ionic mobility and conductivity. | [14] |
| Unstable surface state under vacuum after gas exposure | Potential surface reconstruction or reduction when reactive gas is evacuated. | Compare spectra in gas and UHV. A stable binding energy indicates the surface state is maintained. | [14] |
| Pressure gap between UHV studies and real-world catalytic conditions | Inability to simulate atmospheric pressure conditions in standard XPS. | Utilize a NAP-XPS system with a specialized reaction cell to bridge the "pressure gap." | [13] [14] |
Data Analysis and Reporting Errors
Table 2: Guide to Common XPS Data Analysis Errors
| Error Category | Common Mistake | Correct Practice | Reference |
|---|---|---|---|
| Peak Fitting | Over-fitting with too many peaks. | Use the minimum number of components justified by chemical knowledge. | [1] |
| Background Handling | Applying an incorrect background subtraction model. | Select the background model (e.g., Shirley, Tougaard) appropriate for the sample and spectrum. | [1] |
| Reporting | Failing to report essential instrument parameters. | Always report X-ray source, analyzer settings, pass energy, and step size for reproducibility. | [1] |
| Data Presentation | Showing only peak-fitted data without the original spectrum. | Always overlay the fitted model on the raw data to allow critical evaluation. | [1] |
| Chemical State Identification | Incorrectly assigning peaks without proper reference. | Compare binding energies with reliable databases or standard samples. | [15] |
Frequently Asked Questions (FAQs)
Q1: What is the fundamental advantage of using NAP-XPS over conventional XPS? NAP-XPS allows for the direct analysis of samples under "near-ambient" pressure conditions (up to 100 mbar), bridging the critical "pressure gap" between surface science and real-world applications like catalysis. This enables researchers to study the chemical state of a surface in situ during gas-solid interactions, which may not be preserved when the sample is transferred to a UHV environment for conventional XPS analysis [13] [14].
Q2: How stable is a surface state created in a gas environment when we evacuate the chamber for analysis? Research on complex oxides has shown that for some systems, the surface state formed under an O₂ atmosphere (e.g., 3.5 mbar) can remain largely stable and be maintained when the chamber is evacuated to UHV conditions. This stability can be verified by comparing the binding energy and shape of photoemission peaks, such as the O 1s spectrum, recorded in both environments [14].
Q3: My sample is an insulating material and is charging. What can I do in a NAP-XPS experiment? For certain materials, such as solid oxide ion conductors, performing experiments at elevated temperatures (e.g., 300-400 °C) can be an effective strategy. The increased temperature enhances the material's ionic mobility and electrical conductivity, thereby mitigating electrostatic charging effects induced by the photoelectron emission process [14].
Q4: Besides chemical composition, what unique information can NAP-XPS provide? The correlation of XPS spectra recorded in gas and UHV environments can provide insights into the electrical conductivity of specific surface sites. Shifts in the binding energy of photoemission peaks between these two conditions can be correlated with the electrical properties of different components in a complex material, which is crucial for applications like solid oxide electrochemical devices [14].
Q5: What are the most critical parameters to report when publishing XPS/NAP-XPS data? To ensure reproducibility and reliability, you must report key instrument parameters including the type of X-ray source (monochromatic or non-monochromatic, anode material), the analyzer (model, pass energy, slit settings), the energy step size, and the method used for background subtraction and peak fitting [1].
Experimental Protocols & Methodologies
Protocol: Comparing Surface States in O₂ and UHV using NAP-XPS
This protocol is adapted from a study investigating complex oxides for solid oxide electrochemical cells [14].
1. Sample Preparation:
- Use well-characterized samples (e.g., Ni/yttria-stabilized zirconia (YSZ) cermet or La0.75Sr0.25Cr0.9Fe0.1O3 perovskite).
- Ensure samples are clean and mounted appropriately for the NAP-XPS holder, capable of heating.
2. In Situ Treatment and Data Acquisition:
- Introduce the sample into the NAP-XPS system and pump down to UHV.
- Heat the sample to the target temperature (e.g., 300 °C).
- Introduce O₂ gas into the analysis chamber to the desired pressure (e.g., 3.5 mbar).
- Acquire core-level spectra (e.g., Ni 2p, O 1s, La 3d, Fe 2p) under the O₂ atmosphere.
- After data collection in gas, carefully evacuate the analysis chamber back to UHV conditions while maintaining the sample temperature.
- Acquire the same core-level spectra again, ensuring all instrument parameters (analyzer pass energy, step size, etc.) are identical to the previous measurement.
3. Data Analysis:
- Compare the spectra collected in O₂ and UHV without any binding energy scale correction.
- Look for changes in peak position, shape, and the presence of satellite features.
- A stable peak position indicates the surface state formed in O₂ is maintained in UHV.
- Shifts in binding energy for specific elements can be correlated with their local electrical conductivity at the surface.
Workflow Diagram: NAP-XPS for In-Situ Surface Characterization
The following diagram illustrates the logical workflow for an experiment comparing surface states under gas and vacuum environments.
The Scientist's Toolkit: Essential Research Reagents & Materials
Table 3: Key Materials and Components for NAP-XPS Experiments
| Item | Function / Relevance in HAXPES/NAP-XPS | Example / Note |
|---|---|---|
| Differentially Pumped Analyzer | Enables electron detection under elevated pressure by maintaining UHV in the detector despite pressure in the analysis chamber. | PHOIBOS 150 NAP analyzer [13]. |
| In Situ Reaction Cell | A small-volume chamber connected to the analyzer, allowing for efficient gas exchange and study of reactions in a controlled environment. | DeviSim reaction cell [13]. |
| Complex Oxide Materials | Model systems for studying surface chemistry, catalysis, and electrochemistry under operando conditions. | Ni/YSZ cermets, LSCF perovskites [14]. |
| Synchrotron X-ray Source | Provides high-flux, tunable X-rays, which are often used in NAP-XPS for high signal-to-noise ratio and depth-profiling via variable energy. | Used via a windowless beam entrance stage [13] [14]. |
| Monochromated Lab X-ray Source | A laboratory-based alternative to synchrotron radiation, offering high energy resolution for precise chemical state analysis. | Small spot X-ray source [13]. |
The Role of Localized Surface Plasmon Resonance in Signal Amplification
Core Concepts of LSPR Signal Amplification
What is LSPR and how does it enable signal amplification?
Localized Surface Plasmon Resonance (LSPR) is an optical phenomenon occurring in noble metal nanoparticles (e.g., gold, silver) where collective electron charge oscillations generate a highly localized evanescent field when excited by light. This field is extremely sensitive to minute changes in the local nano-environment, such as refractive index variations caused by molecular binding events. Signal amplification is achieved because this enhanced electromagnetic field significantly increases the detector's response to small molecular interactions, allowing for highly sensitive, label-free detection of biomolecules. [16]
What are the primary mechanisms for enhancing LSPR signals?
LSPR signal enhancement can be achieved through several key strategies:
- Refractive Index Management: Optimizing the thickness and properties of dielectric coatings (e.g., mesoporous silica) on metal nanoparticles to maximize sensitivity to environmental changes. [17]
- Surface Functionalization: Using branched polymer templates (e.g., PAMAM dendrimers) to increase the density of capturing ligands (antibodies, aptamers) on the sensor surface, improving target capture probability and binding avidity. [16]
- Plasmonic Coupling: Employing additional metallic nanoparticles (e.g., AuNPs) conjugated to targets to create coupled plasmonic systems that intensify the signal through enhanced electromagnetic fields. [16]
- Morphology Control: Utilizing nanoparticles with specific shapes (e.g., nanoflowers, nanorods) that feature sharp tips and edges to generate stronger local electric fields for superior signal enhancement. [18]
Troubleshooting Common LSPR Experimental Issues
Low Signal Intensity
Problem: The LSPR wavelength shift or signal change is weak upon analyte binding, leading to poor detection sensitivity. [19]
Solutions:
- Optimize Nanoparticle Structure: Utilize anisotropic nanoparticles like gold nanorods (Au NRs) or nanoflowers (GNFs). Au NRs offer tunable plasmon bands, while GNFs possess multiple tip structures that generate stronger local electric fields, enhancing sensitivity. [17] [18]
- Apply Signal Amplification Tags: Use secondary probes like Rolling Circle Amplification products conjugated to Gold Nanoparticles (RCA-AuNPs). These large complexes increase the mass bound to the sensor surface and enhance the plasmonic coupling effect, significantly amplifying the signal. [16]
- Increase Ligand Density: Immobilize capturing ligands (e.g., antibodies, aptamers) via multi-handled templates like PAMAM dendrimers. This increases the number of binding sites on the sensor surface, improving the probability of target capture and the overall signal. [16]
Non-Specific Binding (NSB)
Problem: Unwanted molecules adsorb to the sensor surface, causing high background noise and false-positive signals. [19] [20]
Solutions:
- Surface Passivation: Modify the sensor surface with non-fouling materials such as poly(amidoamine) (PAMAM) dendrimers or blocking agents like Bovine Serum Albumin (BSA). These materials minimize non-specific interactions from complex sample matrices. [16] [20]
- Buffer Optimization: Add mild detergents (e.g., Tween 20) to the running buffer to disrupt hydrophobic interactions, or increase ionic strength (e.g., with NaCl) to shield charge-based interactions. Typically, 0.005-0.01% Tween 20 or 150-500 mM NaCl is effective. [20]
- Optimize Ligand Orientation: Use site-specific immobilization strategies (e.g., via His-tags or biotin-streptavidin) to ensure capturing ligands are properly oriented, which maximizes specific binding and reduces non-specific surface interactions. [19]
Poor Reproducibility
Problem: Inconsistent results between experimental replicates or sensor chips. [19] [21]
Solutions:
- Standardize Nanoparticle Synthesis: Employ seed-mediated growth methods with precise control over reactant concentrations (e.g., CTAB, HAuCl₄, AgNO₃) and reaction conditions (temperature, time) to ensure batch-to-batch consistency in nanoparticle size, shape, and optical properties. [17] [18]
- Control Immobilization Chemistry: Standardize the surface activation and ligand coupling procedures. For covalent amine coupling, consistently use the same concentrations of EDC/NHS, consistent pH during ligand immobilization, and the same reaction times. [19] [22]
- Implement Rigorous Controls: Always include a reference channel or reference sensor surface that undergoes the exact same functionalization process but lacks the specific capturing ligand. This allows for real-time subtraction of bulk refractive index changes and non-specific binding signals. [20]
Sensor Surface Instability or Degradation
Problem: The functionalized sensor chip loses activity over time or shows baseline drift. [21]
Solutions:
- Apply Protective Coatings: Coat nanoparticles with a thin, stable layer of silica (e.g., 2-5 nm mesoporous SiO₂). This provides a protective shell, improves chemical stability, and can be further functionalized while maintaining high sensitivity. [17]
- Ensure Proper Storage: Store functionalized sensor chips in a nitrogen atmosphere or under vacuum at 4°C. If stored in liquid, use sterile, degassed buffer with antimicrobial agents (e.g., 0.05% sodium azide) to prevent microbial growth and surface degradation. [21]
- Monitor Baseline Stability: Prior to experiments, run the flow buffer over the sensor surface for an extended period (e.g., 30-60 minutes) to achieve a stable baseline. Sudden drifts often indicate an improperly equilibrated surface. [23]
Advanced Optimization & Experimental Protocols
Optimizing Mesoporous Silica Thickness on Gold Nanorods (Au NRs)
A proven method for signal amplification involves coating Au NRs with mesoporous silica. The shell thickness is critical and can be optimized as follows: [17]
Protocol:
- Synthesize Au NRs: Use a seed-mediated growth method in the presence of Cetyltrimethyl Ammonium Bromide (CTAB) to obtain Au NRs with an aspect ratio of ~2.9 and a longitudinal LSPR peak around 726 nm. [17]
- Vary Silica Coating: By adjusting the concentration of CTAB and the amount of tetraethyl orthosilicate (TEOS) (e.g., from 2 µL to 20 µL), a series of Au NRs@SiO₂ with shell thicknesses from 2 nm to 25 nm can be synthesized. [17]
- Characterize Sensitivity: Expose the Au NRs@SiO₂ to solvents with varying refractive indices (e.g., water-glycerol mixtures). Measure the LSPR peak shift for each shell thickness and calculate the sensitivity in nm/RIU. [17]
Data Table: Sensitivity vs. Silica Shell Thickness [17]
| Silica Shell Thickness (nm) | Refractive Index Sensitivity (nm/RIU) |
|---|---|
| 2 | 390 |
| 5 | 340 |
| 10 | 280 |
| 15 | 220 |
| 20 | 170 |
| 25 | 110 |
Dendrimer-Mediated Aptamer Immobilization for SARS-CoV-2 Detection
This protocol details a surface modification strategy to drastically improve sensitivity for viral detection. [16]
Protocol:
- Surface Activation: Start with a gold nanoisland LSPR chip functionalized with carboxyl groups. Activate the surface with EDC/NHS chemistry. [16]
- Dendrimer Immobilization: Immobilize Generation 3.5 carboxylated PAMAM dendrimers (G3.5-COOH) onto the activated surface. Then, conjugate Generation 4 aminated PAMAM dendrimers (G4-NH₂) to the G3.5 layer, creating a dense, non-fouling, multi-handled template. [16]
- Aptamer Conjugation: Covalently link amino-modified aptamers (specific to SARS-CoV-2 spike protein) to the G4-NH₂ dendrimers using EDC/sulfo-NHS chemistry. This results in a high density of capturing probes. [16]
- Signal Amplification (Optional): For ultra-sensitive detection, after capturing the target (e.g., pseudo SARS-CoV-2 virus), introduce a secondary signal amplifier. Use an RCA product that hybridizes with numerous ssDNA-functionalized AuNPs (RCA-AuNPs) to bind to the captured target, massively increasing the mass and plasmonic coupling. [16]
Performance Comparison: This dendrimer-aptamer modified sensor chip demonstrated a limit of detection (LOD) of 21.9 pM for the SARS-CoV-2 spike RBD, which was 152 times more sensitive than a traditional antibody-based chip. The additional RCA-AuNP amplification step improved sensitivity by another 10-fold for whole viral particles. [16]
Enhancing Signals via Nanoparticle Morphology
The shape of gold nanoparticles directly influences their fluorescence quenching efficiency and local field enhancement, which is vital for designing fluorescence-quenching LSPR assays. [18]
Experimental Comparison:
- Synthesize Different Shapes: Prepare four distinct gold nanoparticles (spheres-GNPs, nanoflowers-GNFs, nanorods-GNRs, nanotriangles-GNTs) using seed-growth methods. [18]
- Measure Quenching Efficiency: Test the ability of each nanoparticle type to quench the fluorescence of time-resolved fluorescent microspheres (TRFMs). [18]
- Theoretical Simulation: Perform Finite-Difference Time-Domain (FDTD) calculations to simulate the electric field distribution around each nanoparticle morphology. [18]
Data Table: Nanoparticle Morphology vs. Quenching Performance [18]
| Nanoparticle Morphology | Key Feature | Quenching Efficiency | Dominant Quenching Mechanism |
|---|---|---|---|
| Gold Nanoflowers (GNFs) | Multiple sharp tips, strong local field | 95% | Synergistic NSET & IFE (NSET dominant) |
| Gold Nanotriangles | Sharp edges | High | NSET & IFE |
| Gold Nanorods | Anisotropic, tunable LSPR | Moderate | IFE & NSET |
| Gold Nanospheres (GNPs) | Symmetric, common | Lower | Primarily IFE |
The Scientist's Toolkit: Essential Research Reagents
| Reagent/Material | Function in LSPR Signal Amplification | Example Use Case |
|---|---|---|
| Gold Nanorods (Au NRs) | Tunable plasmonic nanoparticles; sensitive substrate for LSPR sensors. | Core plasmonic material in refractive index sensing. [17] |
| Mesoporous Silica Shell | Coating to protect nanoparticles, enhance stability, and finely tune refractive index sensitivity. | ~2 nm shell on Au NRs for max sensitivity (390 nm/RIU). [17] |
| PAMAM Dendrimers (G3.5-COOH, G4-NH₂) | Hyper-branched polymers for creating non-fouling surfaces and high-density ligand templates. | Immobilizing multiple aptamers for virus detection. [16] |
| Specific Aptamers | Single-stranded DNA/RNA oligonucleotides that bind targets with high affinity and specificity. | Capturing SARS-CoV-2 spike protein on sensor surface. [16] |
| Rolling Circle Amplification (RCA) | Isothermal amplification technique to generate long, repetitive DNA products for signal enhancement. | Creating a scaffold to attach numerous AuNPs. [16] |
| Gold Nanoparticles (AuNPs) | Plasmonic tags for signal intensification via mass increase and plasmonic coupling. | Conjugating to RCA products for secondary amplification. [16] |
| Cetyltrimethyl Ammonium Bromide (CTAB) | Surfactant template for the synthesis and controlled silica coating of gold nanorods. | Directing the growth of uniform mesoporous silica shells. [17] |
| EDC/NHS Chemistry | Crosslinkers for activating carboxyl groups and covalently conjugating ligands to surfaces. | Immobilizing antibodies or aptamers on sensor chips. [16] [22] |
Advanced Applications and Methodological Innovations in Biomedicine
SERRS Immunoassays for Ultrasensitive Biomarker Detection (e.g., Tuberculosis)
Surface-Enhanced Resonance Raman Scattering (SERRS) combines the significant signal enhancement of Surface-Enhanced Raman Scattering (SERS) with the additional intensity gains from Resonance Raman Scattering (RRS). This hybrid technique provides signal enhancements of 10⁸ to 10¹² times greater than normal Raman scattering, enabling single-molecule sensitivity for biomarker detection [24]. When the excitation laser wavelength overlaps with an electronic transition of the Raman reporter molecule and the localized surface plasmon resonance of the metallic nanostructure, this dual enhancement mechanism achieves detection limits that can surpass traditional methods like ELISA and PCR [25].
The application of SERRS immunoassays represents a transformative approach for detecting low-abundance biomarkers, particularly for infectious diseases like tuberculosis. Researchers have demonstrated that SERRS-based platforms can detect mannose-capped lipoarabinomannan (ManLAM), a key tuberculosis biomarker, at concentrations 10 times lower than conventional SERS methods, with a 40-fold increase in analytical sensitivity [24]. This exceptional sensitivity positions SERRS as a next-generation diagnostic platform capable of improving early disease detection and patient outcomes in point-of-need settings.
Technical Foundations & Signaling Pathways
SERRS immunoassays rely on a sophisticated plasmonic architecture that creates "hot spots" of dramatically enhanced electromagnetic fields. The typical assay employs a sandwich-style format with key components: a gold film functionalized with capture antibodies, a target biomarker (antigen), and antibody-conjugated gold nanoparticles coated with Raman reporter molecules [24].
The signal enhancement occurs through multiple mechanisms working synergistically. When laser excitation matches the electronic transition of the Raman reporter molecule, resonance Raman effects provide an initial 10² to 10⁶-fold enhancement. Simultaneously, the nanometric gap between the gold nanoparticle and the underlying gold film creates a coupled plasmonic system that further enhances the local electromagnetic field by approximately 10⁶ times through the lightning rod effect [24]. This hybrid enhancement creates the exceptional sensitivity that distinguishes SERRS from other spectroscopic techniques.
The following diagram illustrates the core architecture and signal enhancement mechanism in a SERRS immunoassay:
Experimental Protocols & Methodologies
SERRS Immunoassay Protocol for Tuberculosis Biomarker Detection
The following protocol details the specific methodology for detecting ManLAM, a tuberculosis biomarker, using SERRS immunoassay technology [24]:
1. Substrate Preparation:
- Begin with a gold film substrate thoroughly cleaned with oxygen plasma treatment
- Prepare a mixed thiolate solution containing 0.1 mM thiolated Cy5 and 1.0 mM dithiobis(succinimidyl propionate) (DSP) in ethanol
- Immerse the gold substrate in the mixed thiolate solution for 2 hours at room temperature to form a self-assembled monolayer
- Rinse with ethanol and dry under nitrogen stream
- Incubate the functionalized substrate with capture antibodies (specific to ManLAM) at 10 µg/mL in phosphate buffer (pH 8.5) for 1 hour
- Block non-specific binding sites with 1% bovine serum albumin (BSA) for 30 minutes
2. Nanoparticle Label Preparation:
- Use 60 nm gold nanoparticles as the core material
- Incubate nanoparticles with thiolated Cy5 Raman reporter at 10 µM concentration for 30 minutes to form a monolayer coating
- Conjugate tracer antibodies to the reporter-coated nanoparticles using standard EDC-NHS chemistry
- Purify the functionalized nanoparticles (extrinsic Raman labels, ERLs) by centrifugation at 10,000g for 15 minutes
3. Assay Procedure:
- Apply clinical samples (serum or urine) to the antibody-functionalized substrate and incubate for 60 minutes at 37°C
- Wash three times with phosphate-buffered saline containing 0.05% Tween-20 (PBST)
- Incubate with ERLs for 45 minutes at 37°C to label captured antigens
- Wash three times with PBST to remove unbound nanoparticles
- Air dry the substrate and acquire SERRS spectra using a 633 nm HeNe laser excitation source
4. Spectral Acquisition Parameters:
- Laser power: <1 mW (to prevent sample damage) [26]
- Integration time: 3-10 seconds
- Spectral range: 500-1800 cm⁻¹
- Objective magnification: 20× or 50×
- Repeat measurements at minimum three different locations per sample
Critical Optimization Steps for SERRS Enhancement
Optimal SERRS performance requires careful optimization of several parameters that directly impact signal intensity and reproducibility:
Nanoparticle Distribution and Density:
- Analyze nanoparticle distributions using atomic force microscopy (AFM)
- Target uniform distribution with approximately 35% higher densities for SERRS compared to SERS configurations
- Optimize surface functionalization to achieve approximately four orders of magnitude below closest-packed layer of 60 nm particles [24]
Buffer and Aggregation Conditions:
- For nucleic acid detection, optimize MgSO₄ concentration as a coagulant (typically 2 μL of 0.01 M solution)
- Balance aggregation to maximize "hot spot" formation without excessive precipitation
- Test different buffer systems (Tris-HCl, phosphate, acetate) for specific applications [27]
Laser Power Optimization:
- Maintain laser power below 1 mW in a diffraction-limited spot to prevent sample damage
- Calculate energy density using formula: Power/(π×(0.61×λ/NA)²)
- For 633 nm laser with 0.5 NA objective, keep energy density below 1.6×10⁵ W/cm² [26]
Troubleshooting Guide: Common SERRS Experimental Challenges
Table 1: Troubleshooting Common SERRS Experimental Issues
| Problem | Possible Causes | Solutions | Prevention Tips |
|---|---|---|---|
| Weak or No Signal | 1. Low nanoparticle capture efficiency2. Suboptimal laser power or alignment3. Raman reporter degradation4. Insufficient plasmonic coupling | 1. Verify antigen-antibody binding with control experiment2. Optimize laser focus and power (0.1-1 mW)3. Prepare fresh Raman reporter solutions4. Check gap distance (<10 nm) between nanoparticle and film | 1. Functionalize nanoparticles with fresh reagents2. Perform regular instrument calibration3. Store Raman reporters in dark at -20°C |
| High Background Signal | 1. Non-specific binding of nanoparticles2. Inadequate washing steps3. Fluorescence from impurities4. Substrate contamination | 1. Increase BSA concentration in blocking buffer (2-5%)2. Optimize wash buffer stringency (increased detergent)3. Implement photobleaching step before measurement4. Clean substrate with plasma treatment | 1. Include appropriate negative controls2. Filter all buffers before use3. Implement multiple blocking steps |
| Inconsistent Results Between Replicates | 1. Irregular nanoparticle distribution2. Pipetting inconsistencies3. Inadequate mixing of reagents4. Variable incubation conditions | 1. Standardize functionalization protocols2. Calibrate pipettes regularly3. Implement vortexing of all reagents4. Use thermal mixer for uniform incubation | 1. Implement rigorous QC of functionalized substrates2. Train personnel on consistent technique3. Use automated liquid handling systems |
| Spectral Damage or Photo-bleaching | 1. Excessive laser power2. Prolonged exposure time3. Heat buildup in metallic structures4. Chemical degradation of reporter | 1. Reduce laser power to minimum detectable level2. Implement multiple short acquisitions3. Perform measurements in aqueous environment4. Test reporter stability under illumination | 1. Establish power curves for each new system2. Use lower NA objectives for reduced energy density3. Incorporate antioxidant in preparation |
Frequently Asked Questions (FAQs)
Q1: What are the key advantages of SERRS over conventional SERS for biomarker detection?
SERRS provides significantly stronger signal amplification by coupling the ~10⁶ enhancement of SERS with additional 10²-10⁶ enhancement from resonance Raman scattering. This combined effect enables SERRS to achieve detection limits that can rival fluorescence methods while maintaining the sharp spectral features and molecular specificity of Raman spectroscopy. Additionally, SERRS exhibits reduced photobleaching, minimal background fluorescence with red excitation, and superior multiplexing capabilities due to narrower spectral bandwidths [24] [25].
Q2: How does the SERRS immunoassay design differ from traditional ELISA?
While both use sandwich-style formats, SERRS replaces enzymatic amplification with plasmonic enhancement. The key differences include: (1) SERRS uses a gold capture substrate instead of plastic wells, (2) SERRS employs gold nanoparticles coated with Raman reporters instead of enzyme-conjugated detection antibodies, and (3) SERRS detection relies on spectroscopic readout rather than colorimetric or chemiluminescent signals. These differences eliminate the time and temperature requirements for enzymatic substrate turnover, significantly reducing assay time while improving sensitivity [24] [25].
Q3: What causes variations in SERRS signal intensity between experiments, and how can we improve reproducibility?
The main factors affecting reproducibility include nanoparticle distribution density, aggregation state, laser power stability, and molecular orientation on metallic surfaces. To improve reproducibility: (1) Standardize nanoparticle functionalization protocols with quality control checks, (2) Optimize and consistently maintain aggregation conditions using MgSO₄ concentration curves, (3) Regularly calibrate laser power and alignment, (4) Implement internal standards for signal normalization, and (5) Use experimental design (DoE) approaches to identify critical factors [27] [28].
Q4: Why is thiolated-Cy5 particularly effective as a Raman reporter in SERRS applications?
Thiolated-Cy5 provides three significant advantages: (1) The thiol group enables strong, specific immobilization to gold surfaces through Au-S bonding, creating stable and reproducible molecular orientation, (2) When adsorbed on gold, Cy5's fluorescence is efficiently quenched, eliminating background fluorescence that could interfere with Raman detection, and (3) The absorption maximum of Cy5 at 649 nm aligns well with common 633 nm HeNe lasers, enabling optimal resonance enhancement [25].
Q5: What considerations are essential for adapting SERRS platforms to point-of-need diagnostic settings?
Key considerations for point-of-need deployment include: (1) Developing rugged, portable Raman spectrometers with battery operation, (2) Stabilizing reagents through lyophilization to break cold-chain requirements, (3) Simplifying sample preparation protocols for non-laboratory settings, (4) Implementing user-friendly software with automated data analysis, and (5) Establishing comprehensive training programs for safe operation including laser safety and sample handling procedures [25].
Research Reagent Solutions
Table 2: Essential Reagents for SERRS Immunoassay Development
| Reagent Category | Specific Examples | Function & Importance | Optimization Tips |
|---|---|---|---|
| Metallic Nanostructures | 60 nm spherical gold nanoparticles; Gold film substrates (50-100 nm thickness) | Provide plasmonic enhancement through localized surface plasmon resonance | Size uniformity (PDI <0.2) critical for reproducible enhancement; Characterize by UV-Vis and TEM |
| Raman Reporters | Thiolated Cy5; Thiolated Rhodamine derivatives; Benzotriazole compounds | Generate characteristic Raman signatures; Resonance enhancement when laser matched to electronic transition | Select reporters with high Raman cross-sections; Thiolation enables stable gold attachment |
| Surface Functionalization | Dithiobis(succinimidyl propionate) (DSP); Carboxyl-PEG-Thiol; NHS-EDC chemistry | Facilitate antibody immobilization with proper orientation; Control surface density | Mixed monolayers optimize bioactivity; Characterize by electrochemical methods |
| Biological Recognition Elements | Anti-ManLAM antibodies (for TB); CA 19-9 antibodies (pancreatic cancer) | Provide molecular specificity for target biomarkers | Validate affinity and specificity; Screen multiple clones for optimal performance |
| Aggregation Agents | MgSO₄ (0.01 M); HCl (0.3-0.7 M); Poly-L-lysine | Promote nanoparticle aggregation to create "hot spots" for enhanced signals | Titrate concentration carefully; Excess causes precipitation; Monitor by color change |
| Blocking Agents | Bovine Serum Albumin (1-5%); Casein; Fish skin gelatin | Reduce non-specific binding to improve signal-to-noise ratio | Test multiple blockers; Consider commercial blocker cocktails for complex samples |
Performance Optimization & Data Analysis
Quantitative Performance Metrics
SERRS immunoassays demonstrate exceptional performance characteristics compared to conventional detection methods:
Table 3: Performance Comparison of SERRS vs. Other Detection Methods
| Analyte | Detection Method | Limit of Detection | Linear Range | Key Advantages |
|---|---|---|---|---|
| ManLAM (TB biomarker) | SERRS Immunoassay | 10× lower than SERS [24] | 1-50 ng/mL | 40× increase in analytical sensitivity vs. SERS |
| MMP-7 (Pancreatic cancer) | SERRS Immunoassay | 2.3 pg/mL [25] | Not specified | 14× improvement vs. ELISA (31.8 pg/mL) |
| CA 19-9 (Pancreatic cancer) | SERRS Immunoassay | 34.5 pg/mL [25] | Not specified | 29× improvement vs. ELISA (987 pg/mL) |
| Single-stranded DNA | SERS with MgSO₄ aggregation | Dependent on buffer optimization [27] | Linear with 1656/1099 cm⁻¹ peak ratio | Enables study of aptamer-toxin interactions |
Data Analysis Workflow
The following diagram illustrates the key steps in optimizing SERRS experiments and troubleshooting performance issues:
SERRS immunoassay technology represents a significant advancement in ultrasensitive biomarker detection, with demonstrated applications in tuberculosis diagnosis and cancer biomarker detection. The exceptional sensitivity and specificity achieved through the combination of plasmonic enhancement and resonance Raman effects position this technology as a powerful tool for researchers and clinical laboratories.
Future development efforts are focusing on several key areas: (1) Integration with vertical flow assay formats to reduce analysis time, (2) Implementation of robust multiplexing capabilities for parallel biomarker detection, (3) Development of field-deployable instrumentation for point-of-need testing, and (4) Creation of standardized reagent systems to improve inter-laboratory reproducibility [25]. As these advancements mature, SERRS-based platforms are poised to transform diagnostic paradigms across multiple disease areas, particularly in resource-limited settings where sensitivity, speed, and cost-effectiveness are paramount considerations.
Label-free vs. Label-based SERS Strategies for Virus and Pathogen Identification
Frequently Asked Questions (FAQs)
Q1: What is the fundamental difference between label-free and label-based SERS detection?
A1: The core difference lies in the source of the detected Raman signal.
- Label-free SERS directly captures the intrinsic Raman scattering signals generated by the pathogen's own molecular components (e.g., proteins, nucleic acids in a virus capsid) when they are adsorbed onto or near the SERS-active substrate [29] [30]. This method avoids complex labeling steps and provides the pathogen's unique "fingerprint" [31].
- Label-based SERS relies on detecting a strong, consistent signal from a dedicated Raman reporter molecule (e.g., 4-aminothiophenol) that is attached to a plasmonic nanoparticle (like a gold nanostar) [32]. These SERS tags are then linked to the pathogen via a specific recognition element (like an antibody or aptamer). The signal comes from the reporter, not the pathogen itself, which allows for indirect, highly sensitive detection [29].
Q2: When should I choose a label-free strategy over a label-based one for my pathogen detection experiment?
A2: The choice depends on your experimental goals, sample type, and required throughput. The following table summarizes the key considerations:
| Factor | Label-Free SERS | Label-Based SERS |
|---|---|---|
| Primary Goal | Pathogen fingerprinting, discovery of unknown spectral features, rapid classification [29] [31]. | Highly sensitive and specific quantification of a known target pathogen [29] [32]. |
| Sensitivity | Generally lower; limited by the intrinsic Raman cross-section of the pathogen [29]. | Very high (can reach single-molecule level); signal is amplified by the reporter molecule [29] [33]. |
| Specificity | Relies on spectral analysis and machine learning for identification; can be affected by background interference [29] [30]. | High, conferred by the biological recognition element (antibody, aptamer) [32]. |
| Sample Preparation | Simpler and faster; often involves mixing the sample with a colloidal substrate [29] [30]. | More complex; requires synthesis of SERS tags and multiple incubation/washing steps [29]. |
| Multiplexing Potential | Challenging due to overlapping spectral fingerprints. | Excellent; different reporters with distinct Raman spectra can be used for different targets [29]. |
| Best for | Rapid screening, identification of unknown pathogens, and studies where preserving the native state of the pathogen is crucial. | Ultrasensitive detection of a specific pathogen in complex matrices, clinical diagnostics, and quantitative assays [32] [33]. |
Q3: I am getting poor and inconsistent signals in my label-free SERS experiments with viruses. What could be the issue?
A3: Inconsistent signals in label-free SERS are a common challenge, often stemming from these factors:
- Substrate Inhomogeneity: The distribution and density of "hotspots" on your SERS substrate are critical. Non-uniform substrates lead to variable signal enhancement [29] [34]. Ensure reproducible fabrication of your nanoparticles or solid substrates.
- Inefficient Pathogen Capture: Viruses may not be consistently driven into the enhanced electromagnetic fields. Employing specific capture methods, such as functionalizing the substrate with antibodies or aptamers, can help concentrate pathogens at the hotspots [29].
- Background Interference: Complex biological samples (like serum or saliva) contain proteins and other molecules that can adsorb to the substrate and swamp the weak viral signal [30] [33]. Optimization of sample pre-treatment (e.g., dilution, filtration) or using substrates with pre-concentration capabilities (like flexible swabs) can mitigate this [34].
- Laser-Induced Damage: Using excessive laser power can denature the viral proteins, altering their Raman fingerprint. Always use the minimum laser power required to obtain a measurable signal.
Q4: How can I improve the stability and reproducibility of my label-based SERS probes?
A4: Focus on the synthesis and functionalization of the plasmonic nanoparticles:
- Controlled Synthesis: Standardize your nanoparticle synthesis protocol (e.g., seed-mediated growth for nanorods or nanostars) to ensure consistent size, shape, and plasmonic properties [32].
- Stable Raman Reporter: Choose a reporter molecule that forms a stable, dense monolayer on the metal surface (e.g., thiolated compounds on gold) to prevent leaching and ensure a stable signal [32].
- Effective Passivation: After attaching the reporter and recognition element, passivate the remaining metal surface with an inert molecule like polyethylene glycol (PEG). This reduces non-specific binding and improves colloidal stability in complex fluids [32].
- Quality Control: Implement characterization techniques like UV-Vis spectroscopy, TEM, and SERS mapping to verify the uniformity of your SERS probes before use in detection assays [32].
Troubleshooting Guides
Issue: Low Signal-to-Noise Ratio in Label-Free Viral Detection
Problem: The Raman signal from the virus is weak and obscured by background fluorescence or noise.
Solutions:
- Optimize the "Hotspot" Generation: For colloidal substrates, induce controlled aggregation of nanoparticles (e.g., using salts or adjusting pH) to create more inter-particle gaps where the field enhancement is strongest. One protocol uses sodium borohydride-reduced silver nanoparticles mixed with acetonitrile and the virus sample to form optimal hotspots for virus detection [30].
- Employ Advanced Substrates: Switch from simple spherical nanoparticles to nanostructures with high field enhancement at their tips, such as gold nanostars [32] or nano-urchins. Alternatively, use flexible SERS substrates (e.g., polymer-based or cellulose) that can conform to the pathogen's surface, improving contact and signal reproducibility [34].
- Leverage Data Analysis: Apply machine learning algorithms like Principal Component Analysis (PCA) to differentiate the subtle spectral features of the pathogen from the complex background of clinical samples like serum or saliva [30] [33].
Issue: High Non-Specific Binding in Label-Based Sandwich Assays
Problem: The SERS tag binds to surfaces or molecules other than the target pathogen, leading to false positives.
Solutions:
- Optimize the Blocking Step: Incubate your capture substrate (e.g., antibody-coated slide or MIP electrode) with a high-concentration blocking agent (e.g., BSA, casein, or commercial blocking buffers) before introducing the sample. This saturates non-specific binding sites.
- Refine Washing Stringency: Increase the number of washes and incorporate mild detergents (e.g., Tween-20) in the wash buffer to remove loosely bound SERS tags without disrupting specific antigen-antibody interactions.
- Use a Biomimetic Capture Layer: Replace or supplement antibodies with Molecularly Imprinted Polymers (MIPs). MIPs, known as "plastic antibodies," offer highly specific binding cavities for the target with superior chemical stability, reducing non-specific interactions [32].
The Scientist's Toolkit: Essential Research Reagents & Materials
Table: Key Reagents for SERS-based Pathogen Detection
| Item | Function | Example Use-Case |
|---|---|---|
| Gold Nanostars (AuNSs) | Plasmonic nanoparticle with sharp tips that act as intense SERS hotspots; highly tunable LSPR [32]. | Used as the core for label-based SERS tags due to their high enhancement factor. |
| Silver Nanoparticles (Ag NPs) | Provides extremely high electromagnetic enhancement, often higher than gold, but can be less stable [30]. | Used in label-free detection, often aggregated to create hotspots for viral fingerprinting. |
| 4-Aminothiophenol (4-ATP) | A common Raman reporter molecule; forms a stable monolayer on gold/silver via the thiol group [32]. | The signal source in a label-based SERS probe; its distinct peaks are monitored for quantification. |
| Molecularly Imprinted Polymer (MIP) | A synthetic polymer with cavities complementary to a target molecule, serving as a stable, artificial antibody [32]. | Used as a capture layer on the SERS substrate to specifically isolate the target pathogen from a sample. |
| Polyvinylpyrrolidone (PVP) | A capping agent and stabilizer that controls nanoparticle growth and prevents aggregation in solution [32]. | Used during the synthesis of anisotropic nanoparticles like gold nanostars to control their shape and stability. |
| Flexible PDMS Substrate | A transparent, deformable polymer that can be coated with metal nanoparticles to create a versatile SERS substrate [34]. | Used for in-situ sampling on irregular surfaces (e.g., fruit skin) or integrated into microfluidic devices. |
Experimental Protocol: Key Workflows
Protocol 1: Label-Free Detection of Virus using Ag Nanoparticles
This protocol is adapted from a study demonstrating the detection of Monkeypox virus in serum [30].
Workflow:
Detailed Steps:
- Substrate Preparation: Add 5 mL of silver nitrate solution (6.6 mg/mL) to 500 mL of vigorously stirred sodium borohydride (NaBH₄) solution (0.135 mg/mL). Stir for 18 minutes. Centrifuge the resulting silver sol at 5500 rpm for 20 minutes at 25°C. Remove the supernatant and redisperse the pellet to concentrate the Ag nanoparticles (Ag@BO) [30].
- Sample Mixing: Combine 7 µL of the concentrated Ag@BO sol with 1 µL of acetonitrile. Then, add 5 µL of the virus sample (e.g., inactivated virus in serum) and 9 µL of 0.05 M NaBH₄ (pH=10). The NaBH₄ acts as an aggregating agent to form viral "hotspots" [30].
- Incubation: Mix the solution thoroughly and allow it to incubate for a few minutes to facilitate aggregation and the entrapment of viruses in the enhanced field regions.
- SERS Measurement: Deposit the mixture onto a slide or well plate. Acquire SERS spectra using a Raman spectrometer (e.g., 532 nm laser, 30 mW power, 30 s acquisition time). The entire detection process can be completed within 5 minutes [30].
- Data Analysis: Process all acquired spectra (e.g., baseline correction). Use multivariate analysis like Principal Component Analysis (PCA) on the 700-1500 cm⁻¹ spectral region to clearly identify and differentiate the virus based on its spectral fingerprint, even in a complex biological background [30].
Protocol 2: Label-Based Detection using SERS Nanotags and a MIP Capture Layer
This protocol is inspired by a biosensor developed for the breast cancer biomarker CA 15-3, demonstrating the principles of a sandwich assay applicable to pathogens [32].
Workflow:
Detailed Steps:
- Capture Substrate Fabrication (MIP): Electropolymerize a monomer (e.g., aniline) on a gold electrode in the presence of the target pathogen (template). This creates a polymer matrix with specific molecular cavities. Extract the template pathogen using a surfactant like Sodium Dodecyl Sulfate (SDS), leaving behind complementary binding sites in the MIP layer [32].
- SERS Nanotag Preparation:
- Synthesize gold nanostars (AuNSs) via a seed-mediated or surfactant-directed method.
- Incubate the AuNSs with a Raman reporter molecule (e.g., 4-ATP) to form a self-assembled monolayer.
- Passivate the surface with a short PEG molecule.
- Conjugate a specific recognition element (e.g., antibody against the target pathogen) to the PEGylated surface [32].
- Sandwich Assay Execution:
- Capture: Incubate the prepared MIP sensor with the sample containing the pathogen. The pathogen is selectively captured into the imprinted cavities.
- Binding: After washing, incubate the sensor with the SERS nanotags. The antibodies on the nanotags bind to the captured pathogen, forming a "MIP-pathogen-nanotag" sandwich structure.
- Washing: Perform stringent washing to remove any unbound SERS nanotags, which is critical for minimizing background signal.
- Signal Detection: Dry the sensor and acquire SERS spectra from the surface. The intensity of the characteristic peaks of the Raman reporter (e.g., 4-ATP) is directly correlated with the concentration of the captured pathogen [32].
SPR Biosensor Design for Real-Time Biomolecular Interaction Analysis
Troubleshooting Guide: Common SPR Experimental Issues
This guide addresses frequent challenges encountered during Surface Plasmon Resonance experiments to optimize signal detection in surface spectroscopy research.
Q1: My baseline is unstable or drifting. What could be the cause and how can I fix it?
A drifting baseline is a common issue often related to the fluidic system or buffer conditions.
- Solution: Ensure your running buffer is properly degassed to eliminate air bubbles, which can cause significant signal fluctuations [21]. Check the entire fluidic system for any leaks that might introduce air [21]. Always use fresh, filtered buffer to avoid particulate contamination, and allow sufficient time for temperature stabilization before starting experiments [21].
Q2: I observe no significant signal change upon analyte injection, despite expecting binding. What should I investigate?
A lack of expected signal can stem from several methodological or preparation issues.
- Solution: First, verify that your analyte concentration is appropriate (typically 0.1 to 10 times the expected KD value) and that the ligand was successfully immobilized [21] [20]. Confirm the biological activity and integrity of both interaction partners, as inactive proteins will not bind [21] [35]. Ensure your running buffer is compatible and does not inhibit the interaction.
Q3: High levels of non-specific binding are obscuring my specific signal. How can I reduce this?
Non-specific binding (NSB) occurs when analytes interact with the sensor surface rather than the specific ligand.
- Solution: Implement surface blocking with agents like BSA or casein to occupy non-specific sites [21] [19]. Optimize your running buffer by adding non-ionic surfactants (e.g., Tween-20) to reduce hydrophobic interactions, or increase salt concentration to shield charge-based interactions [35] [20]. Consider switching to a sensor chip with different surface chemistry that is less prone to NSB for your specific analyte [20].
Q4: The regeneration step does not completely remove bound analyte, causing carryover between cycles. How can I optimize regeneration?
Incomplete regeneration leads to decreasing ligand activity over time and inaccurate data.
- Solution: Systematically scout for optimal regeneration conditions by testing different pH, ionic strength, and buffer compositions [21]. Start with mild conditions (e.g., mild acid or base) and progressively increase stringency until complete analyte removal is achieved without damaging the ligand [20]. Increase regeneration flow rates (100-150 µL/min) and consider multiple short injections rather than one long injection [20].
Q5: My sensorgram suggests mass transport limitations. How do I confirm and address this?
Mass transport limitation occurs when analyte diffusion to the surface is slower than the association rate.
- Solution: To identify, run the assay at different flow rates. If the observed association rate (ka) increases with higher flow rates, mass transport is limiting [20]. To address, increase the flow rate, reduce ligand density, or use a higher analyte concentration [21] [20].
Frequently Asked Questions (FAQs)
Q: What are the key considerations when selecting which binding partner to immobilize as the ligand? A: Choose the smaller molecule as the ligand to maximize the response signal, as SPR response is mass-based [20]. Prefer the partner with higher purity if using covalent coupling, and utilize tagged molecules (e.g., His-tag, biotin) for controlled orientation and higher activity [20]. Avoid using multivalent analytes as ligands, as they can cause avidity effects [20].
Q: How many analyte concentrations should I use for kinetic analysis, and what range is appropriate? A: Use a minimum of 3, but ideally 5 different analyte concentrations spanning from 0.1 to 10 times the expected KD value to ensure well-distributed binding curves [20]. If the KD is unknown, start with a low nM concentration series and adjust until a binding response is observed [20].
Q: How can I minimize bulk refractive index effects (bulk shift) in my experiments? A: Bulk shift appears as a square-shaped signal at injection start/end and is caused by differences between the analyte buffer and running buffer [20]. Match the composition of your analyte sample buffer to the running buffer as closely as possible, using dialysis or buffer exchange if necessary [20]. For components that cannot be matched (e.g., DMSO, glycerol), use reference subtraction, though this may not fully correct for large mismatches [20].
Q: What are the signs of an inadequate regeneration procedure, and how can I develop an effective one? A: Signs include progressively decreasing maximum response (Rmax) over cycles, drifting baseline, or curved baselines post-regeneration [20]. Develop a protocol by scouting different solutions (acidic, basic, high salt, with/without additives) starting with mild conditions and monitoring ligand activity after each regeneration [20]. Always include a positive control to verify ligand functionality remains intact [20].
Advanced Optimization Methodologies
Signal Enhancement Protocols
Nanomaterial-Based Signal Amplification: Incorporating nanomaterials such as gold nanoparticles, graphene, or transition metal dichalcogenides (TMDCs) can significantly enhance sensitivity [36]. These materials increase the local refractive index change and can provide additional binding sites, improving the detection limit for low-abundance analytes [37] [36].
Algorithm-Assisted Sensor Optimization: Recent advances employ multi-objective optimization algorithms like Particle Swarm Optimization (PSO) to simultaneously optimize multiple design parameters (incident angle, metal layer thickness) and performance metrics (sensitivity, figure of merit) [37]. This approach has demonstrated improvements of 230.22% in bulk refractive index sensitivity and enables detection limits as low as 54 ag/mL (0.36 aM) for model systems like mouse IgG [37].
Experimental Parameters for Quantitative Analysis
Table 1: Recommended Analyte Concentration Ranges for Kinetic Analysis
| Expected KD | Concentration Range | Number of Concentrations | Notes |
|---|---|---|---|
| Unknown | 1 nM - 10 µM | 5-8 | Start with logarithmic dilution series |
| Low (pM-nM) | 0.1x to 10x KD | 5 | Use higher flow rates to minimize mass transport |
| High (µM-mM) | 0.5x to 5x KD | 3-5 | May require higher immobilization levels |
Table 2: Common Regeneration Solutions for Different Interaction Types
| Interaction Type | Regeneration Solution | Contact Time | Precautions |
|---|---|---|---|
| Protein A/G - IgG | 10 mM Glycine, pH 1.5-2.5 | 15-30 seconds | Neutralize immediately after regeneration |
| Biotin-Streptavidin | 1-10 mM HCl or 1-5 mM NaOH | 30-60 seconds | Monitor streptavidin activity over cycles |
| His-tag - NTA | 350 mM EDTA, 10-300 mM Imidazole | 30-120 seconds | Requires re-charging with Ni²⁺ after regeneration |
| High Affinity Protein-Protein | 1-4 M MgCl₂, 10-100 mM HCl | 30-60 seconds | Test ligand activity carefully after each regeneration |
Research Reagent Solutions
Table 3: Essential Materials for SPR Experiments
| Reagent/Material | Function | Application Notes |
|---|---|---|
| CM5 Sensor Chip | Carboxylated dextran matrix for covalent immobilization | Versatile for amine, thiol, or carbonyl coupling |
| NTA Sensor Chip | Captures His-tagged proteins via nickel chelation | Requires conditioning with Ni²⁺; gentle regeneration |
| Streptavidin Sensor Chip | Captures biotinylated ligands | Very stable surface; harsh regeneration possible |
| HBS-EP Buffer | Standard running buffer (HEPES + NaCl + EDTA + Surfactant) | Low non-specific binding; compatible with most proteins |
| EDC/NHS Chemistry | Activates carboxyl groups for amine coupling | Standard for covalent immobilization; fresh preparation required |
| Ethanolamine-HCl | Blocks remaining activated groups after coupling | Prevents non-specific binding |
| Glycine-HCl (pH 1.5-3.0) | Common regeneration solution | Effective for many antibody-antigen interactions |
Experimental Workflow Visualization
Systematic Troubleshooting Methodology
Machine Learning and Convolutional Neural Networks for Spectral Analysis and Pathogen Differentiation
Core Concepts and Thesis Context
This technical support center is designed within the framework of a thesis focused on optimizing signal detection in surface spectroscopy research. The integration of Machine Learning (ML) and Convolutional Neural Networks (CNN) aims to overcome long-standing challenges in the field, such as enhancing sensitivity, improving specificity for pathogen differentiation, and managing complex, high-dimensional spectral data. The following guides and FAQs provide targeted support for researchers conducting these advanced experiments.
Troubleshooting Guides & FAQs
Troubleshooting Common Spectral Data Issues
Q: My spectral baseline is unstable or shows significant drift. What could be the cause and how can I fix it?
- A: Baseline instability often points to instrumental or environmental factors.
- Instrumental Causes: In UV-Vis spectroscopy, this is frequently caused by deuterium or tungsten lamps that have not reached thermal equilibrium. In FTIR spectroscopy, thermal expansion or mechanical misalignment of the interferometer can be the source [38].
- Environmental Causes: Subtle influences like air conditioning cycles or mechanical vibrations from nearby equipment can disturb optical components [38].
- Diagnosis and Solution: Record a fresh blank spectrum under identical conditions. If the blank also exhibits drift, the issue is likely instrumental, and you should check lamp warm-up time and ensure the instrument is on a stable, vibration-damping platform. If the blank is stable, the problem is likely sample-related, such as matrix effects or contamination introduced during preparation [38].
Q: The signal-to-noise ratio in my spectra is poor, obscuring important features. How can I improve it?
- A: Excessive noise reduces analytical precision and can originate from multiple sources.
- Data Acquisition: Ensure adequate signal averaging and correct detector gain settings. Verify that purge gas flow rates and sample compartment seals are maintained (for FTIR) to prevent interference from atmospheric water vapor and CO₂ [38].
- Environmental Factors: Protect the instrument from electronic interference, temperature fluctuations, and mechanical vibrations [38].
- Data Processing: Employ multivariate data analysis techniques post-acquisition, such as Principal Component Analysis (PCA) or Orthogonal Signal Correction (OSC), to identify and correct for noise and baseline drift [39].
Q: My CNN model for spectral classification is overfitting to the training data. What strategies can I use?
- A: Overfitting, characterized by high training accuracy and low validation accuracy, is common with complex models and limited data.
- Data Augmentation: Artificially expand your training dataset. For spectral data, this can include adding Gaussian noise, applying time-frequency masking, horizontal flipping, or intensity scaling [40] [41]. For image-based spectrograms, random cropping and rotation are also effective [40].
- Model Simplification and Regularization: Implement regularization techniques like dropout and L2 regularization (weight decay) within your CNN architecture [42]. Consider using model compression methods, such as the Two-Stage Hierarchical Pruning (THP-CNN) framework, which removes redundant parameters while maintaining performance [40].
- Use Callbacks: During training, employ callbacks like early stopping to halt training when validation performance stops improving, preventing the model from memorizing the training data [42].
Troubleshooting Pathogen Detection & Classification
Q: I am getting low accuracy in classifying different pathogenic bacteria from colony images. How can I improve my model's performance?
- A: This issue can stem from the model architecture, the data, or the training strategy.
- Model Architecture: Standard CNNs like ResNet-50 can have parameter redundancy. Consider using a pruned and optimized architecture like THP-CNN, which has been shown to achieve high accuracy (86%) in a 24-class pathogenic bacteria classification task while being computationally efficient [40].
- Data Preprocessing and Augmentation: As with spectral data, ensure your dataset is well-prepared. This includes resizing images to a fixed resolution, normalization, and applying augmentations like random cropping, flipping, and rotation to improve the model's robustness and generalization [40].
- Hyperparameter Tuning: Systematically optimize hyperparameters such as learning rate, batch size, and weight decay. Using a learning rate scheduler that decays the rate at specific epochs can facilitate better convergence [40].
Q: How can I distinguish between spectral or image features of very similar pathogen species?
- A: This requires enhancing the model's ability to extract fine-grained, discriminative features.
- Advanced Architectures: Move beyond basic CNNs. Consider frameworks that combine CNNs and Transformers, using CNNs to extract local features and Transformers to capture long-range, global context within the data [43]. Incorporating attention mechanisms can also help the model focus on the most salient features for differentiation [44].
- Feature-Level Data Augmentation: Implement strategies like feature smoothing or Gaussian perturbation at the superpixel or feature level to help the model better learn intra-class variations and improve its generalization to subtle differences [44].
Performance Data & Experimental Protocols
Performance Comparison of CNN Models for Classification Tasks
The table below summarizes the performance of various models on different tasks, providing a benchmark for your experiments.
| Model/Task | Dataset | Key Metric | Performance | Key Finding |
|---|---|---|---|---|
| THP-CNN (70% Pruned) [40] | 24-class Bacterial Colony Images [40] | Accuracy | 86% (0.86) | Outperforms ResNet-50 (72%), MobileNet V2 (81%) with only 0.62M parameters [40]. |
| ResNet50 [45] | Pediatric Abdominal Radiographs (GI Obstruction) [45] | Accuracy | 95.5% (with automated cropping) | Automated cropping of X-rays significantly improved performance from 93.3% [45]. |
| Transfer Learning (VGG16) [46] | Arabic Voice Pathology (AVPD) | Accuracy | 96.88% | Superior to hybrid CNN-LSTM (92.71%) and SVM (86.46%) models [46]. |
| Fine-tuned ResNet50 [41] | Biomedical Spectrograms (Anatomical Regions) [41] | Accuracy | 93.37% | Demonstrates effectiveness of transfer learning for spectrogram classification [41]. |
Detailed Experimental Protocol: Bacterial Colony Classification with THP-CNN
This protocol is adapted from a study achieving high accuracy in classifying 24 pathogenic bacteria [40].
1. Dataset Preparation:
- Source: Use a high-resolution dataset of bacterial colony images, annotated with bounding boxes for individual colonies [40].
- Preprocessing:
- Resize all images to a fixed resolution required by the network.
- Normalize pixel value distributions to the range required for model training (e.g., [0, 1]).
- Data Augmentation: Apply a series of transformations to the training set to improve generalization:
- Random cropping
- Horizontal and vertical flipping
- Random rotations
- Brightness and contrast adjustments [40].
2. Model Training - THP-CNN Framework:
- Pruning: The THP-CNN framework uses a two-stage process.
- Stage 1 (Channel Pruning): The L2-norm of the scaling parameters (γ) in Batch Normalization (BN) layers is used to quantify the importance of convolutional kernels. Kernels with small γ values are progressively pruned [40].
- Stage 2 (Layer Fusion): Convolutional layers are consolidated based on "receptive field equivalence" (e.g., two sequential 3x3 convolutions can be fused into a single 5x5 convolution), reducing network depth and parameters without losing representational capacity [40].
- Hyperparameters:
- Optimizer: Stochastic Gradient Descent (SGD) with Nesterov momentum.
- Momentum: 0.9
- Weight Decay: 1e-4
- Initial Learning Rate: 0.001
- Batch Size: 32
- Epochs: 160
- Learning Rate Schedule: Decay by a factor of 10 at the 80th and 120th epochs [40].
3. Model Evaluation:
- Use a held-out test set to evaluate the final pruned model.
- Report standard metrics such as accuracy, precision, recall, and F1-score.
Workflow & Signaling Pathways
Workflow for ML-Enhanced Spectral Analysis in Pathogen Detection
The following diagram illustrates a generalized workflow for applying machine learning to spectral data for pathogen detection, integrating steps from sample preparation to model inference.
The Scientist's Toolkit: Essential Research Reagents & Materials
Key Research Reagent Solutions for SERS-Based Pathogen Detection
The following table lists essential materials used in developing SERS sensors for food hazards and pathogen detection, a key application in surface spectroscopy [47].
| Item Name | Function/Brief Explanation |
|---|---|
| SERS-Active Substrates | Metallic nanostructures (e.g., gold/silver nanoparticles) that amplify the weak Raman signal by many orders of magnitude, enabling single-molecule detection sensitivity [47]. |
| Internal Standards | Known compounds added to the sample to correct for instrumental variations and fluctuations in signal intensity, improving quantitative accuracy [39]. |
| Certified Reference Materials | Samples with known, certified analyte concentrations. Used to calibrate spectroscopic instruments and validate the accuracy of ML models [38] [47]. |
| Matrix-Matched Calibration Standards | Calibration standards that mimic the chemical composition of the sample matrix. They are critical for mitigating "matrix effects" that can suppress or enhance signals [38] [47]. |
| Data Augmentation Tools | Software or scripts for generating synthetic data (e.g., via Gaussian noise, feature swapping). Expands training datasets, which is crucial for preventing overfitting in ML models [40] [44] [41]. |
Practical Troubleshooting and Systematic Optimization of Assay Performance
FAQs and Troubleshooting Guides
Surface Plasmon Resonance (SPR)
Q1: What causes baseline drift in my SPR experiment and how can I stabilize it?
A: Baseline drift, a gradual shift in the baseline signal over time, is often a sign of a system that is not fully equilibrated. Common causes and solutions include [48] [19]:
- Cause: Poor System Equilibration. The sensor surface, especially after docking a new chip or an immobilization procedure, requires time to adjust to the flow buffer.
- Solution: Flow running buffer overnight or for an extended period (30+ minutes) to equilibrate the surface before starting analyte injections. Always prime the system after a buffer change and wait for a stable baseline [48].
- Cause: Inefficient Surface Regeneration. Residual material from previous cycles can build up on the sensor chip.
- Solution: Ensure you are using the correct regeneration buffer and protocol to thoroughly clean the surface without damaging the immobilized ligand [19].
- Cause: Buffer or Temperature Fluctuations. Changes in temperature affect detector sensitivity, and inconsistent buffer composition can cause drift.
- Solution: Use fresh, filtered, and degassed buffers daily. Ensure consistent temperature control for the instrument and buffers [48] [19].
- Preventive Experimental Design: Incorporate at least three start-up cycles (dummy injections with buffer) at the beginning of your experiment to "prime" the system and surface. These cycles should not be used in the final analysis [48].
Q2: How can I reduce non-specific binding (NSB) on my SPR sensor chip?
A: Non-specific binding occurs when molecules other than your target analyte adhere to the sensor surface, leading to false signals [19].
- Strategy: Surface Blocking. After immobilizing your ligand, use blocking agents such as ethanolamine, casein, or BSA to occupy any remaining active sites on the sensor chip surface [49] [19].
- Strategy: Optimize Buffer Conditions. Add surfactants like Tween-20 to your running buffer to minimize hydrophobic interactions. Optimize the salt concentration and pH to reduce electrostatic non-specific binding [19].
- Strategy: Use a Reference Channel. Always use a well-designed reference channel (e.g., a surface with no ligand or an irrelevant ligand) and employ double referencing during data analysis. This subtracts signals arising from bulk refractive index changes and non-specific binding to the chip surface [48].
- Strategy: Tune Flow Conditions. A moderate flow rate can help reduce non-specific adsorption compared to very low flow rates [19].
Q3: My SPR signal intensity is low. What can I do to improve it?
A: Low signal intensity can stem from insufficient ligand activity or inefficient binding [19].
- Solution: Optimize Ligand Immobilization Density. A surface that is too sparse gives weak signals, while one that is too dense can cause steric hindrance. Perform immobilization level tests to find the optimal density for your system [19].
- Solution: Check Sample Activity. Ensure your analyte is pure, properly folded, and active. Aggregates or denatured proteins can bind poorly.
- Solution: Use High-Sensitivity Sensor Chips. For weak interactions or low-abundance analytes, consider chips with specialized coatings (e.g., CM5) that offer a higher surface area and enhanced sensitivity [19].
Fourier Transform Infrared (FT-IR) Spectroscopy
Q4: Why is my FT-IR baseline unstable or wavy, and how do I fix it?
A: An unstable baseline in FT-IR is frequently caused by instrumental or sample preparation issues [50] [51].
- Cause: Instrument Vibration. FT-IR spectrometers are highly sensitive to physical disturbances from nearby equipment (e.g., pumps, freezers) or lab activity.
- Solution: Place the instrument on a stable, vibration-dampening optical table and ensure it is not in contact with sources of vibration [50] [51].
- Cause: Dirty ATR Crystal. A contaminated crystal is a primary cause of strange baselines and negative peaks.
- Solution: Clean the ATR crystal thoroughly with an appropriate solvent and collect a fresh background spectrum before measuring your sample [50] [51].
- Cause: Incorrect Data Processing. Using the wrong processing method for your sampling technique can distort the spectrum.
- Solution: For example, when using diffuse reflection, ensure your data is processed in Kubelka-Munk units instead of absorbance to avoid distorted, saturated-looking peaks [50] [51].
Q5: How can I distinguish between surface and bulk chemical properties using FT-IR?
A: This is a common application of Attenuated Total Reflection (ATR) [50] [51].
- Method: Surface vs. Bulk Analysis. The ATR technique primarily interrogates the first few microns of a sample. To compare surface and bulk chemistry:
- First, collect a spectrum from the surface of the sample as it is received.
- Then, cut the sample to expose the interior and collect a spectrum from the freshly exposed surface.
- Advanced Method: Variable Penetration Depth. You can leverage the fact that the depth of penetration of the IR evanescent wave in ATR depends on the wavelength and the refractive index of the crystal. By using different ATR crystals (e.g., Diamond vs. Germanium) or varying the angle of incidence, you can probe different depths into the sample surface [51].
The following table summarizes key quantitative performance data from recent advanced SPR biosensing studies, highlighting the sensitivity and detection limits achievable with optimized systems.
Table 1: Performance Metrics of Recent SPR Biosensor Designs
| Target Analyte | Sensor Design / Functionalization | Key Performance Metric | Reported Value | Reference |
|---|---|---|---|---|
| SARS-CoV-2 N-protein | Azide-terminated Carbon Nanomembrane (N3-CNM) | Equilibrium Dissociation Constant (KD) | 570 ± 50 pM | [49] |
| SARS-CoV-2 S-protein RBD | Azide-terminated Carbon Nanomembrane (N3-CNM) | Equilibrium Dissociation Constant (KD) | 22 ± 2 pM | [49] |
| SARS-CoV-2 S-protein RBD | Azide-terminated Carbon Nanomembrane (N3-CNM) | Limit of Detection (LOD) | ~10 pM | [49] |
| COVID-19 Neutralizing Antibody | Spectral-phase 3D SPR Imaging | Biomolecular Detection Limit | 18.2 pg/μL | [52] |
| COVID-19 Neutralizing Antibody | Spectral-phase 3D SPR Imaging | Refractive Index Resolution | 2.3 × 10⁻⁶ RIU | [52] |
| Mycobacterium tuberculosis | Prism/CaF2/TiO2/Ag/TiO2/Black Phosphorus | Angular Sensitivity | 654 deg/RIU | [53] |
Experimental Protocols
Protocol: Functionalizing an SPR Sensor Chip with a Carbon Nanomembrane for COVID-19 Protein Detection
This protocol summarizes the detailed hierarchical functionalization procedure used in recent high-sensitivity SARS-CoV-2 research [49].
Objective: To covalently immobilize SARS-CoV-2 antibodies onto a gold SPR sensor chip via a 2D carbon nanomembrane (CNM) linker for specific and sensitive virus protein detection.
Materials:
- Gold-coated SPR sensor chip
- 4’-nitro-[1,1’]-biphenyl-4-thiol (NBPT)
- Azidoacetyl chloride linker
- SARS-CoV-2 antibodies (e.g., against N-protein or S-protein RBD)
- Dibenzocyclooctyne (DBCO)-N-hydroxysuccinimide (NHS) ester
- Casein blocking agent
- Phosphate Buffered Saline (PBS) or other suitable physiological buffer
Procedure:
- Form Self-Assembled Monolayer (SAM): Incubate the bare gold sensor chip with NBPT to form a nitro-terminated SAM [49].
- Create Carbon Nanomembrane (CNM): Expose the NBPT SAM to low-energy electron irradiation. This crosslinks the SAM and converts the nitro groups into amino groups (NH2-CNM) [49].
- Graft Azide Linker: React the NH2-CNM with azidoacetyl chloride to form an azide-terminated CNM (N3-CNM) [49].
- Modify Antibody: Separately, functionalize the SARS-CoV-2 antibodies with a DBCO linker via an NHS ester reaction [49].
- Immobilize Antibody: Covalently attach the DBCO-modified antibodies to the N3-CNM surface on the sensor chip using copper-free click chemistry [49].
- Surface Passivation: Passivate both the signal and reference flow channels with a blocking agent like casein to minimize non-specific adsorption of subsequent analytes [49].
- Validation: The successful functionalization of each step can be confirmed in real-time using SPR and complemented with surface science techniques like X-ray Photoelectron Spectroscopy (XPS) [49].
Protocol: Minimizing Noise in FT-IR Spectroscopy via ATR
Objective: To obtain a clean, high-quality FT-IR spectrum with a stable baseline using an ATR accessory.
Materials:
- FT-IR spectrometer with ATR accessory
- Appropriate solvents for cleaning (e.g., methanol, isopropanol)
- Lint-free wipes
- Your sample (solid or liquid)
Procedure:
- Instrument Warm-up: Ensure the spectrometer has been powered on for at least 30 minutes to stabilize [51].
- Clean ATR Crystal: Thoroughly clean the ATR crystal with a suitable solvent and a lint-free wipe. Inspect the crystal to ensure it is free of residue [50] [51].
- Collect Background Spectrum: With a clean, dry crystal, collect a fresh background spectrum. This is critical, as a background collected on a dirty crystal will produce negative peaks and a distorted baseline in your sample spectrum [50] [51].
- Apply Sample: Place your sample firmly onto the crystal to ensure good contact. For solids, use the pressure clamp to press the sample uniformly onto the crystal.
- Collect Sample Spectrum: Acquire the spectrum of your sample.
- Post-Processing: Apply the ATR correction algorithm (which accounts for the depth of penetration variation with wavelength) to your sample spectrum to produce a final spectrum that is comparable to traditional transmission libraries [54].
Signaling Pathways and Workflows
Diagram 1: Logical workflow for troubleshooting common Surface Plasmon Resonance (SPR) issues, linking problems to diagnostic questions and their corresponding solutions.
Diagram 2: A step-by-step workflow for obtaining high-quality FT-IR spectra using an ATR accessory, highlighting critical steps to prevent common issues like noisy baselines and spectral distortions.
The Scientist's Toolkit: Research Reagent Solutions
Table 2: Essential Reagents and Materials for SPR and FT-IR Experiments
| Item | Function / Application | Key Considerations |
|---|---|---|
| CM5 Sensor Chip | A versatile SPR chip with a carboxymethylated dextran matrix for covalent ligand immobilization. | Ideal for general protein studies; surface can be activated with EDC/NHS chemistry [19]. |
| NTA Sensor Chip | For capturing His-tagged proteins via nickel chelation. | Useful for reversible immobilization; requires conditioning with NiCl₂ [19]. |
| Casein | A blocking agent used in SPR to passivate the sensor surface and reduce non-specific binding. | Found to be highly effective in blocking surfaces for SARS-CoV-2 protein detection [49]. |
| EDC/NHS | Cross-linking reagents used for activating carboxyl groups on sensor chips for covalent coupling. | Standard for amine coupling of proteins and other ligands [19] [52]. |
| Tween-20 | A non-ionic surfactant added to running buffers in SPR to minimize hydrophobic non-specific binding. | Typically used at low concentrations (e.g., 0.05% v/v) [19]. |
| ATR Crystals (Diamond, Ge, ZnSe) | The internal reflection element in FT-IR ATR accessories. | Diamond is robust and common; Germanium (Ge) provides a higher refractive index for deeper penetration [54]. |
| Potassium Bromide (KBr) | Used for preparing solid samples for FT-IR transmission measurements. | IR-transparent; mixed with sample and pressed into a pellet [54]. |
| Degassing Unit | For removing dissolved air from solvents used as mobile phase in SPR or for sample prep in FT-IR. | Prevents air bubbles in the SPR flow cell and associated signal spikes and drift [48]. |
Optimizing SERS Substrates and Nanoparticle Labels for Enhanced Signal and Reproducibility
Troubleshooting Guide: Common SERS Substrate Challenges
Why is my SERS signal weak or inconsistent?
Weak SERS signals typically originate from suboptimal "hotspot" formation, inadequate molecular adsorption, or inappropriate substrate choice for your target analyte. The electromagnetic enhancement mechanism, which relies on localized surface plasmon resonance (LSPR), is the dominant factor contributing to signal intensity [34] [9].
- Solution A: Increase Hotspot Density: Create more nanogaps (0.5-1.0 nm) between metallic nanostructures where the electromagnetic field is strongest. This can be achieved by forming aggregates of colloidal nanoparticles or fabricating nanostructures with sharp tips and edges [55] [56].
- Solution B: Employ Hybrid Substrates: Combine noble metals (Ag, Au) with functional materials like semiconductors (e.g., Cu₂O), graphene, or metal-organic frameworks (MOFs). These composites provide synergistic enhancement through both electromagnetic (EM) and chemical (CM) mechanisms [55] [57].
- Solution C: Optimize Nanostructure Geometry: Precisely control the size and shape of plasmonic nanostructures. Particles that are too large or too small will have reduced enhancement efficiency. The ideal size is typically in the 20-100 nm range for spherical gold and silver nanoparticles [56] [9].
How can I improve the reproducibility of my SERS substrates?
Reproducibility is hindered by inhomogeneous nanostructure fabrication, uneven analyte distribution, and fluctuating molecular orientation on the substrate surface [55].
- Solution A: Utilize Top-Down Fabrication Methods: Techniques like electron-beam lithography (EBL) and photolithography create well-ordered, periodic nanostructure arrays with precise control over geometry and nanogap spacing, ensuring uniform hotspot distribution [56].
- Solution B: Implement Statistical Analysis and Hyperspectral Imaging: Minimize inherent SERS variability by collecting spectra from multiple points across a wide sample area. Hyperspectral imaging, combined with chemometric analysis, helps average out signal fluctuations and provides more reliable identification [7].
- Solution C: Apply Flexible SERS Substrates (FSS): For irregular surfaces, use flexible substrates made of polymers (PDMS) or cellulose. These can conform to curved or rough sample surfaces, ensuring consistent contact and more reproducible signal collection compared to rigid substrates [34].
What can I do to enhance my substrate's stability and reusability?
Instability often arises from oxidation of metallic nanostructures (especially silver), carbonization of analytes under laser irradiation, or physical degradation of the substrate [55].
- Solution A: Create Core-Shell Structures: Protect plasmonic nanoparticles (e.g., silver) with a thin, inert shell (e.g., silica or graphene) to prevent oxidation and chemical degradation while maintaining enhancement properties [34] [57].
- Solution B: Employ Semiconductor-Noble Metal Composites: Materials like Cu₂O/Ag composite nanoparticles offer improved stability over pure Ag substrates. The semiconductor component can also provide additional chemical enhancement, leading to a reusable substrate with self-cleaning capabilities via photocatalytic degradation of adsorbed analytes [55].
- Solution C: Leverage Doping Engineering: Introduce dopants (e.g., Nitrogen into Cu₂O) to create defects that facilitate charge transfer, suppress carrier recombination, and improve the overall stability and SERS activity of semiconductor-based substrates [55].
SERS Substrate Optimization: Performance Comparison
Table 1: Comparison of SERS Substrate Types and Their Performance Characteristics
| Substrate Type | Key Materials | Enhancement Factor (EF) Range | Reproducibility | Best For |
|---|---|---|---|---|
| Colloidal Nanoparticles | Ag, Au NPs in solution | 10⁸ – 10¹² [56] | Low to Moderate | Fundamental studies, bio-applications [56] |
| Rigid Solid Substrates | Au/Ag on Si, glass | 10⁴ – 10⁷ [56] | High | Laboratory analysis on flat surfaces [34] |
| Flexible Solid Substrates (FSS) | Polymers (PDMS), cellulose, textiles | Varies by design [34] | Moderate to High | Conformal sensing on irregular surfaces, wearables [34] |
| Semiconductor Substrates | Cu₂O, TiO₂, ZnO | ~10³ (CM) [55] | Moderate | Stable, reusable detection [55] |
| Hybrid Substrates | rGO/Ag, Cu₂O/Ag | 10⁹ – 10¹¹ (Synergistic) [55] [7] | Moderate to High | High-sensitivity, multifunctional applications [55] [57] |
Table 2: Quantitative Optimization Results from Recent Studies
| Optimization Strategy | Substrate System | Result | Detection Limit Achieved |
|---|---|---|---|
| Doping Engineering | 2% N-doped Cu₂O NPs | Most significant SERS enhancement vs. other doping ratios [55] | - |
| Noble Metal Compounding | Cu₂O/Ag composite NPs | Enabled trace detection [55] | 10⁻⁹ M R6G [55] |
| Multivariate Optimization | rGO/AgNPs thin film | ~21,500x signal enhancement vs. conventional Raman; 8x vs. non-optimized substrate [7] | 1.0 × 10⁻⁷ M Ametryn [7] |
Detailed Experimental Protocols
Protocol 1: Synthesis and Optimization of Cu₂O/Ag Composite Nanoparticles
This protocol outlines a facile chemical method to create high-performance SERS substrates leveraging the synergistic effect of electromagnetic and chemical enhancement [55].
Synthesis of Cu₂O Nanoparticles:
- Reagents: Anhydrous copper chloride (CuCl₂), sodium borohydride (NaBH₄), sodium hydroxide (NaOH).
- Procedure: Use a facile redox process with NaBH₄ as a reducing agent. The concentration of NaBH₄ is critical; an excessive concentration leads to the formation of metallic copper impurities. Maintain an appropriate concentration to obtain pure phase Cu₂O nanoparticles.
- Doping (Optional): To further enhance SERS activity, introduce N-doping during synthesis using a precursor like urea. Research indicates that 2% N-doped Cu₂O nanoparticles exhibit the most significant enhancement effect [55].
Formation of Cu₂O/Ag Composite:
- Reagents: Silver nitrate (AgNO₃).
- Procedure: Employ an in-situ reduction reaction to deposit Ag nanoparticles onto the synthesized Cu₂O nanoparticles. The ratio of AgNO₃ to Cu₂O must be optimized to maximize the formation of hotspots without overcoating.
Characterization and Validation:
- Use techniques like SEM/TEM to confirm the composite structure.
- Validate SERS performance using a probe molecule like Rhodamine 6G (R6G). The optimized Cu₂O/Ag composite should enable detection of R6G at concentrations as low as 10⁻⁹ M [55].
Protocol 2: Multivariate Optimization of rGO/AgNP Thin Films
This protocol uses a systematic statistical approach to fine-tune substrate synthesis for maximum analytical performance, ideal for detecting pesticide residues on food peels [7].
Substrate Fabrication:
- Synthesize reduced graphene oxide/silver nanoparticle (rGO/AgNPs) thin films via a liquid-liquid interfacial route.
Systematic Optimization:
- Factorial Design: First, perform a screening design to identify the most influential synthesis parameters (e.g., precursor concentrations, reaction time, temperature).
- Box-Behnken Design (BBD): Subsequently, apply a BBD, a type of response surface methodology, to model and optimize the levels of the critical parameters identified in the first step. This helps find the precise combination that maximizes SERS signal intensity.
Hyperspectral Imaging for Reliable Detection:
- After optimizing and fabricating the substrate, use it to detect target analytes (e.g., the herbicide Ametryn).
- Perform hyperspectral imaging over wide areas of the sample (e.g., apple or potato peels). This minimizes the impact of SERS signal variability and improves detection limits with minimal sample preparation [7].
The Scientist's Toolkit: Essential Research Reagent Solutions
Table 3: Key Reagents and Materials for SERS Substrate Development
| Reagent/Material | Function in SERS Experiment | Example Application |
|---|---|---|
| Gold (Au) & Silver (Ag) Salts | Precursors for plasmonic nanostructures providing strong EM enhancement. | HAuCl₄ for Au nanosphere synthesis; AgNO₃ for Ag nanocube growth [56] [9]. |
| Sodium Borohydride (NaBH₄) | Strong reducing agent for the synthesis of nano-sized metal particles. | Facile synthesis of Cu₂O and Ag nanoparticles [55]. |
| Polyvinylpyrrolidone (PVP) | Stabilizing and capping agent to control nanoparticle growth and prevent aggregation. | Shape-controlled synthesis of metallic nanostructures [56]. |
| Rhodamine 6G (R6G) | Model probe molecule with a well-characterized Raman fingerprint for substrate calibration. | Evaluating the enhancement factor of a new SERS substrate [55]. |
| Reduced Graphene Oxide (rGO) | Component in hybrid substrates; provides CM enhancement, quenches fluorescence, improves adsorption. | rGO/AgNP composite films for pesticide detection [7]. |
| Polydimethylsiloxane (PDMS) | Flexible, transparent polymer used as a supporting material for Flexible SERS Substrates (FSS). | Creating stamps or films for conformal contact on curved surfaces [34] [56]. |
| Semiconductors (Cu₂O, TiO₂) | Provide CM enhancement via charge transfer; can form stable, reusable composite substrates. | Cu₂O/Ag composites for stable, sensitive detection [55]. |
SERS Substrate Selection and Optimization Workflow
SERS Substrate Selection and Optimization Workflow
Frequently Asked Questions (FAQs)
What is the fundamental difference between electromagnetic (EM) and chemical (CM) enhancement?
EM enhancement is the dominant mechanism, providing enhancement factors of 10³–10⁸. It arises from the localized surface plasmon resonance (LSPR) of noble metal nanostructures, creating intense electromagnetic fields at "hotspots" like nanogaps and nanotips. It is largely independent of the molecule's structure. In contrast, CM enhancement is typically smaller (~10³) and results from a charge transfer between the analyte molecule and the substrate surface, which alters the polarizability of the molecule. It is highly dependent on the chemical properties of the analyte and its interaction with the surface [34] [9] [57].
My substrate works well with probe molecules but fails with real samples. What could be wrong?
This is a common issue when transitioning from ideal to complex matrices. The problem likely stems from:
- Matrix Interference: Other molecules in the sample compete for adsorption sites on the substrate. Pre-concentration steps or sample purification may be necessary.
- Insufficient Affinity: The target analyte may not adsorb effectively to the substrate surface. Functionalize your substrate with capture agents (e.g., antibodies, aptamers) that specifically bind your target.
- Fluorescence Background: Complex samples can produce strong fluorescence that overwhelms the Raman signal. Using a longer wavelength excitation laser (e.g., 785 nm) or a substrate with fluorescence-quenching properties (e.g., graphene-based) can mitigate this [57].
How can Artificial Intelligence (AI) help in SERS analysis?
AI and machine learning are revolutionizing SERS by enhancing spectral data processing. They can:
- Identify Patterns: Recognize complex spectral patterns that are difficult to discern manually, enabling highly accurate identification of mixtures or disease biomarkers.
- Improve Classification: Distinguish between different sample types (e.g., healthy vs. cancerous tissue) based on their SERS spectral fingerprints.
- Quantify Analytes: Build models to predict the concentration of target molecules in complex mixtures, moving beyond mere identification to precise quantification [56] [58].
Algorithm-Assisted Optimization of SPR Sensors for Single-Molecule Detection
Technical Support Center: Troubleshooting & FAQs
This guide provides targeted support for researchers employing algorithm-assisted optimization of Surface Plasmon Resonance (SPR) sensors, focusing on challenges in achieving ultra-sensitive, single-molecule detection.
Frequently Asked Questions
Q1: Our algorithm-optimized SPR sensor shows significant baseline drift. How can we stabilize it?
Baseline drift undermines signal accuracy, especially in low-concentration detection. Key solutions include:
- Buffer Degassing: Ensure your running buffer is properly degassed to eliminate microbubbles that cause refractive index fluctuations [21].
- System Leak Check: Inspect the fluidic system for leaks that can introduce air or cause pressure variations [21].
- Environmental Control: Place the instrument in a stable environment, minimizing temperature fluctuations and vibrations [21].
- Surface Regeneration: Ensure the sensor surface is properly cleaned and regenerated between analysis cycles to remove residual material [21] [19].
Q2: After multi-parameter optimization, we are not observing a significant signal change upon analyte injection. What could be wrong?
A lack of signal, despite an optimized design, often points to experimental or sample preparation issues:
- Verify Analyte Concentration: Even with a highly sensitive sensor, the analyte concentration must be appropriate for the immobilized ligand density. It may be below the optimized sensor's detection limit in your test [21].
- Confirm Ligand Activity: The biological ligand immobilized on the sensor surface may have become inactive. Ensure the protein is functional, and consider using a different coupling chemistry (e.g., capture-based immobilization) to improve orientation and accessibility [59].
- Check Surface Density: While algorithms optimize metal film parameters, the density of the biorecognition element (ligand) on the surface is critical. Too low a density yields a weak signal; too high can cause steric hindrance [19].
Q3: How can we reduce high non-specific binding (NSB) on our optimized SPR surface?
NSB can mask the specific signal of low-concentration analytes. Address this by:
- Surface Blocking: After ligand immobilization, block any remaining active sites on the sensor chip with a suitable agent like BSA, casein, or ethanolamine [21] [19] [59].
- Buffer Additives: Supplement the running buffer with additives like Tween-20 (a surfactant) or BSA to reduce non-specific interactions [19] [59].
- Optimize Surface Chemistry: Select a sensor chip with a surface chemistry that minimizes NSB for your specific analyte. A different chemical matrix (e.g., carboxymethylated dextran vs. a flat monolayer) can significantly improve specificity [19].
Q4: What is a common pitfall when transitioning from a simulated, optimized design to an actual experiment?
A major pitfall is the ligand immobilization strategy. The algorithm may optimize the optical structure (angle, metal thickness), but the method of attaching biorecognition molecules dictates the sensor's functional performance.
- Strategy Selection: Choose between covalent (e.g., amine coupling with EDC/NHS) and non-covalent (e.g., streptavidin-biotin) immobilization. Covalent coupling offers stability, while capture methods can provide better control over orientation [19].
- Density Control: Experimentally determine the optimal ligand density. A surface that is too densely packed can lead to steric hindrance and mass transport limitations, reducing the binding signal and compromising kinetic data [19].
Performance Metrics & Optimization Data
Table 1: Performance Enhancement via Multi-Objective PSO Algorithm Comparison of standard versus algorithm-optimized SPR sensor performance for single-molecule detection [60] [61].
| Performance Metric | Standard Sensor | Optimized Sensor | Percentage Improvement |
|---|---|---|---|
| Sensitivity (S) | Not specified | 24,482.86 nm/RIU | 230.22% |
| Figure of Merit (FOM) | Not specified | Not specified | 110.94% |
| Depth FOM (DFOM) | Not specified | Not specified | 90.85% |
| Limit of Detection (LOD) | >1 × 10⁻¹⁵ g/mL | 54 ag/mL (0.36 aM) | >4 orders of magnitude |
Table 2: Optimized Design Parameters for Single-Molecule SPR Biosensor Key physical parameters identified by the multi-objective optimization algorithm [60].
| Design Parameter | Role in SPR Performance | Optimized Value/Configuration |
|---|---|---|
| Incident Angle | Determines the coupling efficiency for exciting surface plasmons. | Optimized via Algorithm |
| Adhesive Layer (Cr) Thickness | Affects adhesion of the metal film and the overall electric field distribution. | Optimized via Algorithm |
| Metal Layer (Au) Thickness | Critical for generating and sustaining the surface plasmon wave. | Optimized via Algorithm |
| Sensing Structure | Multilayered configuration to enhance plasmonic response. | Prism/Cr/Au functionalization |
Experimental Protocols
Protocol 1: Comprehensive Optimization of an SPR Biosensor using Multi-Objective PSO
This methodology details the algorithm-assisted optimization process for enhancing multiple sensor performance metrics concurrently [60].
- Define Optimization Objectives: Establish the key performance metrics (S, FOM, DFOM) as simultaneous optimization targets for the algorithm.
- Model the SPR System: Represent the sensor as a multi-layer optical model (e.g., prism/adhesive layer/metal layer/sensing interface). Use the transfer matrix method (TMM) to compute reflectance spectra for any given set of design parameters.
- Initialize the PSO Algorithm: Set up the particle swarm optimization with the design parameters (incident angle, adhesive layer thickness, metal layer thickness) as variables for the particles to explore.
- Run Iterative Optimization: Allow the PSO to run over multiple iterations (e.g., 150 cycles), with the fitness function seeking to maximize S, FOM, and DFOM.
- Validate and Select Parameters: Use the k-means clustering method on the final optimized parameter set to identify a robust design configuration that is less sensitive to processing errors.
- Experimental Validation: Fabricate the sensor with the optimized parameters and test its performance using a standard analyte like mouse IgG to confirm enhancements in sensitivity, dynamic range, and LOD.
Protocol 2: Direct Electronic Readout Integration for Compact SPR Systems
This protocol describes integrating an on-fiber photodetector to replace bulky spectrometers, enabling miniaturization [62].
- Fabricate SPR Sensor: Construct a hyperbolic-metamaterial SPR (HMM-SPR) sensor on a side-polished fiber (SPF) using alternating layers of Au and ZrO₂.
- Fabricate On-Fiber Photodetector (oFGPD): Transfer a single layer of graphene onto a tapered fiber region. Pattern Au electrodes and cover the graphene with a PMMA protective film.
- Integrate Components: Combine the SPR sensor and the oFGPD into a single optical fiber device.
- System Calibration: Characterize the oFGPD's responsivity (e.g., 3.42 × 10⁶ A W⁻¹ at 1550 nm) and response time (~90 ms).
- Electrical Signal Correlation: Correlate changes in the photodetector's output current with shifts in the SPR resonance condition caused by varying refractive indices or analyte binding.
The Scientist's Toolkit: Research Reagent Solutions
Table 3: Essential Materials for SPR Sensor Development and Optimization
| Item | Function in SPR Experiment | Example Use Case |
|---|---|---|
| CM5 Sensor Chip | A carboxymethylated dextran matrix for covalent immobilization of ligands via amine coupling. | General protein-protein interaction studies [19]. |
| NTA Sensor Chip | Coated with nitrilotriacetic acid for capturing His-tagged proteins via nickel chelation. | Studying kinetics of recombinant His-tagged proteins [19]. |
| SA Sensor Chip | Coated with streptavidin for capturing biotinylated ligands. | Immobilizing biotinylated DNA or antibodies [19]. |
| EDC/NHS Chemistry | Activates carboxyl groups on the sensor surface for covalent coupling to primary amines on ligands. | Standard amine coupling procedure [19]. |
| Ethanolamine | Used as a blocking agent to deactivate and block unreacted sites on the sensor surface after ligand coupling. | Reducing non-specific binding after amine coupling [21] [19]. |
| Glycine-HCl (pH 2.0) | A low-pH regeneration solution for disrupting protein-protein interactions. | Removing bound antibody from its antigen between assay cycles [59]. |
| NaOH Solution | A high-pH regeneration solution. | Removing tightly bound analytes or for cleaning surfaces [59]. |
| BSA or Tween-20 | Additives to running buffer to reduce non-specific binding to the sensor surface. | Minimizing background noise in complex samples [19] [59]. |
| Mouse IgG | A common model analyte and ligand for proof-of-concept testing and validation of sensor performance. | Validating ultra-sensitive detection capabilities [60] [61]. |
Optimization Workflow and Signaling Pathways
Diagram 1: SPR Optimization via Multi-Objective PSO
Diagram 2: SPR Sensing and Electronic Readout Integration
A technical guide for ensuring reproducibility and accuracy in your X-ray Photoelectron Spectroscopy analysis.
Within the broader context of optimizing signal detection in surface spectroscopy research, the proper processing and interpretation of X-ray Photoelectron Spectroscopy (XPS) data is paramount. The widespread use of XPS has been accompanied by an increase in erroneous uses and misapplications of the method, contributing to reproducibility issues in the scientific literature [63]. This guide addresses common pitfalls and provides actionable protocols to ensure the reliability of your XPS analyses.
FAQs on Common XPS Peak Fitting and Interpretation Errors
1. What are the most frequent errors made during XPS background subtraction?
Incorrect background handling is a primary source of error in quantitative XPS. The most common mistakes include:
- Using an inappropriate background type: The Shirley background is often misapplied. It is most valid for homogeneous solids where inelastically scattered electrons originate from deep within the sample. A linear background may be more appropriate for poorly resolved spectra from inhomogeneous samples [1].
- Inconsistent application: Using different background types for the same set of spectra, especially when comparing samples, invalidates quantitative comparisons.
- Using the background to "flatten" spectra: Artificially manipulating the background to create a flat baseline distorts the true spectral information and compromises quantification [1].
2. How can I avoid overfitting my XPS spectra?
Overfitting occurs when a model is excessively complex, fitting to random noise rather than the underlying signal. To avoid it:
- Minimize the number of peaks: Use the minimum number of peaks required to represent the physical and chemical state of the sample. Do not add peaks without chemical justification [1].
- Constrain parameters appropriately: Apply sensible constraints to peak positions, full width at half maximum (FWHM), and spin-orbit doublet separations and area ratios based on known chemical physics [63].
- Critically evaluate fit quality: A good fit is not just mathematically sound but also chemically meaningful. Examine the residual (difference between data and fit) for systematic structure, which indicates an poor model [1].
3. What information must I report to ensure my XPS analysis is reproducible?
A critical error is the failure to report sufficient experimental and processing details. The table below summarizes the essential information required for reproducibility [63]:
Table 1: Essential Parameters for Reproducible XPS Reporting
| Category | Specific Parameters to Report |
|---|---|
| Instrument Details | Manufacturer and model, X-ray source (Al Kα, Mg Kα, etc.), analyzer pass energy and step size, instrument calibration status. |
| Data Collection | Charge neutralization method (if used), measurement location (if imaging), number of scans, total acquisition time. |
| Data Analysis | Software used (name and version), background type (e.g., Shirley, Tougaard, linear), all constraints applied during peak fitting. |
| Peak Fitting | Peak shape (e.g., Gaussian-Lorentzian mix), FWHM values, peak positions and their assignments. |
4. Why is charge referencing critical, and what is the best practice?
Incorrect charge referencing is a major source of binding energy errors. The common practice of referencing the C 1s peak of adventitious carbon to 284.8 eV can be problematic as this peak's position can shift. Best practices include:
- Using a well-defined internal standard: If possible, use a known component of your sample, such as the C 1s from a saturated hydrocarbon or a metal peak from the substrate, as a reference [1].
- Reporting the method explicitly: Always state which peak was used for charge referencing and the value to which it was set in your publication or report [63].
Troubleshooting Guide: Resolving Specific XPS Data Issues
Symptom: Poor or Unstable Fit
- Potential Cause: Incorrect or unstable background subtraction.
- Solution: Re-evaluate your choice of background. Ensure the background is applied consistently across all spectra in a dataset. Avoid manipulating the background to force a flat baseline [1].
Symptom: Physically Impossible Fit Parameters
- Potential Cause: Lack of appropriate constraints during fitting.
- Solution: Apply chemical knowledge. Constrain the FWHM of peaks from the same chemical species to be similar. For doublets (e.g., p, d, f orbitals), fix the spin-orbit splitting and area ratio to their theoretical values [1] [63].
Symptom: Inconsistent Results Between Measurements
- Potential Cause: Sample damage or unstable charge referencing.
- Solution: Check for X-ray-induced damage by comparing successive scans. For charge correction, use a reliable internal reference and report the method used to ensure consistency [1].
Experimental Protocols for Reliable XPS Analysis
Adhering to a standardized workflow is essential for obtaining high-quality, interpretable XPS data. The following protocol, visualized in the diagram below, outlines the key steps from planning to reporting.
1. Pre-Measurement Planning and Instrument Verification
- Define the Objective: Clearly state what information is needed from the analysis (elemental identity, chemical state, quantification) [63].
- Instrument Calibration: Verify the energy scale calibration of the spectrometer using standard samples (e.g., Au, Ag, Cu) before analysis to ensure accuracy [63].
2. Data Collection Strategy
- Acquire both survey and high-resolution spectra: Survey spectra identify all elements present, while high-resolution spectra provide chemical state information.
- Ensure adequate statistics: Collect enough scans to achieve a good signal-to-noise ratio, especially for minor constituents. Inconsistent replication of measurements is a common source of non-reproducibility [63].
3. Data Processing and Peak Fitting Workflow
- Charge Correction: Apply a consistent and reported charge referencing method to all spectra [1].
- Background Subtraction: Select a physically justified background type (e.g., Shirley, Tougaard, or linear) and apply it consistently across all datasets for comparison [1].
- Peak Fitting: Follow a disciplined approach:
- Identify: Assign peaks based on known binding energies.
- Model: Start with a simple model. Use the minimum number of peaks.
- Constrain: Apply chemical and physical constraints (FWHM, doublet ratios).
- Iterate: Refine the model and check the residual for systematic errors.
The Scientist's Toolkit: Essential Materials for XPS Experiments
Table 2: Key Research Reagent Solutions and Materials for Surface Spectroscopy
| Item | Function / Rationale |
|---|---|
| Standard Calibration Samples (e.g., Au, Ag, Cu foil) | Critical for verifying the binding energy scale accuracy of the XPS instrument before and during analysis [63]. |
| Charge Reference Materials (e.g., Sputter-cleaned Au, Adventitious Carbon reference) | Provides a known spectral feature for reliable correction of charging effects on insulating samples [1]. |
| Reliable XPS Database (e.g., NIST XPS Database) | A trusted resource for core-level binding energies to aid in accurate peak identification and avoid misassignment [63]. |
| Peak Fitting Software with Constraint Capabilities | Enables the application of physical constraints during spectral deconvolution, which is essential for preventing overfitting and obtaining chemically meaningful results [1] [63]. |
The logical relationship between a well-planned experiment, proper data processing, and a final reliable result is summarized in the following workflow. Adherence to this pathway minimizes the introduction of errors.
By integrating these best practices, troubleshooting guides, and standardized protocols into your research workflow, you significantly enhance the reliability and credibility of your surface spectroscopy data, directly contributing to the optimization of signal detection and analysis.
Validation Frameworks and Comparative Analysis of Detection Technologies
Fundamental Concepts: LOD and Analytical Sensitivity
What are the Limit of Detection (LOD) and Analytical Sensitivity, and how do they differ?
The Limit of Detection (LOD) is the lowest quantity of an analyte that can be reliably distinguished from the background noise of an analytical method, though not necessarily quantified with exact precision. It represents the ultimate sensitivity threshold for detecting that a substance is present [64].
Analytical Sensitivity, often related to the calibration curve's slope, refers to the method's ability to reliably detect and measure small changes in analyte concentration. A steeper slope generally indicates higher sensitivity [64] [65].
The Limit of Quantification (LOQ) is a related but distinct parameter. It is the lowest concentration that can be quantitatively measured with acceptable precision and accuracy. The LOQ is always greater than the LOD, typically defined as 10 times the standard deviation of the blank signal [64] [66].
What is the core mathematical relationship used to calculate the LOD?
A common formula for calculating the LOD is:
LOD = (3.3 × σ) / S
Where:
- σ is the standard deviation of the blank measurement or the response at low concentrations
- S is the slope of the analytical calibration curve [64]
This formula highlights that improving the LOD requires either reducing background noise (σ) or increasing the method's sensitivity (S).
Troubleshooting Common Signal Detection Issues
Why is my signal unstable or drifting, and how can I fix it?
Signal instability can stem from instrumental, environmental, or sample-related issues.
| Problem Area | Specific Issue | Recommended Solution |
|---|---|---|
| Instrument | Insufficient lamp warm-up [67]. | Allow spectrophotometer lamps to warm up for 15-30 minutes before use [67]. |
| Instrument vibrations [50]. | Place the instrument on a stable, vibration-free surface away from pumps or heavy lab activity [50]. | |
| Sample | Air bubbles in the sample [67]. | Gently tap the cuvette to dislodge bubbles before measurement [67]. |
| Sample is too concentrated [67]. | Dilute the sample to bring its absorbance into the optimal linear range (typically 0.1-1.0 AU) [67]. | |
| Improper sample preparation (e.g., inhomogeneous) [67]. | Ensure the sample is well-mixed and homogeneous before measurement [67]. |
My signal-to-noise ratio (SNR) is poor. What strategies can improve it?
A poor SNR obscures the detection of low-concentration analytes. Improvement strategies focus on boosting the signal and reducing noise.
Improving Signal-to-Noise Ratio
- Signal Enhancement: In techniques like LIBS, methods such as energy injection (multi-pulse, discharge) and spatial confinement can directly amplify the plasma signal [68]. For SERS, the signal is enhanced by the plasmonic properties of nanostructured substrates [65]. Using Attenuated Total Reflection (ATR) accessories can also enhance sensitivity for certain samples by increasing interaction with the evanescent wave [50] [69].
- Noise Reduction: Implement rigorous clean laboratory practices. Using a laminar flow box for sample preparation and high-purity reagents can drastically reduce contamination that contributes to background noise [66]. Regular instrument maintenance, including cleaning ATR crystals and optical windows, is crucial to prevent noise from dirt or residue [50] [70] [67].
- Data Processing: Employ signal averaging and background correction algorithms during data processing to improve the SNR of the collected data [64] [69].
How can I validate that my LOD determination is accurate and reliable?
Validation ensures your reported LOD is robust. Key practices include:
- Replicate Measurements: Determine the LOD from multiple, independent measurements of the blank or a low-concentration sample (typically n ≥ 10) to establish a statistically sound standard deviation [64].
- Matrix-Matched Standards: Use calibration standards and blanks that closely mimic the composition of the real sample. This accounts for potential matrix effects that can alter sensitivity and background in complex samples like biological fluids [64] [65].
- Verification with Low-Level Samples: Analyze samples with concentrations near the calculated LOD to confirm they can be reliably distinguished from the blank with the desired confidence [64].
Detailed Experimental Protocols
Protocol 1: Establishing a Calibration Curve and Determining LOD/LOQ
This is a foundational protocol for quantitative method validation [64] [65].
- Prepare Calibration Standards: Prepare a series of standard solutions across the expected concentration range, including a blank (zero concentration). Use high-purity reagents and a matrix that matches your unknown samples [66].
- Analyze in Random Order: Measure the analytical response (e.g., peak height, area) for each standard in a randomized sequence to minimize effects of instrument drift.
- Construct the Calibration Curve: Plot the measured response against the known concentration. Perform regression analysis to determine the slope (S) and intercept.
- Determine Noise Level: Measure the blank solution multiple times (at least 10 replicates). Calculate the standard deviation (σ) of these response values.
- Calculate LOD and LOQ:
- LOD = (3.3 × σ) / S
- LOQ = (10 × σ) / S
- Verify Experimentally: Confirm the calculated LOD and LOQ by analyzing independent samples prepared at those concentrations.
Protocol 2: Signal Optimization for Surface Spectroscopy (SERS-focused)
This protocol outlines steps to maximize signal intensity in SERS experiments [65].
- Substrate Selection and Preparation: Choose an enhancing substrate suitable for your analyte and laser wavelength. Aggregated Ag and Au colloids are robust starting points. Ensure substrate cleanliness and activity.
- Analyte-Substrate Interaction: Since plasmonic enhancement falls off steeply with distance, facilitate the adsorption of the target analyte onto the metal surface. This may involve adjusting pH, solvent, or using chemical linkers.
- Instrument Optimization: Align the microscope and spectrometer. Use an appropriate laser power that provides good signal without causing sample damage or degradation. Optimize the integration time.
- Incorporation of an Internal Standard: For quantitative SERS, add a known quantity of an internal standard (a compound with a distinct Raman peak not present in the sample) to correct for variations in substrate activity and laser power [65].
- Data Acquisition and Processing: Collect multiple spectra from different spots on the substrate to account for heterogeneity. Process data with baseline correction and normalize signals to the internal standard peak.
The Scientist's Toolkit: Essential Research Reagents and Materials
The following table details key materials used in sensitive spectroscopic analysis to achieve low detection limits.
| Item | Function | Application Notes |
|---|---|---|
| High-Purity Acids & Reagents | Sample digestion, dilution, and standard preparation. | Minimizes background contamination from trace metals; sub-boiling distilled acids are recommended for ultratrace analysis [66]. |
| Internal Standards (IS) | Corrects for instrument drift & sample matrix effects in quantitative analysis. | The IS should be a non-interfering compound not found in the sample; it is added in a constant amount to all samples and calibrants [65]. |
| Plasmonic Nanoparticles (Au/Ag) | Form the enhancing substrate for SERS. | Gold (Au) and Silver (Ag) colloids are commonly used; their aggregation state is critical for generating "hot spots" with extreme field enhancement [65]. |
| Contrast Agents / Aptamers | Enhance signal or provide specificity in complex matrices. | Used in techniques like THz spectroscopy; aptamers bind specific targets, concentrating them at the sensor surface and improving SNR for biomarkers [69]. |
| ATR Crystals | Enable sample analysis with minimal preparation via evanescent wave. | Materials like diamond, ZnSe, or Ge; require regular cleaning to prevent signal loss or negative peaks from residue [50]. |
Frequently Asked Questions (FAQs)
Common contamination sources and their controls are summarized below.
| Source of Contamination | Impact on LOD | Control Measure |
|---|---|---|
| Laboratory Environment (Dust) | Introduces exogenous analytes, increases background. | Use laminar flow boxes during sample preparation [66]. |
| Impure Reagents & Acids | Directly elevates the blank signal. | Use high-purity (e.g., ultrapure) acids and solvents [66]. |
| Sample Containers & Vials | Leaching of elements (e.g., B, Na, Si) or adsorption of analyte. | Condition containers with dilute acid (e.g., 1% HNO₃) before use [66]. |
| Improper Sample Handling | Introduction of contaminants from skin (salts, oils), quench oils, etc. | Use gloves, clean tools, and avoid touching sample surfaces [70]. |
Why do I keep getting negative absorbance readings, and what do they mean?
A negative absorbance value typically occurs when the reference (blank) measurement absorbs more light than the sample itself [67]. Common causes and fixes:
- Cause 1: Using different cuvettes for the blank and the sample, where the "blank" cuvette is dirtier or has different optical properties [67].
- Solution: Use the exact same cuvette for both blanking and sample measurement, or a verified matched pair.
- Cause 2: The blank solution is chemically "dirtier" than the sample (e.g., due to contamination) [67].
- Solution: Prepare a fresh, clean blank solution. Ensure the cuvette is impeccably clean before the blank measurement.
My analysis results are inconsistent between replicates. Where should I start troubleshooting?
Inconsistent replicates point to a lack of precision, often from procedural or substrate variability.
- Check Sample Introduction: In SERS, ensure the substrate is homogeneous. Collect multiple spectra from random spots to account for inherent hotspot variations [65]. In solution spectroscopy, ensure the sample is homogeneous and free of bubbles [67].
- Verify Cuvette Orientation: Always place the cuvette in the holder in the same orientation, as slight imperfections can affect the light path [67].
- Inspect for Sample Degradation: If the sample is light-sensitive or volatile, readings may change over time. Minimize exposure and perform measurements quickly [67].
- Monitor Instrument Stability: Ensure the instrument has been properly warmed up and that there are no environmental disturbances like drafts or temperature fluctuations [67].
Comparative Analysis of SERS Signal-to-Noise Ratio Across Sampling Methodologies
Surface-Enhanced Raman Spectroscopy (SERS) has emerged as a powerful analytical technique that significantly amplifies the inherently weak Raman scattering effect, enabling single-molecule detection sensitivity in some applications. The technique leverages nanostructured metallic surfaces or colloidal nanoparticles to generate enhancement factors ranging from 10⁴ to 10¹⁴ through electromagnetic and chemical enhancement mechanisms. Despite its considerable potential in biosensing, environmental monitoring, and clinical diagnostics, SERS applications face significant challenges in achieving reproducible signals and optimal signal-to-noise ratios (SNR) across different sampling methodologies. The SNR in SERS experiments is critically influenced by multiple experimental parameters including substrate type, laser wavelength, aggregation conditions, and sample preparation protocols. This technical guide provides a systematic framework for troubleshooting SNR issues, with comparative analysis of methodologies to assist researchers in optimizing their SERS experimental outcomes.
Comparative Performance of SERS Methodologies
Table 1: Quantitative Comparison of SERS Sampling Methodologies
| Methodology | Reported Enhancement Factor | Key Advantages | SNR Limitations | Optimal Applications |
|---|---|---|---|---|
| Colloidal Ag/Au NPs (in solution) | 10⁴–10⁶ [71] | Easy preparation, low cost, tunable plasmonics | High heterogeneity, aggregation-dependent signal variance [12] | High-throughput screening, biofluid analysis [72] |
| Patterned Nanostructures (solid substrates) | 10⁶–10⁸ [73] | Better reproducibility, controlled hotspot geometry | Limited to surface molecules, lower enhancement than optimal colloids [12] | Multiplexed detection, imaging [73] |
| rGO/AgNP Hybrid Substrates | ∼21,500x vs. normal Raman [7] | Improved reproducibility, minimized variability via hyperspectral imaging | Complex synthesis requires multivariate optimization [7] | Trace detection (e.g., pesticide residues) [7] |
| Functionalized SERS Probes (e.g., antibody-conjugated) | Varies by application | High specificity for target analytes | Signal depends on recognition chemistry, not just SERS substrate [12] | Targeted molecular detection, in vivo imaging [73] |
| SESORS (Surface-Enhanced Spatially Offset Raman Spectroscopy) | Not quantified | Enhanced depth acquisition for deep-seated tumors [74] | Optimization required for SNR and reduced acquisition times [74] | Pre-clinical deep-tumor imaging [74] |
Table 2: SNR Optimization Parameters Across Experimental Conditions
| Parameter | Impact on SNR | Optimization Strategy | Reference Methodology |
|---|---|---|---|
| Laser Wavelength | Visible (532, 633 nm): May trigger fluorescence; NIR (785 nm): Reduces fluorescence but lower scattering efficiency [71] | Match to substrate plasmon resonance; avoid analyte electronic resonances that cause fluorescence [75] | Multivariate optimization [71] [7] |
| Nanoparticle Aggregation | Critical for EM enhancement but causes signal variance; insufficient aggregation = weak signal; excessive = precipitation [71] [12] | Systematic titration of aggregating agent (e.g., NaCl); monitor via UV-Vis spectroscopy [71] | Factorial and Box-Behnken designs [7] |
| Analyte-Surface Interaction | Low adsorption affinity = poor signal despite strong enhancement potential [12] | pH adjustment, surface functionalization (e.g., thiols for gold, amines for silver) [71] | Chemical enhancement strategies [76] |
| Incubation Time | Time-dependent adsorption equilibrium affects signal stability [71] | Perform kinetic studies to identify optimal incubation window [71] | Protocol comparison studies [72] |
| Power & Integration Time | Higher power/longer times increase signal but risk photodegradation [12] [75] | Use low power (<1 mW) with high-throughput optics; balance integration time with sample stability [75] | Laser power optimization [77] |
Troubleshooting Guides & FAQs
Frequently Asked Questions
Q: Why do I get inconsistent SERS signals between replicate measurements? A: Signal inconsistency primarily stems from the heterogeneous distribution of electromagnetic "hotspots" - nanoscale gaps and crevices where the majority of SERS signals originate [12]. In colloidal systems, this is exacerbated by non-reproducible nanoparticle aggregation. To address this:
- Implement internal standards (e.g., co-adsorbed reference molecules or isotope variants) to correct for variance [12]
- Acquire multiple spectra (>100 spots) to average out heterogeneity [12]
- Consider using rGO/AgNP hybrid substrates with hyperspectral imaging, which has demonstrated improved reproducibility [7]
- Employ multivariate optimization approaches rather than one-factor-at-a-time optimization [71]
Q: How can I distinguish between poor enhancement and poor analyte adsorption? A: This common challenge can be addressed through systematic characterization:
- First, verify your substrate's enhancement capability using a standard compound like rhodamine or benzenthiol that strongly interacts with metals [12]
- Measure zeta potential to understand nanoparticle surface charge and its compatibility with your analyte [71]
- Adjust pH to modify analyte charge state and improve adsorption [71]
- Consider chemical functionalization of your substrate to specifically attract target analytes [76]
Q: What are the primary causes of high background noise in SERS spectra? A: High background typically originates from:
- Fluorescence interference: Switch to NIR excitation (785 nm) to reduce fluorescence contribution [75]
- Substrate impurities: Implement thorough cleaning protocols for solid substrates [77]
- Unwanted chemical reactions: Use lower laser power (<1 mW) to prevent photodegradation or surface chemistry [12]
- Container/scaffold contributions: Utilize confocal microscopy settings to minimize sampling volume from substrate materials [75]
Q: Why does my SERS spectrum look different from the conventional Raman spectrum of the same compound? A: Spectral differences arise from multiple factors:
- Surface selection rules: Modes aligned with the enhanced electric field are preferentially enhanced [12]
- Molecular structure changes: Some analytes undergo chemical transformations upon adsorption to metal surfaces [12]
- Charge transfer complexes: Formation of analyte-metal complexes can activate new vibrational modes [71] Always perform calibration with known concentrations of your target analyte under the same SERS conditions you'll use for unknown samples [12].
Experimental Protocol for Method Comparison
Protocol for Direct Comparison of SERS Methodologies [72]
Sample Preparation
- Use identical biological samples (e.g., human serum) across all compared protocols
- For colloids: Synthesize Ag or Au nanoparticles via standardized citrate-reduction methods [71]
- For solid substrates: Use commercially available SERS substrates or fabricate using reproducible methods like electron beam lithography
Instrumentation Standardization
- Use consistent laser wavelength across measurements where possible
- Standardize laser power at sample plane (typically <1 mW to prevent damage) [12]
- Maintain consistent integration times and spectral resolution
Data Acquisition
- Collect minimum of 100 spectra per methodology to account for heterogeneity [12]
- Include internal reference standards when possible
- Randomize measurement order to avoid systematic bias
Data Analysis
- Pre-process spectra (cosmic ray removal, background subtraction)
- Calculate SNR ratios for characteristic peaks
- Perform Principal Component Analysis (PCA) to evaluate reproducibility and variance [72]
The Scientist's Toolkit: Research Reagent Solutions
Table 3: Essential Materials for SERS Experimentation
| Reagent/Substrate | Function | Application Examples |
|---|---|---|
| Citrate-reduced Ag/Au colloids | Provide tunable plasmonic properties with cost-effective preparation | General biofluid analysis, rapid screening [72] [71] |
| Gold nanostars (AuNSt) | Offer high enhancement from sharp tips and nanogaps | Detection of low-abundance analytes (e.g., bile acids) [77] |
| rGO/AgNP hybrid substrates | Combine plasmonic enhancement with graphene's uniform surface | Trace detection requiring high reproducibility [7] |
| Aggregating agents (NaCl, KNO₃) | Induce nanoparticle aggregation to create enhancement hotspots | Optimizing signal from colloidal solutions [71] |
| Internal standards (isotope labels, co-adsorbed references) | Correct for signal variance and enable quantification | Quantitative SERS applications [12] |
| Anti-fouling thiol mixtures (OCT/DMAET) | Selective capture of target analytes while repelling interferents | Complex biological matrices [77] |
| Functionalized nanoparticles (antibody-, aptamer-conjugated) | Target-specific recognition for precise molecular detection | In vivo imaging, targeted biosensing [73] |
Experimental Workflows and Signaling Pathways
SERS Optimization Workflow
SERS Enhancement Mechanisms
Advanced Optimization Strategies
Multivariate Optimization Approaches
Traditional one-factor-at-a-time optimization is inefficient for SERS due to complex parameter interactions. Implement design of experiments (DoE) and evolutionary computational methods for more effective optimization [71]. For example, factorial and Box-Behnken designs have successfully optimized rGO/AgNP substrates, achieving 8-fold improvement over non-optimized synthesis [7].
SNR Enhancement Through Referencing
Multiple referencing approaches can significantly improve SNR by reducing intensity fluctuations across sensing areas. Splitting a macroscopic sensing surface into multiple microscopic neighboring sensing and referencing subareas has demonstrated proportional SNR improvement to the splitting factor [78].
Deep Learning-Assisted Classification
For challenging detection scenarios involving molecules with similar structures (e.g., bile acids differing by single hydroxyl groups), convolutional neural networks (CNNs) can successfully classify SERS spectra even at low concentrations where traditional analysis fails [77].
Benchmarking SERS and SERRS Against ELISA and PCR for Clinical Diagnostics
Performance Benchmarking: Analytical Figures of Merit
The core objective of this technical support center is to provide a clear, quantitative comparison of key diagnostic technologies. The following data, synthesized from recent literature, serves as a benchmark for expected performance in clinical diagnostics.
Table 1: Comparative Limits of Detection (LOD) and Key Characteristics
| Technology | Typical LOD (Molar) | Key Characteristics | Best-Suited Applications |
|---|---|---|---|
| SERS Immunoassay | Median: 4.3 × 10⁻¹³ M [79] | ~2 orders of magnitude lower LOD than FIA; high multiplexing potential; narrow spectral peaks [79] | Detection of low-abundance biomarkers (e.g., cancer markers) [79] [80] |
| SERRS Immunoassay | ~10× lower than SERS [24] | Combines plasmonic + resonance enhancement; signals can rival fluorescence [24] | Ultra-sensitive detection of targets like tuberculosis biomarkers [24] |
| Fluorescence Immunoassay (FIA/ELISA) | Median: 1.5 × 10⁻¹¹ M [79] | Well-established, commercialized; requires enzymatic signal generation [79] [24] | Standardized, high-throughput clinical testing |
| PCR | 1–50 copies/μL (for nucleic acids) [80] | Gold standard for nucleic acid detection; requires thermocycling [80] [81] | Early detection of infectious diseases (e.g., Mycoplasma pneumoniae) [82] [81] |
Table 2: Clinical Performance Metrics for Diagnostic Assays
| Technology | Sensitivity & Specificity | Assay Time | Cost & Complexity |
|---|---|---|---|
| SERS/SERRS | Can achieve >95% accuracy, sensitivity, and specificity when combined with ML [83]; outperforms ELISA in sensitivity for EV-associated biomarkers [83] | 10–60 minutes [80] | Instrumentation costs higher than lateral flow; potential for point-of-care use [80] |
| ELISA | Limited sensitivity and specificity for early-stage cancer detection (e.g., CA-125 for ovarian cancer) [83] | 4–6 hours [80] | Well-established and relatively low-cost |
| PCR | High sensitivity for early infection (e.g., 24% within first 2 weeks for Q fever vs. 14% for serology) [81] | ~2–4 hours (including thermocycling) [80] | Requires specialized equipment and lab infrastructure [80] |
Experimental Protocols and Methodologies
Protocol: SERS-Based Sandwich Immunoassay
This protocol is a foundational method for detecting protein biomarkers (e.g., for cancer or tuberculosis) with high sensitivity [79] [24].
- Substrate Preparation: Use a gold film substrate functionalized with a self-assembled monolayer. Covalently immobilize the capture antibody specific to the target antigen onto this surface [24].
- Sample Incubation and Capture: Apply the clinical sample (e.g., serum, urine) to the substrate. The target antigen binds to the capture antibody. Wash thoroughly to remove unbound material [24].
- Detection with Extrinsic Raman Labels (ERLs): Incubate with ERLs. These are gold nanoparticles coated with:
- Signal Readout: After a final wash, the substrate is interrogated with a Raman spectrometer. The laser excites the plasmonic nanostructure, generating a strong, characteristic SERS signal from the Raman reporters confined in the gap between the nanoparticle and the gold film [24].
Protocol: SERRS Immunoassay for Ultra-Sensitive Detection
This protocol modifies the SERS assay to achieve even lower limits of detection by leveraging resonance enhancement [24].
- Architecture Modification: The key difference is the placement of the Raman reporter. For SERRS, the strong Raman reporter molecule (e.g., thiolated Cy5) is coated directly onto the gold capture substrate, not on the nanoparticle label.
- Assay Procedure: The sandwich assay steps (antigen capture and labeling with antibody-coated nanoparticles) proceed as in the standard SERS protocol. The critical factor is that the excitation laser wavelength must overlap with an electronic transition of the Raman reporter molecule to activate the resonance effect.
- Signal Readout: The signal enhancement is a product of the electromagnetic enhancement (from the plasmonic nanostructure) and the resonance Raman effect, leading to a dramatic boost in signal intensity and lower LODs [24].
Workflow Diagram: SERS/SERRS Sandwich Immunoassay
This diagram illustrates the key steps and structural differences between SERS and SERRS assay configurations.
Troubleshooting Guides and FAQs
Frequently Asked Questions (FAQs)
Q1: What is the fundamental difference between SERS and SERRS? SERS relies on electromagnetic enhancement caused by plasmonic nanostructures (typically gold or silver), which amplifies the Raman signal of nearby molecules by factors of 10⁶ or more [84] [12]. SERRS couples this plasmonic enhancement with resonance Raman scattering. This occurs when the laser excitation wavelength overlaps with an electronic absorption band of the molecule, providing an additional signal boost of 10² to 10⁶, making SERRS typically more sensitive than SERS [24].
Q2: Why are my SERS signals inconsistent or variable? SERS intensity is highly dependent on the local electromagnetic field, which is strongest in nanoscale "hotspots" (e.g., gaps between nanoparticles) [12]. Inconsistencies often arise from:
- Irreproducible formation of hotspots, especially in colloidal nanoparticle aggregates.
- Variation in the number of molecules occupying these hotspots. Solution: Use engineered nanostructured substrates instead of colloidal aggregates for better reproducibility. To account for inherent variance, collect spectra from multiple spots (e.g., >100 locations). For quantitative work, employ an internal standard (e.g., a co-adsorbed stable isotope variant of the analyte) to correct for intensity fluctuations [12].
Q3: My assay shows high background. What could be the cause? A high background in SERS-based immunoassays is frequently due to:
- Insufficient washing, leading to unbound reagents or non-specifically adsorbed molecules on the substrate [85].
- Non-specific protein binding from the sample matrix (e.g., serum) to the active surface [79]. Solution: Optimize washing procedures by increasing soak times and ensuring complete drainage between steps. Implement an effective blocking step using agents like BSA or casein to minimize non-specific binding [79] [85].
Q4: When should I choose a SERS-based assay over established methods like ELISA or PCR? The choice depends on the analyte and required performance:
- vs. ELISA: Choose SERS/SERRS when you need higher sensitivity (lower LOD), faster results, or the ability to multiplex (detect several targets at once) without additional time penalty [79] [80].
- vs. PCR: PCR remains the gold standard for nucleic acid detection. SERS is superior for detecting non-nucleic acid targets like proteins, small molecules, or pathogens directly via their surface antigens [82] [80] [81]. SERS can also be faster as it does not require thermocycling.
Troubleshooting Guide for Common SERS/SERRS Assay Problems
Problem: Weak or No Signal
| Possible Cause | Solution |
|---|---|
| Reagents not at room temperature | Allow all reagents to equilibrate on the bench for 15-20 minutes before starting the assay [85]. |
| Low binding of capture antibody | Ensure you are using an ELISA plate (not tissue culture plate) for coating. Verify antibody concentration, incubation time, and use PBS for dilution [85]. |
| Insufficient nanoparticle labeling | Confirm the preparation and dilution of detection antibodies or extrinsic Raman labels (ERLs). Follow optimized protocols or titrate for best performance [85] [24]. |
| Laser wavelength mismatch (for SERRS) | For SERRS, ensure the laser excitation wavelength overlaps with an electronic absorption peak of the Raman reporter molecule [24]. |
Problem: High Background Signal
| Possible Cause | Solution |
|---|---|
| Insufficient washing | Increase wash cycles and duration. Ensure plates are drained thoroughly by inverting and tapping forcefully on absorbent tissue [85]. |
| Non-specific binding | Optimize the blocking step. Use a fresh, effective blocking agent and ensure complete coverage of the well surface. |
| Contamination between wells | Always use a fresh plate sealer during incubations to prevent cross-contamination and evaporation [85]. |
Problem: Poor Reproducibility Between Replicates
| Possible Cause | Solution |
|---|---|
| Inconsistent washing | Use an automated plate washer or standardized manual technique to ensure equal washing across all wells [85]. |
| Inconsistent incubation temperature | Perform incubations in a stable temperature environment (e.g., an incubator) to avoid fluctuations [85]. |
| Pipetting errors | Check pipette calibration and technique. Double-check all dilution calculations [85]. |
The Scientist's Toolkit: Essential Research Reagents
Table 3: Key Reagent Solutions for SERS/SERRS Assay Development
| Item | Function | Key Considerations |
|---|---|---|
| Gold Nanoparticles (AuNPs) | Plasmonic core for ERLs and substrates; generates intense local electromagnetic fields for enhancement [84] [24]. | Size (typically 40-80 nm), shape, and surface chemistry are critical for controlling plasmon resonance and functionalization [12]. |
| Raman Reporter Molecules (RRMs) | Molecules that provide the characteristic SERS fingerprint signal. | Should have a high Raman cross-section (e.g., rhodamine, aromatic thiols). For SERRS, must have an electronic transition resonant with the laser [24] [12]. |
| Antibodies (Capture & Tracer) | Provide the immunoassay's specificity by binding to the target antigen. | Affinity and specificity are paramount. Must be carefully selected to bind non-competing epitopes for sandwich assays [79] [24]. |
| Plasmonic Substrates | The solid support that provides SERS enhancement, often a gold film or nanostructured surface. | Can be pre-fabricated (for reproducibility) or based on in-situ nanoparticle aggregation (for high enhancement) [80] [12]. |
| Polyyne-based Raman Tags | A class of RRMs with sharp, distinct peaks in the cell-silent region (1800-2800 cm⁻¹), reducing background in bio-assays [83]. | Ideal for multiplexed detection, as their peaks do not overlap with intrinsic biomolecule signals [83]. |
Assessing Reproducibility and Standardization Challenges for Clinical Translation
Technical Support Center: Troubleshooting Guides and FAQs
This support center is designed to assist researchers and drug development professionals in overcoming common experimental hurdles in surface spectroscopy, with a focus on optimizing signal detection for robust and reproducible clinical translation.
Frequently Asked Questions (FAQs)
Q1: My spectrophotometer is giving very noisy or inconsistent absorbance readings. What could be the cause? Inconsistent readings are often related to instrument configuration or sample handling. First, ensure the instrument has been allowed adequate warm-up time to stabilize [86]. Check the condition of your cuvette for scratches, residue, or improper alignment, and inspect the light path for any debris [86]. For absorbance mode, remember that calibration with the appropriate solvent is required every time you use the instrument [87]. Finally, verify that your absorbance values fall within the reliable range of the instrument, as readings can become unstable above 1.0 absorbance unit [87].
Q2: Why do my preclinical spectroscopic findings fail to translate to reliable human results? This is a core challenge in translational science. A significant factor is the poor predictiveness of many preclinical models. It is estimated that only about 33% of highly cited animal studies translate accurately to human clinical trials [88]. This can be due to simplified model systems that lack the complexity of human disease, deficiencies in experimental reproducibility, and low statistical power in preclinical studies [88]. Strategies to overcome this include establishing refined study endpoints that closely match clinical conditions and employing biomarkers capable of predicting treatment responses in humans [89].
Q3: What is the difference between internal and external validity, and why are both critical for translation?
- Internal Validity refers to the reproducibility and robustness of an experiment within your own lab. It is challenged by factors like low statistical power, poor experimental design, and a lack of rigorous protocols [88]. High internal validity is a prerequisite for any finding to be considered reliable.
- External Validity refers to how generalizable your findings are to broader, real-world patient populations. A model with poor external validity, even if internally valid, will not produce results that translate to the clinic. Enhancing external validity requires the use of clinically relevant models and standardized assessments [89].
Q4: How can I reduce stray light in my spectroscopy system to improve the signal-to-noise ratio for weak signals? Stray light is a critical barrier to detecting weak signals, such as in fluorescence or Raman spectroscopy. Using optical simulation software like TracePro for system design can help identify and eliminate ghost reflections and unwanted light paths within optical assemblies [90]. Practically, you can implement baffles, use specialized optical coatings, and incorporate absorptive materials in your instrument design to minimize stray light [90].
Troubleshooting Guide
The table below outlines common issues, their potential causes, and recommended solutions.
| Problem | Possible Cause | Solution |
|---|---|---|
| Drift or unstable baseline [86] | Instrument not stabilized; aging light source; residual sample in cuvette. | Allow instrument to warm up for recommended time; replace aging lamp; ensure cuvette is clean and properly filled. |
| Low light intensity or signal error [86] | Debris in light path; misaligned or scratched cuvette; failing light source. | Inspect and clean optics and cuvette; ensure proper cuvette alignment; replace lamp if necessary. |
| Failed calibration or blank error [87] | Incorrect reference solution; dirty reference cuvette; software not updated. | Re-blank with correct solvent; use a clean, properly filled cuvette; update instrument firmware/software. |
| Poor reproducibility between labs [88] | Lack of standardized protocols; low statistical power; unaccounted for model variability. | Implement clearly defined, detailed experimental procedures; perform power analysis for sample size; use validated, standardized models where possible. |
| Failure to detect weak signals (e.g., Raman) | Stray light overwhelming the signal [90]; suboptimal light collection. | Use instrumentation designed to minimize stray light; optimize lens and detector placement for maximum signal collection efficiency [90]. |
Experimental Protocol for Robust Signal Detection
This protocol provides a general framework for conducting reproducible surface spectroscopy experiments aimed at clinical translation.
1. Pre-Experimental Planning
- Objective Definition: Clearly define the clinical question and the specific molecular or structural information the spectroscopic measurement intends to provide.
- Power Analysis: Conduct a statistical power analysis to determine the necessary sample size to detect a meaningful effect, thereby reducing the risk of false negatives [88].
- Protocol Standardization: Document all procedures in detail, including sample preparation, instrument settings, calibration methods, and environmental conditions.
2. Instrument Calibration and Validation
- Warm-Up: Power on the spectrophotometer and allow it to stabilize until the lamp indicator LED remains steady (e.g., green) [87].
- Baseline Correction: Perform a baseline correction or full recalibration with the appropriate reference standard or solvent [86].
- System Suitability: Run a test with a known standard where the absorbance is between 0.1 and 1.0 to verify system performance [87].
3. Data Collection and Analysis
- Blinded Analysis: Where possible, use blinded methods for data analysis to prevent unconscious bias.
- Data Management: Record all raw data and metadata. Employ pre-specified data analysis plans to avoid "p-hacking."
Experimental Workflow for Reproducible Spectroscopy
The Scientist's Toolkit: Key Research Reagent Solutions
The table below lists essential materials for surface spectroscopy experiments and their role in ensuring reproducible results.
| Item | Function & Importance for Reproducibility |
|---|---|
| Quartz Cuvettes [87] | Essential for UV-VIS spectroscopy; provide high transmission in UV range. Inappropriate material can lead to signal loss and inaccurate readings. |
| Certified Reference Standards [86] | Used for regular instrument calibration to ensure accuracy and comparability of measurements over time and across different labs. |
| White Reflective Standard Tiles [91] | Critical for calibrating reflective color measurement systems, enabling standardized and comparable reflective spectroscopy data. |
| Stable Light Source | A consistent, calibrated light source (e.g., deuterium arc lamp) is fundamental for stable signal detection. Aging lamps are a common source of drift [86]. |
| Integrating Sphere/Reflection Probe [91] | Enables standardized reflective color measurements by capturing all reflected light, crucial for quantifying color in materials science and diagnostics. |
The Translational Pathway and Quality Control
The journey from a basic research observation to a clinically validated tool is complex. The following diagram visualizes this pathway and the quality control checkpoints essential for maintaining reproducibility.
Translational Pathway with QC Gates
Conclusion
Optimizing signal detection in surface spectroscopy is a multi-faceted endeavor that successfully merges deep foundational knowledge with cutting-edge technological advancements. The journey from understanding core enhancement principles to implementing sophisticated methodological applications, rigorous troubleshooting, and robust validation is critical for translating these techniques from the research bench to clinical diagnostics. Future progress hinges on developing standardized protocols, advancing algorithm-assisted sensor optimization and machine learning for data analysis, and creating more stable and reproducible substrates. The continued convergence of SERS, SPR, and computational analytics promises a new era of ultra-sensitive, point-of-care diagnostic tools capable of single-molecule detection, fundamentally impacting drug development, personalized medicine, and global public health responses to infectious diseases.
References
- 1. Avoiding common errors in X-ray photoelectron ... [https://www.sciencedirect.com/science/article/pii/S266652392300168X]
- 2. Common Problems - XPS Instrument Consultants (XIC) [https://xpsinstruments.com/common-problems/]
- 3. Common Difficulties - The XPS Library [https://xpslibrary.com/common-difficulties/?srsltid=AfmBOooU8hXLhoi34mTrVvjO3DFHjMih7KqL9kUgbYtbvttpVMt9JA-t]
- 4. X-ray photoelectron spectroscopy as a useful tool to study ... [https://www.sciencedirect.com/science/article/pii/S0039602824000220]
- 5. Article TOF-SIMS: Accurate Mass Scale Calibration [https://www.sciencedirect.com/science/article/pii/S1044030505010482]
- 6. Probing dynamic degradation and mass transport in solid ... [https://pubs.rsc.org/en/content/articlehtml/2025/eb/d5eb00071h]
- 7. Optimization of a surface-enhanced Raman spectroscopy ... [https://pubmed.ncbi.nlm.nih.gov/41237731/]
- 8. Integrated acoustic echo and background noise suppression ... [https://asp-eurasipjournals.springeropen.com/articles/10.1186/1687-6180-2012-11]
- 9. Surface-enhanced Raman spectroscopy [https://en.wikipedia.org/wiki/Surface-enhanced_Raman_spectroscopy]
- 10. Synergistic enhancement of chemical and electromagnetic ... [https://www.sciencedirect.com/science/article/abs/pii/S0003267024011310]
- 11. Electromagnetic theories of surface-enhanced Raman ... [https://pubs.rsc.org/en/content/articlelanding/2017/cs/c7cs00238f]
- 12. A Newcomer's Guide to Using Surface Enhanced Raman ... [https://www.spectroscopyonline.com/view/demystifying-sers-newcomer-s-guide-using-surface-enhanced-raman-scattering]
- 13. NAP XPS Systems - Pressures up to 100 mbar [https://www.specs-group.com/specsgroup/knowledge/applications/productlines/detail/nap-xps-systems/]
- 14. In situ X-ray photoelectron spectroscopy study of complex ... [https://www.sciencedirect.com/science/article/abs/pii/S0169433217318743]
- 15. XPS Experts - XPS Instrument Consultants (XIC) [https://xpsinstruments.com/xps-instrument-experts/]
- 16. Localized surface plasmon resonance biosensor chip surface ... [https://pmc.ncbi.nlm.nih.gov/articles/PMC10204340/]
- 17. Amplifying the signal of localized surface plasmon ... [https://www.nature.com/articles/s41598-017-03495-1]
- 18. Localized surface plasmon enhancement strategy with ... [https://www.sciencedirect.com/science/article/abs/pii/S1385894725091703]
- 19. Troubleshooting and Optimization Tips for SPR Experiments [https://www.creative-proteomics.com/resource/troubleshooting-optimization-tips-for-spr-experiments.htm]
- 20. Top 10 tips for high quality SPR data | SPR Guide [https://nicoyalife.com/blog/spr-tips/top-10-tips-for-high-quality-spr-data/]
- 21. Surface Plasmon Resonance (SPR) Troubleshooting Guide [https://knowledge.kactusbio.com/trouble-shooting-guide-for-surface-plasmon-resonance-spr]
- 22. Development of a surface plasmon resonance biosensor ... [https://pmc.ncbi.nlm.nih.gov/articles/PMC9805936/]
- 23. Troubleshooting [https://www.sprpages.nl/troubleshooting]
- 24. Improving Biomarker Detection with Surface-Enhanced Resonance Raman Scattering: An Interview with 2025 Charles Mann Award Winner Marc Porter (Part 1) [https://www.spectroscopyonline.com/view/improving-biomarker-detection-with-surface-enhanced-resonance-raman-scattering-an-interview-with-2025-charles-mann-award-winner-marc-porter-part-1-]
- 25. Pushing the Boundaries of TB and Cancer Diagnostics with SERRS Immunoassays: An Interview with 2025 Charles Mann Award Winner Marc Porter (Part 2) [https://www.spectroscopyonline.com/view/pushing-the-boundaries-of-tb-and-cancer-diagnostics-with-serrs-immunoassays-an-interview-with-2025-charles-mann-award-winner-marc-porter-part-2-]
- 26. Not Too Hot: The Importance of Optimizing Laser Power ... [https://www.spectroscopyonline.com/view/not-too-hot-the-importance-of-optimizing-laser-power-for-surface-enhanced-raman-spectroscopy-sers-measurements]
- 27. Optimization of Surface-Enhanced Raman Spectroscopy ... [https://pmc.ncbi.nlm.nih.gov/articles/PMC8779825/]
- 28. Optimization of experimental conditions by surface ... [https://www.sciencedirect.com/science/article/abs/pii/S1386142521012051]
- 29. SERS technology in virus Detection: Advances, challenges ... [https://www.sciencedirect.com/science/article/abs/pii/S095656632500778X]
- 30. Label-free Detection of Virus Based on Surface-Enhanced ... [https://pmc.ncbi.nlm.nih.gov/articles/PMC10300235/]
- 31. Application of SERS in the Detection of Fungi, Bacteria and ... [https://pmc.ncbi.nlm.nih.gov/articles/PMC9609009/]
- 32. SERS biosensor with plastic antibodies for detection of a ... [https://pmc.ncbi.nlm.nih.gov/articles/PMC10991021/]
- 33. Label-Free Saliva Test for Rapid Detection of Coronavirus ... [https://www.mdpi.com/2306-5354/10/3/391]
- 34. Flexible surface-enhanced Raman scattering substrates [https://www.sciencedirect.com/science/article/abs/pii/S0010854525003091]
- 35. Surface Plasmon Resonance Troubleshooting - SPR ... [https://bitesizebio.com/31665/spr-instrument-troubleshooting-surface-plasmon-resonance-assay-technology/]
- 36. State-of-the-art strategies of surface plasmon resonance ... [https://www.sciencedirect.com/science/article/abs/pii/S0010854524004958]
- 37. Algorithm assisted comprehensive optimization of SPR ... [https://www.sciencedirect.com/science/article/abs/pii/S0956566325007225]
- 38. How to Troubleshoot a Spectrum That Looks Wrong [https://www.azooptics.com/Article.aspx?ArticleID=2811]
- 39. Advanced Spectroscopy Troubleshooting [https://www.numberanalytics.com/blog/advanced-spectroscopy-troubleshooting]
- 40. Two-Stage Hierarchical Pruning (THP-CNN) of ... [https://pmc.ncbi.nlm.nih.gov/articles/PMC12468648/]
- 41. Deep Learning-Enhanced Spectrogram Analysis for ... [https://www.mdpi.com/2076-3417/15/10/5313]
- 42. and ANN Models: Tips and Techniques Troubleshooting CNN [https://www.linkedin.com/advice/3/how-do-you-troubleshoot-debug-cnn-ann]
- 43. Boosting hyperspectral image classification with Gate-Shift- ... [https://www.sciencedirect.com/science/article/pii/S0168169925005952]
- 44. AU-super: superpixel scale optimization and training data ... [https://www.frontiersin.org/journals/remote-sensing/articles/10.3389/frsen.2025.1685140/full]
- 45. Diagnostic accuracy of convolutional neural network ... [https://dirjournal.org/articles/diagnostic-accuracy-of-convolutional-neural-network-algorithms-to-distinguish-gastrointestinal-obstruction-on-conventional-radiographs-in-a-pediatric-population/dir.2025.242950]
- 46. Voice pathology identification using mel spectrogram ... [https://link.springer.com/article/10.1007/s11760-025-04527-4]
- 47. Trends in smart surface-enhanced Raman scattering ... [https://www.sciencedirect.com/science/article/abs/pii/S0924224425003358]
- 48. Baseline drift [https://www.sprpages.nl/troubleshooting/baseline-drift]
- 49. Highly sensitive and label-free detection of SARS-CoV-2 ... [https://pmc.ncbi.nlm.nih.gov/articles/PMC12378216/]
- 50. FT-IR Troubleshooting Guide: How to Solve Common ... [https://www.spectroscopyonline.com/view/ftir-troubleshooting-guide-how-to-solve-common-problems-in-infrared-spectroscopy]
- 51. Common Problems with FT-IR Instruments and How to ... [https://www.spectroscopyonline.com/view/common-problems-with-ft-ir-instruments-and-how-to-avoid-them]
- 52. Spectral-phase 3D surface plasmon resonance imaging ... [https://opg.optica.org/oe/abstract.cfm?uri=oe-33-8-18089]
- 53. Optimized design of a surface plasmon resonance ... [https://pubmed.ncbi.nlm.nih.gov/41186760/]
- 54. Guide to FT-IR Spectroscopy | Bruker [https://www.bruker.com/en/products-and-solutions/infrared-and-raman/ft-ir-routine-spectrometer/what-is-ft-ir-spectroscopy.html]
- 55. Synthesis and optimization strategy for enhancing SERS ... [https://www.sciencedirect.com/science/article/abs/pii/S0925346724017312]
- 56. Advancements in SERS: Revolutionizing Biomedical Analysis ... [https://pmc.ncbi.nlm.nih.gov/articles/PMC12435236/]
- 57. Research Progress of Surface-Enhanced Raman ... [https://www.mdpi.com/2304-6732/12/8/809]
- 58. Nanomaterials and clinical SERS technology - RSC Publishing [https://pubs.rsc.org/en/content/articlehtml/2025/tb/d4tb02525c]
- 59. Troubleshooting SPR [https://www.genengnews.com/insights/troubleshooting-spr/]
- 60. Algorithm assisted comprehensive optimization of SPR ... [https://www.sciencedirect.com/science/article/pii/S0956566325007225]
- 61. Algorithm assisted comprehensive optimization of SPR ... [https://pubmed.ncbi.nlm.nih.gov/40812130]
- 62. Direct electronical readout of surface plasmon resonance ... [https://www.sciencedirect.com/science/article/abs/pii/S0956566324009990]
- 63. Practical Guides for X-Ray Photoelectron Spectroscopy ... [https://pmc.ncbi.nlm.nih.gov/articles/PMC6774202/]
- 64. in Laboratory Method Detection : An In-Depth... Limits Validation [https://www.linkedin.com/pulse/detection-limits-laboratory-method-validation-in-depth-overview-ofa7f]
- 65. A practical approach to quantitative analytical -enhanced... surface [https://pubs.rsc.org/en/content/articlehtml/2025/cs/d4cs00861h]
- 66. Strategies for Achieving the Lowest Possible Detection in... Limits [https://www.spectroscopyonline.com/view/strategies-achieving-lowest-possible-detection-limits-icp-ms]
- 67. Spectrophotometer Troubleshooting [https://www.hinotek.com/spectrophotometer-troubleshooting/]
- 68. Methods for optimization of the original signal in laser ... [https://www.sciencedirect.com/science/article/abs/pii/S0584854724001265]
- 69. Terahertz spectroscopy in biomedical field: a review on signal ... [https://photonix.springeropen.com/articles/10.1186/s43074-020-00011-z]
- 70. Troubleshooting Common Spectrometer Issues [https://verichek.net/troubleshooting-common-spectrometer-issues.html]
- 71. Achieving optimal SERS through enhanced experimental design [https://pmc.ncbi.nlm.nih.gov/articles/PMC4984853/]
- 72. Direct comparison of different protocols to obtain surface ... [https://www.sciencedirect.com/science/article/pii/S1386142524005560]
- 73. Surface-enhanced Raman scattering (SERS) technology [https://www.sciencedirect.com/science/article/abs/pii/S1046202325001306]
- 74. Optimization of Surface-Enhanced Spatially Offset Raman ... [https://opg.optica.org/abstract.cfm?uri=OMP-2025-OM3E.3]
- 75. Overcoming the limitations of Raman spectroscopy [https://www.renishaw.com/tw/overcoming-the-limitations-of-raman-spectroscopy--25811?srsltid=AfmBOopBBTdzuDic16_KxnbhRlaS0FxKEMELChxqzlnA4zmMm9oCcBJb]
- 76. Research progress on regulation strategies for surface ... [https://pubs.rsc.org/en/content/articlehtml/2025/ay/d5ay00555h]
- 77. Pushing the Limits of Surface-Enhanced Raman Spectroscopy ... [https://pmc.ncbi.nlm.nih.gov/articles/PMC9082968/]
- 78. Noise Reduction by Multiple Referencing in Surface ... [https://pubmed.ncbi.nlm.nih.gov/18315286/]
- 79. Immunoassays: Analytical and Clinical Performance ... [https://pmc.ncbi.nlm.nih.gov/articles/PMC10889711/]
- 80. Surface-Enhanced Raman Scattering (SERS) combined ... [https://www.sciencedirect.com/science/article/abs/pii/S1040842825001246]
- 81. Comparison of PCR and Serology Assays for Early ... [https://pmc.ncbi.nlm.nih.gov/articles/PMC262519/]
- 82. Comparison of PCR, Culture, and Serological Tests for ... [https://pmc.ncbi.nlm.nih.gov/articles/PMC84154/]
- 83. Integration of label-free surface enhanced Raman ... [https://pmc.ncbi.nlm.nih.gov/articles/PMC12352489/]
- 84. What is Surface-enhanced Raman Scattering (SERS)? [https://www.horiba.com/usa/scientific/technologies/raman-imaging-and-spectroscopy/raman-explained-faq/what-is-surface-enhanced-raman-scattering-sers/]
- 85. ELISA Troubleshooting Guide [https://www.thermofisher.com/us/en/home/life-science/protein-biology/protein-biology-learning-center/protein-biology-resource-library/pierce-protein-methods/overview-elisa/elisa-troubleshooting-guide.html]
- 86. Spectrophotometer Selection and Troubleshooting [https://sperdirect.com/blogs/news/spectrophotometer-selection-and-troubleshooting-a-practical-guide?srsltid=AfmBOoqRDd9qwDPvU2qJ683TvhAUaAAqmwbCty2HsPABGVRewhpeqxGU]
- 87. UV-VIS Spectrophotometer Troubleshooting and FAQs [https://www.vernier.com/til/3044?srsltid=AfmBOorug-QCYH3k1XFJcn-cUWhGZJvs0qwAa2_ErYPTHMP-VmFpnMaV]
- 88. Reproducibility, relevance and reliability as barriers to ... [https://www.sciencedirect.com/science/article/abs/pii/S0169409X22000084]
- 89. Most prominent challenges in translational neuroscience ... [https://www.explorationpub.com/Journals/en/Article/1006106]
- 90. Designing & Optimizing the Spectroscopy Systems in ... [https://lambdares.com/news/spectroscopy-simulation-using-tracepro]
- 91. Using Spectroscopy to Measure Color [https://www.azom.com/article.aspx?ArticleID=10515]